In my last blog post I showed you the integration of an AKS Engine cluster with Azure Active Directory.
-> https://www.danielstechblog.io/using-an-aks-engine-cluster-with-azure-active-directory-integration/
Today we talk about the distribution of the kubeconfig credentials to our engineers and developers. You do not want to give them access via SSH to the AKS Engine master for two reasons. First, they do not need access to the master itself via SSH to access the Kubernetes API server. Second, the kubeconfig credentials stored and used on the AKS Engine master are configured to bypass the AAD integration. Think of them as an emergency or break glass account and treat them like that.
So, how to get or create the kubeconfig credentials using the AAD integration for distribution to the engineers and developers?
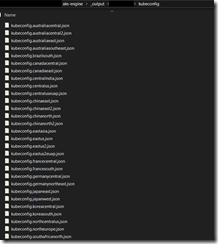
Take a look into the _output folder that the aks-engine generate command created. Under kubeconfig you find the pre-created kubeconfig credentials. Pick the one for the Azure region the AKS Engine cluster got deployed to.
Looking into the file itself, we can see the naming of the user stating {clustername}-admin.
> kubectl config view
apiVersion: v1
clusters:
- cluster:
    certificate-authority-data: DATA+OMITTED
    server: https://aksengine.northeurope.cloudapp.azure.com
  name: aksengine
contexts:
- context:
    cluster: aksengine
    user: aksengine-admin
  name: aksengine
current-context: aksengine
kind: Config
preferences: {}
users:
- name: aksengine-admin
  user:
    auth-provider:
      config:
        apiserver-id: {serverAppID}
        client-id: {clientAppID}
        environment: AzurePublicCloud
        tenant-id: {tenantID}
      name: azure
If we want to change it, we can do so to have an appropriate naming and not a misleading one.
Executing cp kubeconfig.northeurope.json ~/.kube/config copies the kubeconfig credentials file into the .kube folder. Now we can run kubectl with authentication against Azure AD.
> kubectl get nodes
To sign in, use a web browser to open the page https://microsoft.com/devicelogin and enter the code REDACTED to authenticate.
NAME                                STATUS   ROLES    AGE     VERSION
k8s-master-23109953-0               Ready    master   6d12h   v1.15.0
k8s-nodepool1-23109953-vmss000000   Ready    agent    6d12h   v1.15.0
k8s-nodepool1-23109953-vmss000001   Ready    agent    6d12h   v1.15.0
After the customization steps the .json file is ready for distribution to the engineers and developers. Depending on the ClusterRoles, ClusterRoleBindings, Roles and RoleBindings you have configured for different AAD group the engineers and developers getting different access to the AKS Engine cluster based on their AAD group membership.
In the case you do not want to use the pre-created kubeconfig credentials, you can create them from scratch.
All you need is the ca.crt file from the _output folder containing the CA data. Then run the following commands to create the kubeconfig credentials.
> kubectl config set-cluster aksengine --server=https://aksengine.northeurope.cloudapp.azure.com --certificate-authority=_output/aksengine/ca.crt --embed-certs

> kubectl config set-credentials clusterUser-aksengine \
--auth-provider=azure \
--auth-provider-arg=environment=AzurePublicCloud \
--auth-provider-arg=client-id={clientAppID} \
--auth-provider-arg=tenant-id={tenantID} \
--auth-provider-arg=apiserver-id={serverAppID}

> kubectl config set-context aksengine \
--cluster=aksengine \
--user=clusterUser-aksengine
Before you run any kubectl command copy the config file from your .kube folder and store it at a place you can distribute it from to your engineers and developers.
