Certainly, you have heard the term service mesh in the context of Kubernetes. Istio is one of the service mesh implementations that you might have heard of mostly. Beside Istio, Linkerd is the other popular service mesh implementation for Kubernetes.
In this blog post I talk about the installation of Linkerd and running it on Azure Kubernetes Service. The easiest part to get started with Linkerd is just following the guide on the Linkerd website.
-> https://linkerd.io/2/getting-started/
First install the Linkerd CLI so we can set up our test installation.
curl -sL https://run.linkerd.io/install | sh
export PATH=$PATH:$HOME/.linkerd2/bin
linkerd version
Then you should run the following command to check all prerequisites for Linkerd.
linkerd check --pre
Afterwards we can execute the install command to get Linkerd running on Azure Kubernetes Service.
linkerd install | kubectl apply -f -
We can check the installation status with the command linkerd check.
It is the simplest installation you can get. But it is a good starting point to get to know Linkerd and its capabilities.
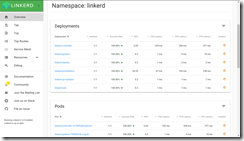
Linkerd also brings a dashboard along that can be reached via linkerd dashboard &.
For more advanced production ready scenarios you should look into the Linkerd CLI install reference.
-> https://linkerd.io/2/reference/cli/install/
If you want to have the automatic proxy injection capability enabled for example, you can use the following commands to install Linkerd with it enabled or update an existing installation.
linkerd install --proxy-auto-inject | kubectl apply -f -
linkerd upgrade --proxy-auto-inject | kubectl apply -f -
The automatic proxy injection deploys the Linkerd sidecar container to new deployments without any manual interaction. For that you add the following annotation to a namespace to enable it for the whole namespace and every new deployment in it or just per deployment. The latter is what I recommend.
...
    metadata:
      annotations:
        linkerd.io/inject: enabled
...
Another example for that you would like to customize the default Linkerd install command is the usage of the Horizontal Pod Autoscaler for your container application deployments. The HPA requires that every container in a pod has set values for resource requests like CPU or memory depending on what you have defined in your HPA configuration. Otherwise the HPA does not work for the container application.
Per default the Linkerd sidecar container has not set any resource requests. When looking at the Linkerd CLI install reference you find the parameters –proxy-cpu-request and –proxy-memory-request to specify the resource request values for the sidecar container.
linkerd install --proxy-cpu-request 100m --proxy-memory-request 50Mi | kubectl apply -f -
linkerd upgrade --proxy-cpu-request 100m --proxy-memory-request 50Mi | kubectl apply -f -
As already said the default installation is simple and a good starting point to get familiar with Linkerd and the service mesh concept. Throughout your testing you will adjust and update your Linkerd installation pretty fast to cover more advanced production ready scenarios.
