This is the first blog post out of three in a series covering k3s a new Kubernetes distribution by Rancher.
In this post we focus on the setup of k3s on Raspbian to get a working Kubernetes cluster with one master and two nodes each powered by a Raspberry Pi 3B+.
Before we get started with the k3s setup, I want to share the shell script with you I am using for the Raspbian provisioning.
-> https://github.com/neumanndaniel/kubernetes/blob/master/k3s/installRaspbian.sh
When calling the shell script, you can provide the following parameters.
- Hostname
- SD card mount path
- Public SSH key
- Time zone path
The script itself does the following steps to get a ready to use Raspbian installation.
- Downloads the latest Raspbian image to the local machine, unpacks and renames it.
- Applies the image to the SD card.
- Mounts second SD card partition.
- Applies Wi-Fi settings provided through a wpa_supplicant.conf file.
- Changes hostname.
- Adds an additional entry to /etc/hosts.
- Adjusts time zone settings.
- Disables password authentication.
- Sets public SSH key in authorized_keys file.
- Mounts first SD card partition.
- Enables SSH access.
- Enables cgroup cpuset and memory.
An example configuration of the mentioned wpa_supplicant.conf file I am using is shown here.
country=DE

network={
    ssid="demo-wi-fi"
    psk="REDACTED"
}
You just specify the country code and then SSID and password of your Wi-Fi network. That is all.
Now we can start preparing the SD cards for the k3s Kubernetes cluster by calling the script with our parameters like this.
./installRaspbian.sh k3s-master-0 /mnt/raspbian 'ssh-rsa REDACTED' Europe/Berlin
Before we continue with the setup of our k3s master and nodes, I want to share one specialty in my setup. That is important to understand why the k3s node install script is written as it is.
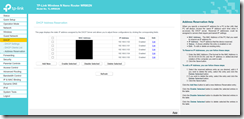
In my demo environment I am using a tp-link nano router to setup a demo Wi-Fi which I can carry with me and use at conferences for example. That said I am using MAC address reservations for my Raspberry Pi 3B+ devices to assign them static IP addresses.
Beside that I do not run a dedicated DNS server in the demo Wi-Fi environment. Instead I am only using the DNS services of the so-called WAN to which the tp-link nano router is connected to. So, keep that in mind when we talk about the k3s node install script.
Currently k3s does not support HA masters, we can have only one master right now.
The k3s master install script is a simple one. It downloads the latest k3s install script and executes the downloaded script with the parameter server and --kubelet-arg. The server parameter indicates that we want to install the master component and the --kubelet-arg parameter is essential to get the Metrics API up and running. We will get back to this later.
Furthermore, the script installs jq, vim and git before the master receives its taint and labels.
#!/bin/bash
MASTER=$(hostname)

curl -sfL https://get.k3s.io -o install.sh
chmod +x install.sh
./install.sh server --kubelet-arg="address=0.0.0.0"
systemctl status k3s

sudo apt update
sudo apt install jq vim git -y
kubectl taint nodes $MASTER node-role.kubernetes.io/master=true:NoSchedule
kubectl label node $MASTER kubernetes.io/role=master node-role.kubernetes.io/master=
-> https://github.com/neumanndaniel/kubernetes/blob/master/k3s/install-k3s-master.sh
Now we run kubectl get nodes to check our k3s master.
pi@k3s-master-0:~ $ kubectl get nodes
NAME           STATUS   ROLES    AGE     VERSION
k3s-master-0   Ready    master   3m32s   v1.14.1-k3s.4
The final step to set up the Metrics API is in the first place to clone the k3s GitHub repository and then apply the metrics-server templates. Before you apply the templates make sure you modify the metrics-server-deployment.yaml to add the toleration and nodeSelector. So, the metrics-server can run on the master and additionally only runs on the master. Cause we are running on the ARM platform do not forget to adjust the container image in the template also.
---
apiVersion: v1
kind: ServiceAccount
metadata:
  name: metrics-server
  namespace: kube-system
---
apiVersion: apps/v1
kind: Deployment
metadata:
  name: metrics-server
  namespace: kube-system
  labels:
    k8s-app: metrics-server
spec:
  selector:
    matchLabels:
      k8s-app: metrics-server
  template:
    metadata:
      name: metrics-server
      labels:
        k8s-app: metrics-server
    spec:
      serviceAccountName: metrics-server
      tolerations:
        - key: node-role.kubernetes.io/master
          operator: Equal
          value: "true"
          effect: NoSchedule
      nodeSelector:
        kubernetes.io/role: master
      volumes:
      # mount in tmp so we can safely use from-scratch images and/or read-only containers
      - name: tmp-dir
        emptyDir: {}
      containers:
      - name: metrics-server
        command:
        - /metrics-server
        - --logtostderr
        # - --v=2
        # - --metric-resolution=10s
        - --kubelet-insecure-tls
        - --kubelet-preferred-address-types=InternalIP
        image: k8s.gcr.io/metrics-server-arm:v0.3.2
        imagePullPolicy: Always
        volumeMounts:
        - name: tmp-dir
          mountPath: /tmp
git clone https://github.com/rancher/k3s.git
kubectl apply -f k3s/recipes/metrics-server
A final check with the command kubectl get --raw /apis/metrics.k8s.io/v1beta1/nodes | jq . should show us a correct functioning Metrics API.
pi@k3s-master-0:~ $ kubectl get --raw /apis/metrics.k8s.io/v1beta1/nodes | jq .
{
  "kind": "NodeMetricsList",
  "apiVersion": "metrics.k8s.io/v1beta1",
  "metadata": {
    "selfLink": "/apis/metrics.k8s.io/v1beta1/nodes"
  },
  "items": [
    {
      "metadata": {
        "name": "k3s-master-0",
        "selfLink": "/apis/metrics.k8s.io/v1beta1/nodes/k3s-master-0",
        "creationTimestamp": "2019-06-03T22:26:12Z"
      },
      "timestamp": "2019-06-03T22:26:03Z",
      "window": "30s",
      "usage": {
        "cpu": "1315534257n",
        "memory": "496396Ki"
      }
    }
  ]
}
Only two additional steps need to be done, before we set up the nodes.
First, we need the kubeconfig file /etc/rancher/k3s/k3s.yaml from the master to manage our k3s Kubernetes cluster remotely. Modifying the kubeconfig file is another necessary step to get it working remotely. Replace localhost with the k3s master IP address in the server entry.
Second, the node token is a hard requirement to join additional nodes to the k3s Kubernetes cluster. The node token is placed on the k3s master at /var/lib/rancher/k3s/server/node-token.
Finally, we are prepared to join additional nodes to the cluster. For that I am using the following install script.
#!/bin/bash
K3SMASTER=$1
K3SMASTERIPADDRESS=$2
NODE_TOKEN=$3
NODE=$(hostname)

echo "$K3SMASTERIPADDRESS       $K3SMASTER" | sudo tee -a /etc/hosts
curl -sfL https://get.k3s.io -o install.sh
chmod +x install.sh
./install.sh agent --server https://$K3SMASTER:6443 --kubelet-arg="address=0.0.0.0" --token $NODE_TOKEN
systemctl status k3s-agent

sudo apt update
sudo apt install jq vim -y

kubectl label node $NODE kubernetes.io/role=agent node-role.kubernetes.io/agent=
-> https://github.com/neumanndaniel/kubernetes/blob/master/k3s/install-k3s-node.sh
The script has three parameters. One for the k3s master hostname, another one for the k3s master IP address and the final one for the node token.
./install-k3s-node.sh k3s-master-0 192.168.0.101 "REDACTED::node:REDACTED"
As the k3s master install script the one for the nodes is also simple. It downloads the latest k3s install script and executes the downloaded script with the parameters agent, --server, --kubelet-arg and --token.
The agent parameter indicates that we want to install the agent component. The other parameters are necessary to join the cluster representing the API server endpoint and node token. Again, we have also the --kubelet-arg parameter for the Metrics API functionality. Same as on the master jq and vim gets installed before the node receives its labels.
After we have added all our nodes to the cluster, we issue a final kubectl get nodes to check our k3s Kubernetes cluster.
[] > kubectl get nodes
NAME              STATUS   ROLES    AGE   VERSION
k3s-master-0      Ready    master   18d   v1.14.1-k3s.4
k3s-nodepool1-0   Ready    agent    18d   v1.14.1-k3s.4
k3s-nodepool1-1   Ready    agent    18d   v1.14.1-k3s.4
The cluster should be ready now for deploying our first workloads.

