In January Docker announced and integrated the experimental support of Kubernetes for its Edge channel version of Docker for Windows.
-> https://blog.docker.com/2018/01/docker-windows-desktop-now-kubernetes/
During the writing of my blog post about “Deploying the Kubernetes ACI connector on AKS – Managed Kubernetes in Azure”, I was curios to try the same for Kubernetes on Docker for Windows.
-> https://www.danielstechblog.io/deploying-kubernetes-aci-connector-aks-managed-kubernetes-azure/
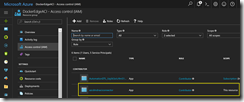
First, I started with the preparation for it in Azure creating a resource group and an Azure AD Service Principal.
Followed by the permission assignment for the Azure AD Service Principal on the newly created resource group.
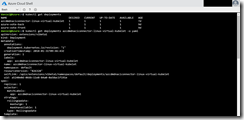
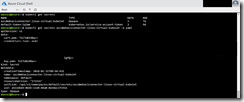
The next step for me was to extract the YAML deployment configuration for the ACI connector out of my existing AKS cluster. An easy step with the Azure Cloud Shell.
I just had to execute the following kubectl commands.
kubectl get deployments

kubectl get deployments azcdmdnaciconnector-linux-virtual-kubelet -o yaml
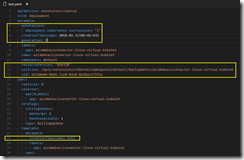
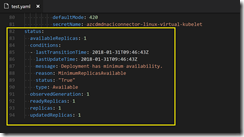
I copied the output into my favorite editor Visual Studio Code and removed the yellow marked parts as you can see it in the following screenshots.
You can go straight ahead with the generalized YAML file aciconnector.yaml on my GitHub repo.
-> https://github.com/neumanndaniel/kubernetes/blob/master/ACI-connector/aciconnector.yaml
Just replace the placeholder <<PLACE HERE YOUR ACI CONNECTOR NAME>>, <<PLACE HERE YOUR AZURE RESOURCE GROUP NAME FOR YOUR ACI DEPLOYMENTS>>, <<PLACE HERE YOUR FAVORITE AZURE ACI REGION>>, and <<PLACE HERE YOUR ACI CONNECTOR SECRETS NAME>> in the file with your values.
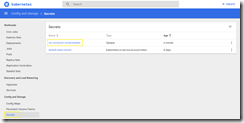
Beside the YAML deployment configuration, I also needed the information how the secret is build for the ACI connector deployment.
I just had to execute the following kubectl commands in the Azure Cloud Shell.
kubectl get secrets

kubectl get secrets azcdmdnaciconnector-linux-virtual-kubelet -o yaml
I copied the output again into my editor and removed the yellow marked parts as you can see it in the following screenshot.
And again, you can go straight ahead with the generalized YAML file secrets.yaml on my GitHub repo.
-> https://github.com/neumanndaniel/kubernetes/blob/master/ACI-connector/secrets.yaml
Just replace the placeholder <<PLACE HERE YOUR BASE64 ENCODED STRING>> and <<PLACE HERE YOUR ACI CONNECTOR SECRETS NAME>> in the file with your values.
Getting the base64 string is simple and I will guide you through it. But first, I needed to know which values are presented in the credentials.json. Decoding the base64 string is as simple as that with Azure Cloud Shell. I just had to copy the base64 string and putting it into the following command.
echo 'base 64 string'|base64 --decode
Now I had the credentials.json configuration and copied into my editor.
And again, you can go straight ahead with the generalized JSON file credentials.json on my GitHub repo.
-> https://github.com/neumanndaniel/kubernetes/blob/master/ACI-connector/credentials.json
Just replace the placeholder <<PLACE HERE THE AZURE AD SERVICE PRINCIPAL APP ID>>, <<PLACE HERE THE AZURE AD SERVICE PRINCIPAL SECRET>>, <<PLACE HERE YOUR AZURE SUBSCRIPTION ID>>, and <<PLACE HERE YOUR AZURE AD TENANT ID>> in the file with your values.
You already have the Azure AD Service Principal id and secret, after creating the Service Principal. Getting the subscription id and tenant id can be accomplished to execute the following command in the Azure Cloud Shell
az account show
After putting your values into the credentials.json file, copy the content and execute the following command in the Azure Cloud Shell to get the base64 string for the secrets.yaml file.
echo 'credentials.json content'|base64 --wrap=0
Copy the output into the secrets.yaml file behind credentials.json: as a one liner and deploy the secrets.yaml file to the local Kubernetes on Docker for Windows instance.
kubectl create -f .\secrets.yaml
All the preparations are done, and we can deploy the ACI connector to the local instance.
kubectl create -f .\aciconnector.yaml
Now we can test the ACI connector with the following YAML file deploying the ACI helloworld container. You have to change the nodeName, so it matches with the one you have defined in the file aciconnector.yaml.
apiVersion: v1
kind: Pod
metadata:
  name: helloworld
spec:
  containers:
  - image: microsoft/aci-helloworld
    imagePullPolicy: Always
    name: helloworld
    resources:
      requests:
        memory: 1G
        cpu: 1
    ports:
    - containerPort: 80
      name: http
      protocol: TCP
    - containerPort: 443
      name: https
  dnsPolicy: ClusterFirst
  nodeName: virtual-kubelet-azcdmdnaciconnector-linux
  tolerations:
  - key: azure.com/aci
    effect: NoSchedule
kubectl create -f .\aci-connector-test-local.yaml
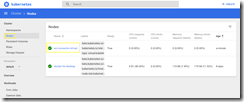
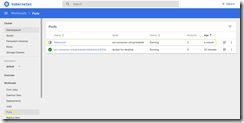
The successful deployment of the ACI instance can be verified by running the commands kubectl get pods -o wide and az container list -o table.
Now take your browser and navigate to the public IP and you will be presented with the ACI welcome screen.
You also can see the created ACI instance in your resource group.
