When you are working with Azure IaaS services especially with Azure VMs, it comes down to one critical component you have to look very accurately during the design phase and that is Azure storage. It does not matter whether you going to use standard storage accounts or premium storage accounts.
Why I am telling you this? Because it is easy to overload a storage account and you will epxerience a serious performance hit on your Azure VMs. But let us start first with the different storage accounts limits you have to know about, when you are working with Azure VMs.
A standard storage account has an total request rate limit of 20.000 IOPS per storage account. Each disk of a VM on a standard storage account has IOPS limit of 500, when we are talking about the standard VM size tiers. That means that a standard storage account can only support a maximum of 40 disk for optimal performance. Adding more disks is not prohibited and you can do this, but performance will decrease for all VMs using this storage account, because they compete against each other to get the necessary IOPS.
So how you can avoid this? It is easy, splitting the workloads over several storage accounts to ensure the best performance for them. One example, when you would like to use a G5 VM with all the supported 64 data disks, then you have to split the data disks accross two standard storage accounts to ensure that the performance does not decrease.
The limits of a premium storage account are different from the limits of a standard storage account. A premium storage account has two limits, you have to look for. First a disk capacity limit of 35 TB and second a throughput limit of 50 Gbps. The disk capacity limit can be easily considered during the design phase, because we only have three different premium disk sizes: P10 with 128 GB, P20 with 512 GB and P30 with 1 TB. The throughput limit needs additional assistance by the Azure VM size documentation.
-> DS: https://docs.microsoft.com/en-us/azure/virtual-machines/virtual-machines-linux-sizes?toc=%2fazure%2fvirtual-machines%2flinux%2ftoc.json#ds-series
-> DSv2: https://docs.microsoft.com/en-us/azure/virtual-machines/virtual-machines-linux-sizes?toc=%2fazure%2fvirtual-machines%2flinux%2ftoc.json#dsv2-series
-> FS: https://docs.microsoft.com/en-us/azure/virtual-machines/virtual-machines-linux-sizes?toc=%2fazure%2fvirtual-machines%2flinux%2ftoc.json#fs-series
-> GS: https://docs.microsoft.com/en-us/azure/virtual-machines/virtual-machines-linux-sizes?toc=%2fazure%2fvirtual-machines%2flinux%2ftoc.json#gs-series
In the documentation you can find the necessary information about the maximum throughput of each VM size of the series DS, DSv2, FS and GS in the column “Max uncached disk throughput: IOPS / MBps”. But keep in mind that the throughput values are presented in MBps and not in Mbps or Gbps.
The GS5 VM has a throughput of 2.000 MBps. Converted in Gbps it is 16. So a premium storage account can host a maximum of three GS5 VMs at the same time, when not exceeding the disk capacity limit. For hosting a GS5 VM with all of the supported 64 data disks you need two premium storage accounts and the P30 disk size.
As you can see you have to consider different limits, when you are in the design phase of your Azure VMs. But you also have to monitor the storage performance health before deployments and during operations.
The following PowerShell script will do that for you and works against the different Azure environments around the world.
First of all we have the login phase in the script.
#Azure login
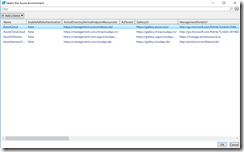
$AzureEnvironment=Get-AzureRmEnvironment|Out-GridView -PassThru
$null=Login-AzureRmAccount -Environment $AzureEnvironment
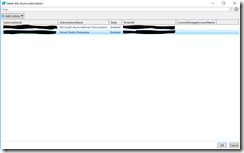
$null=Get-AZureRMSubscription|Out-GridView -PassThru|Select-AzureRmSubscription
Then the necessary variables with all the information of the different limits and premium disk sizes
#Variables
$P10=0
$P20=0
$P30=0
$PremiumStorageMaxGbps=0
$StandardDisks=0
$P10Size=128
$P20Size=512
$P30Size=1024
$PremiumStorageLimitGB=35840
$PremiumStorageLimitGbps=50
$StandardStorageLimitIOPS=20000
$StandardStorageLimitDisks=40
$StandardOutputArray=@()
$PremiumOutputArray=@()
The next part is the most important part, because the hashtable contains the information about the different VM throughputs you can find in the Azure VM size documentation.
$VMs=@{
    Standard_DS1=32;
    Standard_DS2=64;
    Standard_DS3=128;
    Standard_DS4=256;
    Standard_DS11=64;
    Standard_DS12=128;
    Standard_DS13=256;
    Standard_DS14=512;
    Standard_DS1_v2=48;
    Standard_DS2_v2=96;
    Standard_DS3_v2=192;
    Standard_DS4_v2=384;
    Standard_DS5_v2=768;
    Standard_DS11_v2=96;
    Standard_DS12_v2=192;
    Standard_DS13_v2=384;
    Standard_DS14_v2=768;
    Standard_DS15_v2=960;
    Standard_F1s=48;
    Standard_F2s=96;
    Standard_F4s=192;
    Standard_F8s=384;
    Standard_F16s=768;
    Standard_GS1=125;
    Standard_GS2=250;
    Standard_GS3=500;
    Standard_GS4=1000;
    Standard_GS5=2000;
}
The rest is simple for the standard storage account evaluation. The script will get all storage accounts in the subscription that are standard storage accounts and will continue processing of each blob that is from the blob type PageBlob.
The premium storage account evaluation approach is a bit different. First the script gets all storage accounts in the subscription that are premium storage accounts and will continue processing of each blob that if from the blob type PageBlob. During the different processing steps the script gets information about the VM size to be able to get the right troughput value out of the hashtable through the comparison of the current PageBlob URI and the VM OS disk URI. Next step is to check, if the VM has data disks. When the VM has data disks, if they are placed accross different storage accounts. This is important to assign the VM throughput to both premium storage accounts during evaluation to get an accurate result. Last but not least the PageBlob size will be used to determine if it is a P10, P20 or P30 premium disk.
You can find the PowerShell in the TechNet gallery under the following link.
-> https://gallery.technet.microsoft.com/Azure-storage-performance-3e18fe3d


