Several months ago, I worked on a little side project during my spare time but instead of writing a blog post I set it aside till today.
Since the announcement that Docker made yesterday on what has changed in the Docker Subscription Service Agreement my side project got my attention again.
-> https://www.docker.com/blog/updating-product-subscriptions/
For most of us nothing will change as Docker for Desktop stays free for personal use. But for companies which have been using Docker for Desktop for free and not using Docker Hub as their primary container registry things have changed since yesterday.
Looking at alternatives for Docker for Desktop, Podman will be definitely the container engine that gets most of the attention right now.
In today’s blog post I walk you through how to run Podman on macOS with Multipass as an alternative for Docker for Desktop. This was my little side project I worked on several months ago.
Let us start with the prerequisites for it. You need two tools installed on your Mac. The Podman client and Multipass. Both tools can be installed easily via brew.
I have written an install script which installs both tools via brew in the first step.
#!/bin/bash

PODMAN_MODE=$1

# Install podman client & multipass
brew install podman multipass

# Symlink as otherwise `az acr login` does not work.
ln -s /usr/local/bin/podman /usr/local/bin/docker || true

# Podman setup
SSH_PUB_KEY=$(cat ~/.ssh/id_rsa.pub)
echo '
ssh_authorized_keys:
  - '${SSH_PUB_KEY}'' >> user-data

./create.sh $PODMAN_MODE
Instead of only using docker as an alias for podman, as recommended in most articles throughout the web, I am creating a symlink too. The symlink is a hard requirement when you are working with the Azure Container Registry and using the command az acr login. The command checks for the docker binary executable and fails if it cannot find it on the system. So, the docker alias will not work in that case but the symlink does.
Next step is your SSH public key which is added to the end of the user-data file.
users:
  - default

write_files:
  - path: /home/ubuntu/setup-podman.sh
    content: |
      #!/bin/bash

      # Set correct permission on own home folder
      sudo chown ubuntu:ubuntu .
      chmod 755 .

      # Install podman
      . /etc/os-release
      echo "deb https://download.opensuse.org/repositories/devel:/kubic:/libcontainers:/stable/xUbuntu_${VERSION_ID}/ /" | sudo tee /etc/apt/sources.list.d/devel:kubic:libcontainers:stable.list
      curl -L https://download.opensuse.org/repositories/devel:/kubic:/libcontainers:/stable/xUbuntu_${VERSION_ID}/Release.key | sudo apt-key add -
      sudo apt update
      sudo apt install podman fuse-overlayfs -y
      sudo cp /home/ubuntu/.ssh/authorized_keys /root/.ssh/authorized_keys
      sudo systemctl --system enable --now podman.socket
      systemctl --user enable --now podman.socket
      sudo loginctl enable-linger $USER
      sudo systemctl enable --now ssh.service
    permissions: "0755"

runcmd:
  - sudo cp /etc/skel/.bashrc /home/ubuntu/.bashrc
  - sudo cp /etc/skel/.bash_logout /home/ubuntu/.bash_logout
  - sudo cp /etc/skel/.profile /home/ubuntu/.profile
The user-data file is a cloud-init file which configures our Ubuntu VM we spin up with Multipass on our Mac.
As seen above a setup script for installing Podman in the Ubuntu VM is placed in the user’s home folder. Podman gets configured to be accessible in root and rootless mode. Depending on the parameter you provide when running the install.sh script you interact in root or rootless mode with Podman.
> ./install.sh root
> ./install.sh rootless
Last step is running the create.sh script.
#!/bin/bash

PODMAN_MODE=$1

INSTANCE_NAME="podman"
multipass set client.primary-name=$INSTANCE_NAME

multipass launch -c 4 -m 8G -d 32G -n $INSTANCE_NAME --cloud-init user-data 20.04
multipass exec $INSTANCE_NAME -- /home/ubuntu/setup-podman.sh

IP=$(multipass info $INSTANCE_NAME | grep IPv4: | cut -d ':' -f2 | tr -ds ' ' '')
if [ "$PODMAN_MODE" == "root" ]; then
  podman system connection add $INSTANCE_NAME --identity ~/.ssh/id_rsa  ssh://root@${IP}/run/podman/podman.sock
else
  podman system connection add $INSTANCE_NAME --identity ~/.ssh/id_rsa  ssh://ubuntu@${IP}/run/user/1000/podman/podman.sock
fi

# List of volume mounts that Docker for Desktop also mounts per default.
multipass mount /Users $INSTANCE_NAME
multipass mount /Volumes $INSTANCE_NAME
multipass mount /private $INSTANCE_NAME
multipass mount /tmp $INSTANCE_NAME
multipass mount /var/folders $INSTANCE_NAME

multipass list
echo "#######################"
podman system connection list
The script launches a new Multipass Ubuntu 20.04 instance with 4 cores, 8 GB memory and 32 GB disk configured. Podman then gets installed by executing the setup script. Afterwards a system connection is added for Podman which enables us using the Podman client from our Mac to interact with the Podman server in the Multipass instance.
Finally, several folders are mounted into the Multipass instance and Podman is ready. The volume mounts are the exact default mounts Docker for Desktop uses. In the end you only need the /Users mount point.
“By default the /Users, /Volume, /private, /tmp and /var/folders directory are shared.”
https://docs.docker.com/desktop/mac/#resources
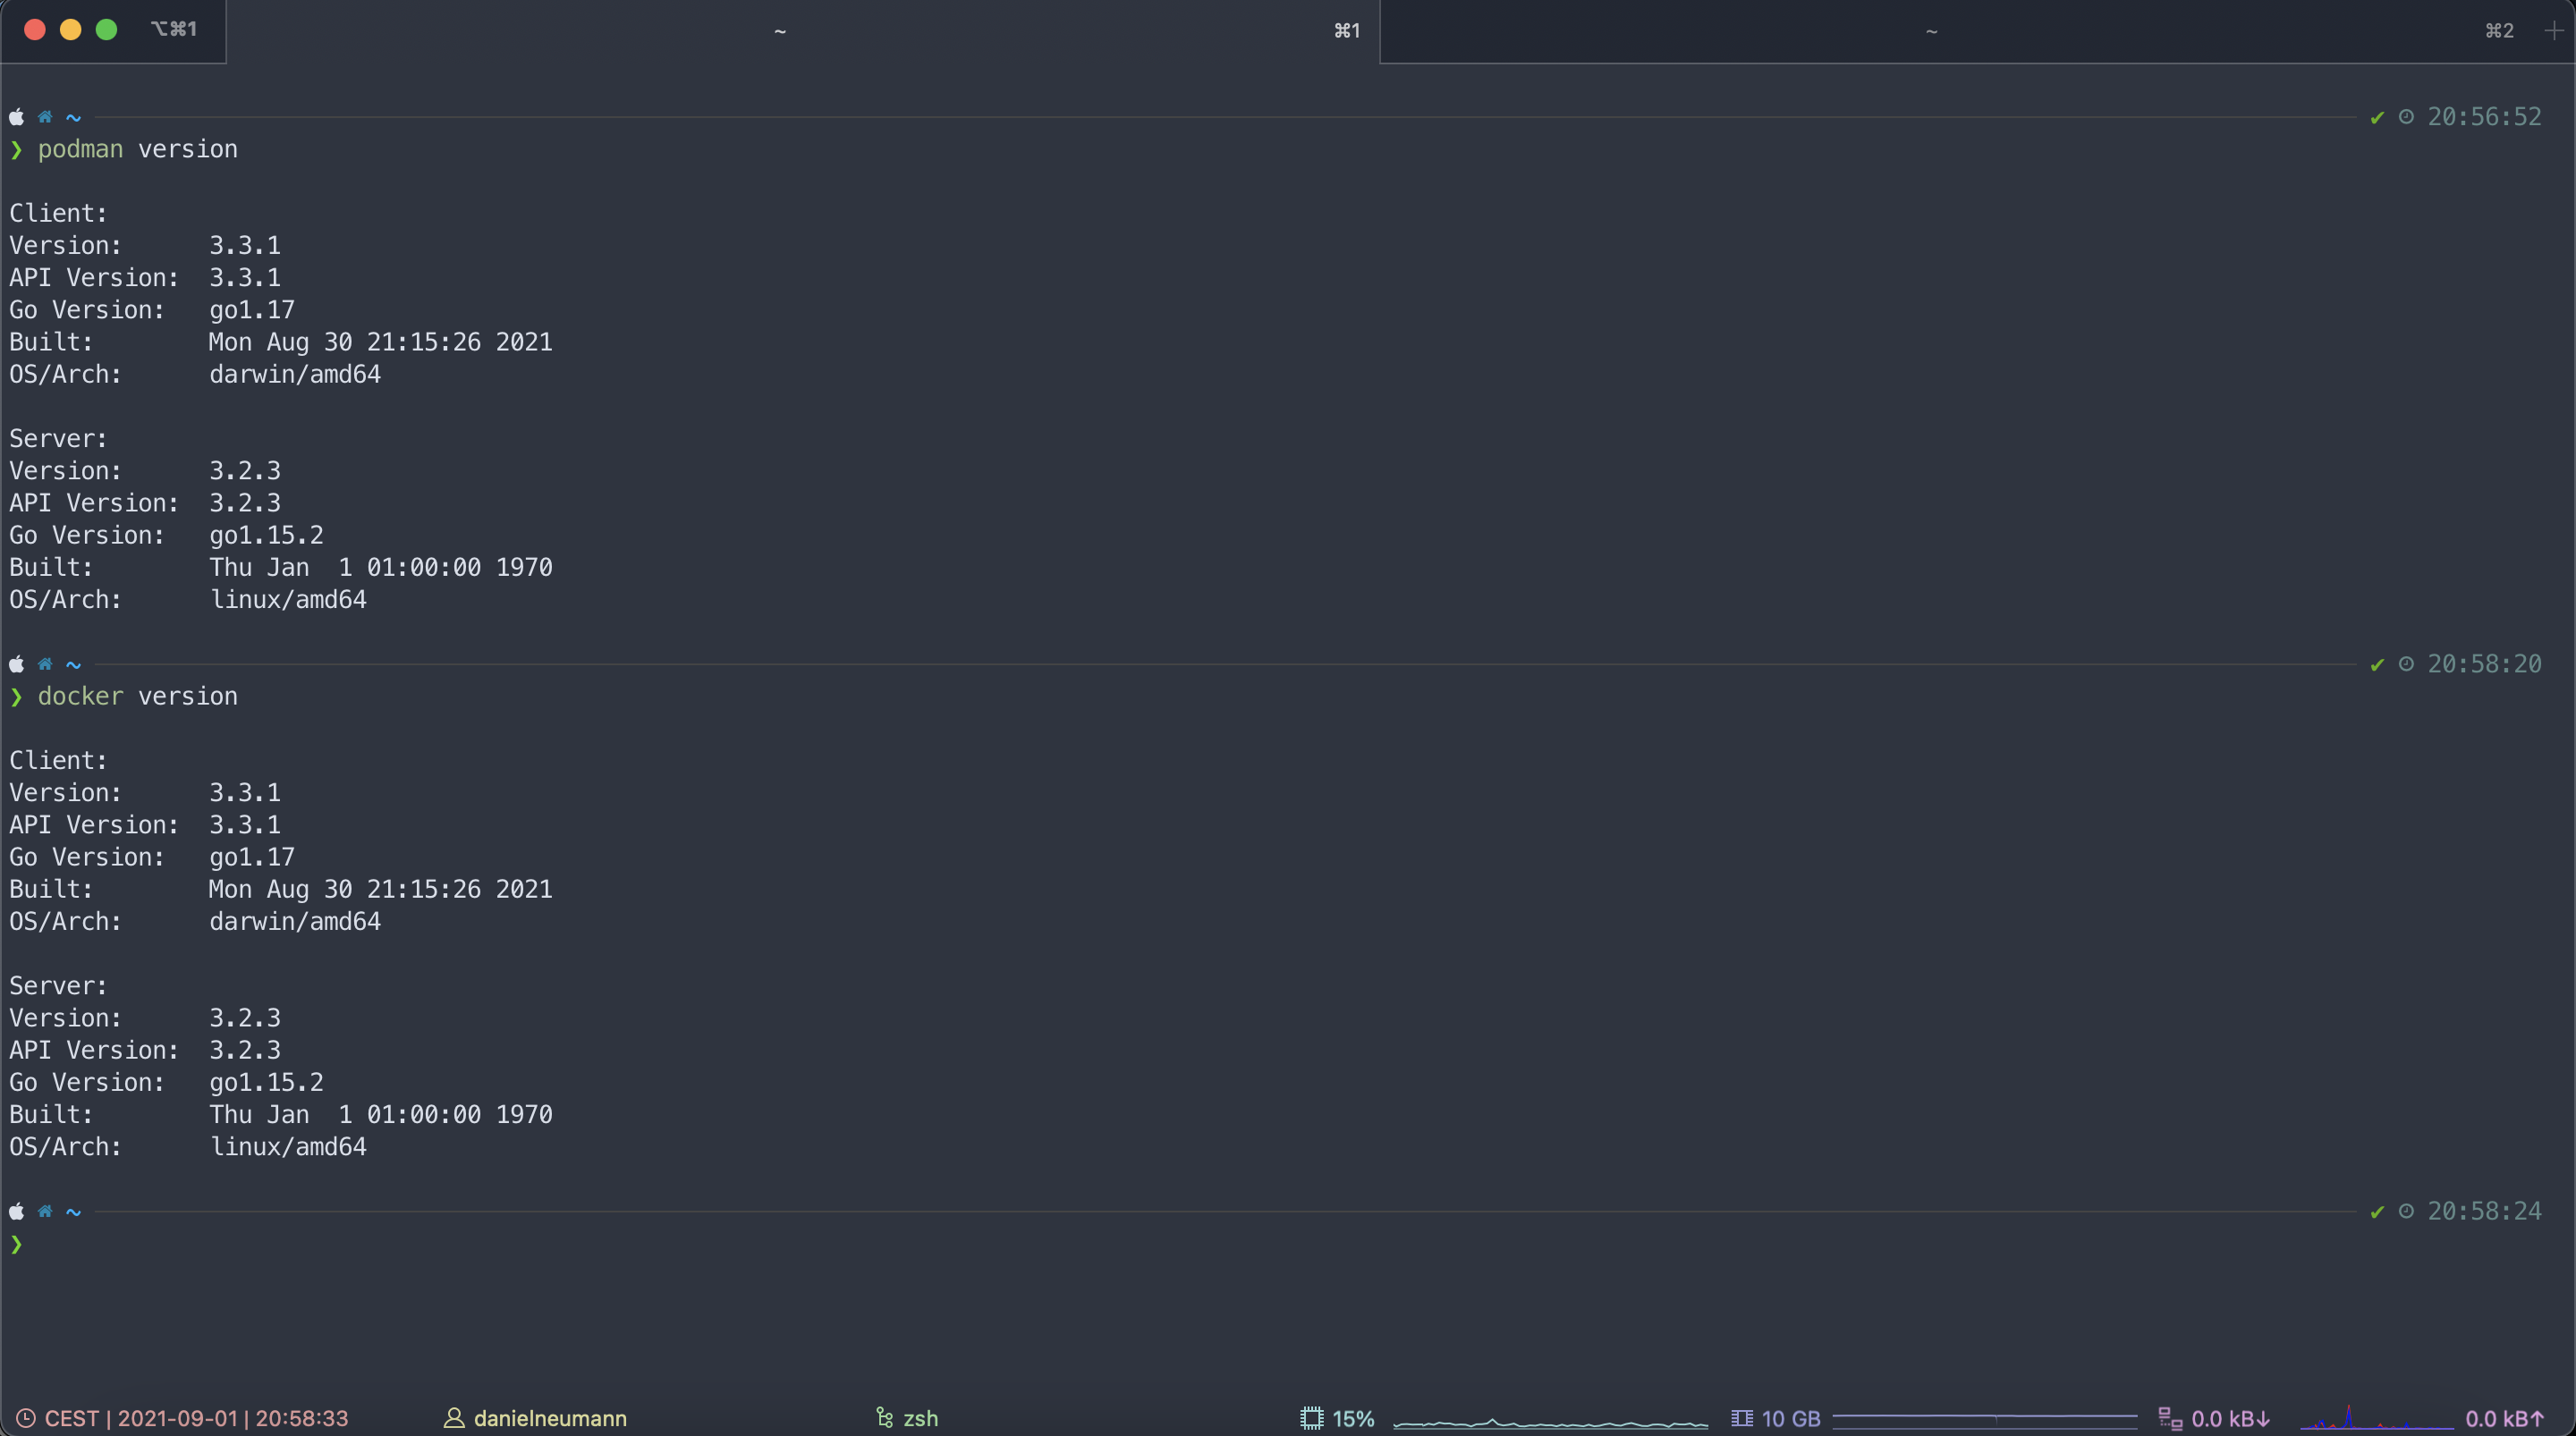
When we run now podman version or docker version we get the version information about the Podman client and server.
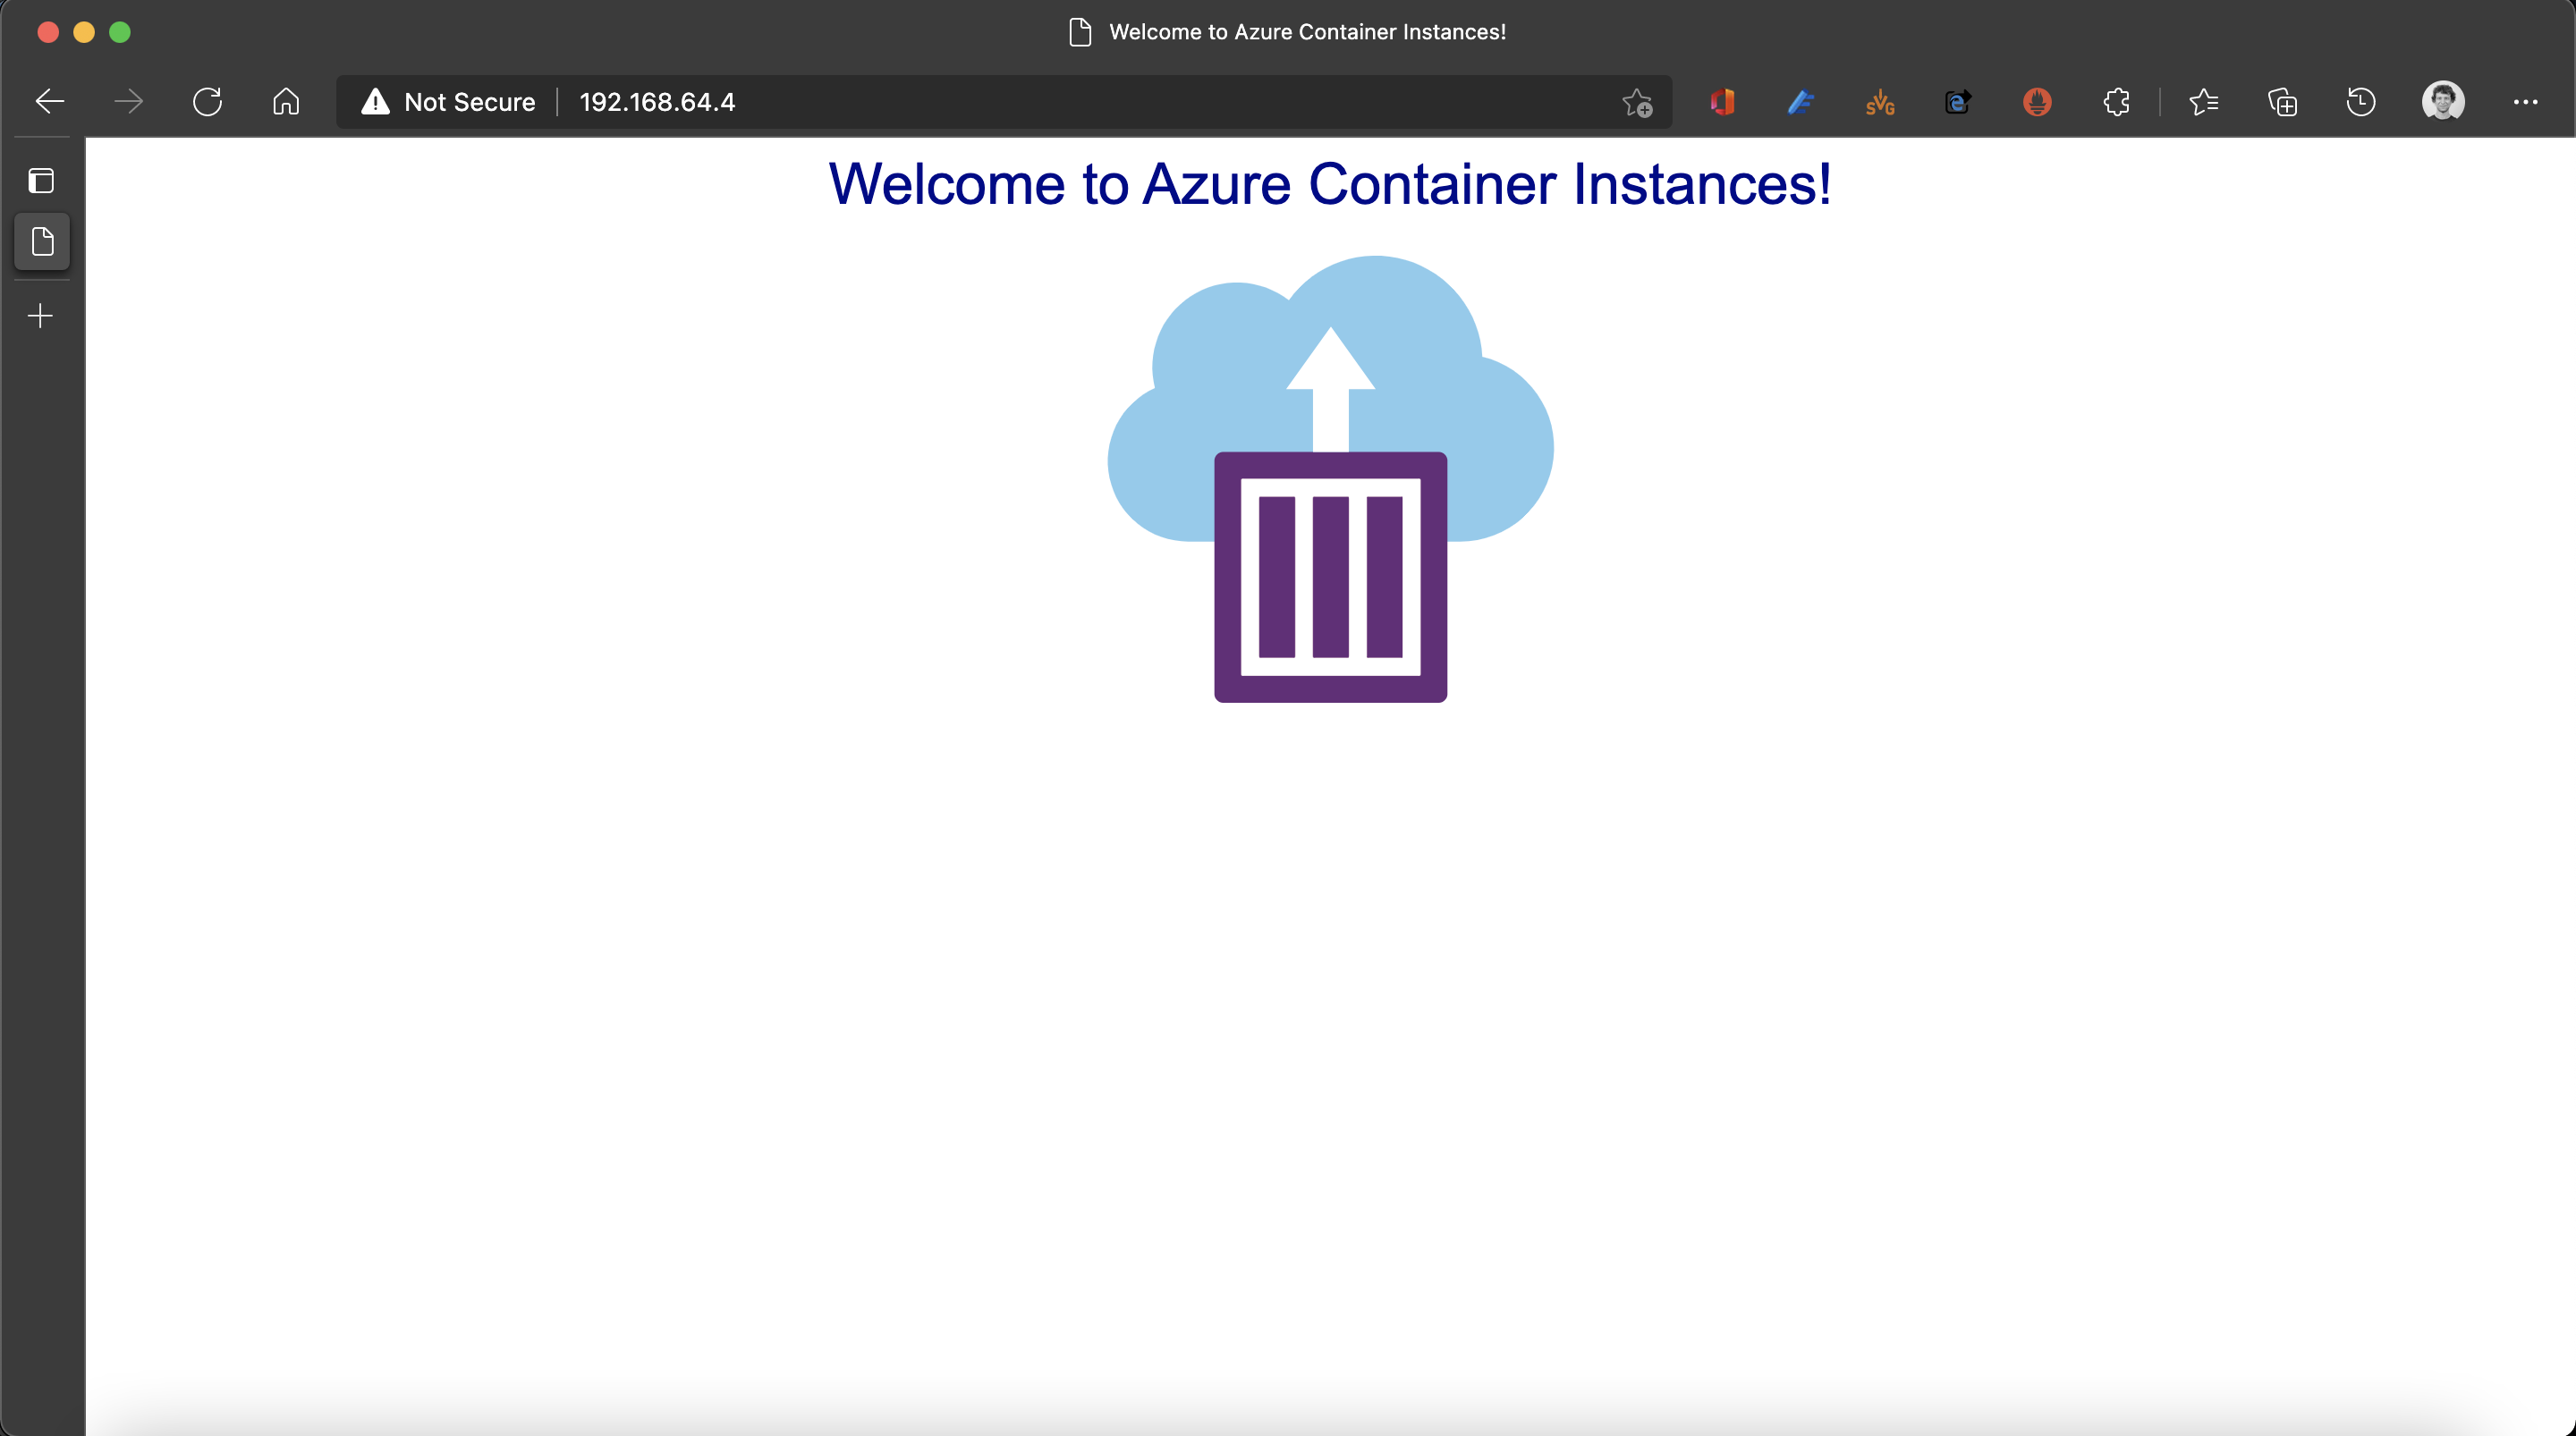
Let us start a simple Hello World container application. As I am interacting with Podman in root mode I can bind the container to the privileged port 80.
> docker run -d -p 80:80 mcr.microsoft.com/azuredocs/aci-helloworld:latest

> docker ps
CONTAINER ID  IMAGE                                              COMMAND               CREATED         STATUS             PORTS               NAMES
c0aca4d57e9a  mcr.microsoft.com/azuredocs/aci-helloworld:latest  /bin/sh -c node /...  16 seconds ago  Up 16 seconds ago  0.0.0.0:80->80/tcp  exciting_colden
Opening a browser and accessing the Multipass instance via its IP address we see the Hello World application.
As always, you find the scripts on my GitHub repository.
-> https://github.com/neumanndaniel/scripts/tree/main/Bash/Podman
I also added two more scripts. One for switching between root and rootless mode and the other one to reset the Multipass instance.