As a tenant you may want to deploy your own images instead of using the images provided by the cloud service provider. All you need to achieve your objective in Azure Stack is a sysprepped Windows Server or Linux image, an ARM template and a PowerShell script.
The first step is to prepare the ARM template. I am using two files for the ARM template the general template file and the parameter template file.
In the general template file we have to add a new parameter called osDiskVhdUri.
{
    "$schema": "https://schema.management.azure.com/schemas/2015-01-01/deploymentTemplate.json#",
    "contentVersion": "1.0.0.0",
    "parameters": {
        "osDiskVhdUri": {
            "type": "string",
            "metadata": {
                "description": "Uri of the user image"
            }
        },…
In the resources section we have to modify the virtual machine resource and there the value for the uri under image in the storageProfile property. When we are using Linux instead of Windows then we have to modify the osType also. Otherwise the deployment will fail.
{
    "apiVersion": "2015-06-15",
    "type": "Microsoft.Compute/virtualMachines",
    "name": "[variables('vmName')]",
    "location": "[parameters('location')]",
    "tags": {
        "environment": "[parameters('environment')]"
    },
    "dependsOn": [
        "[concat('Microsoft.Storage/storageAccounts/', parameters('newStorageAccountName'))]",
        "[concat('Microsoft.Network/networkInterfaces/', variables('nicName'))]",
        "[concat('Microsoft.Compute/availabilitySets/', parameters('availabilitySet'))]"
    ],
    "properties": {
        "availabilitySet": {
            "id": "[resourceId('Microsoft.Compute/availabilitySets', parameters('availabilitySet'))]"
        },
        "hardwareProfile": {
            "vmSize": "[parameters('vmSize')]"
        },
        "osProfile": {
            "computerName": "[variables('vmName')]",
            "adminUsername": "[parameters('adminUsername')]",
            "adminPassword": "[parameters('adminPassword')]"
        },
        "storageProfile": {
            "osDisk": {
                "name": "[variables('OSDiskName')]",
                "vhd": {
                    "uri": "[concat('https://',parameters('newStorageAccountName'),'.',parameters('blobStorageEndpoint'),'/',variables('vmStorageAccountContainerName'),'/',variables('OSDiskName'),'.vhd')]"
                },
                "caching": "ReadWrite",
                "createOption": "FromImage",
                "osType": "Windows",
                "image": {
                    "uri": "[parameters('osDiskVhdUri')]"
                }
            }
        },
In the parameter file we are adding osDiskVhdUri as an additional parameter with the URI to our uploaded custom image.
{
    "$schema": "https://schema.management.azure.com/schemas/2015-01-01/deploymentParameters.json#",
    "contentVersion": "1.0.0.0",
    "parameters": {
        "osDiskVhdUri": {
            "value": "http://customimagedeployment.blob.azurestack.local/images/WS2012R2.vhd"
        },…
Now we can upload the image and deploy our VM on Azure Stack.
#Authentication against Azure Stack
$AadTenantId = "xxxxxxxx-xxxx-xxxx-xxxx-xxxxxxxxxxxx"
Add-AzureRmEnvironment -Name 'Azure Stack' `
    -ActiveDirectoryEndpoint ("https://login.windows.net/</a>$AadTenantId/") `
    -ActiveDirectoryServiceEndpointResourceId "https://azurestack.local-api/" `
    -ResourceManagerEndpoint ("https://api.azurestack.local/") `
    -GalleryEndpoint ("https://gallery.azurestack.local:30016/") `
    -GraphEndpoint "https://graph.windows.net/"
# Get Azure Stack Environment Information
$env = Get-AzureRmEnvironment 'Azure Stack'
# Authenticate to AAD with Azure Stack Environment
Login-AzureRmAccount -Environment $env -Verbose
# Get Azure Stack Environment Subscription
Get-AzureRmSubscription | Out-GridView -PassThru  | Select-AzureRmSubscription
#Resource group name
$ResourceGroupName = "CustomImageDeployment"
#Read ARM JSON template parameter file
$ARMtemplate = cat "C:\scripts\WS2012R2image.parameters.json"|ConvertFrom-Json
#Azure datacenter location
$Location = $ARMtemplate.parameters.location.value
#Storage account name
$StorageAccountName = $ARMtemplate.parameters.newStorageAccountName.value
#Create resource group
New-AzureRmResourceGroup -Name $ResourceGroupName -Location $Location -Verbose
#Create storage account
New-AzureRmStorageAccount -ResourceGroupName $ResourceGroupName -Name $StorageAccountName -Type $ARMtemplate.parameters.storageAccountType.value -Location $Location –Verbose
Our first step is the authentication against our Azure Stack environment and the selection of the right subscription. Then we read the parameter file and save the values into a variable. At the next steps we are creating the resource group and the storage account.
Afterwards we can kick off the upload of our image.
#Upload custom Windows Server 2012 R2 image to Azure Stack
Add-AzureRmVhd -ResourceGroupName $ResourceGroupName -Destination $ARMtemplate.parameters.osDiskVhdUri.value -LocalFilePath "C:\scripts\WS2012R2.vhd" -NumberOfUploaderThreads 8 –Verbose
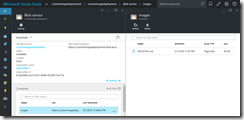
Same procedure as we would upload an image to Azure. When the upload is finished we can see our image in the storage account under the container images.
Now, everything is ready for our VM deployment. We run an additional test of the template files, asking for user credentials which will be used for the sign-on and then we kick off the VM deployment.
#Custom Image VM Deployment
Test-AzureRmResourceGroupDeployment -ResourceGroupName $ResourceGroupName -TemplateFile "C:\scripts\WS2012R2image.json" -TemplateParameterFile "C:\scripts\WS2012R2image.parameters.json" -Verbose
$Credential=Get-Credential
New-AzureRmResourceGroupDeployment -ResourceGroupName $ResourceGroupName -TemplateFile "C:\scripts\WS2012R2image.json" -adminUsername $Credential.UserName -adminPassword $Credential.Password -TemplateParameterFile "C:\scripts\WS2012R2image.parameters.json" –Verbose
The deployment takes some time, but then we have a VM that was deployed from our custom image.


