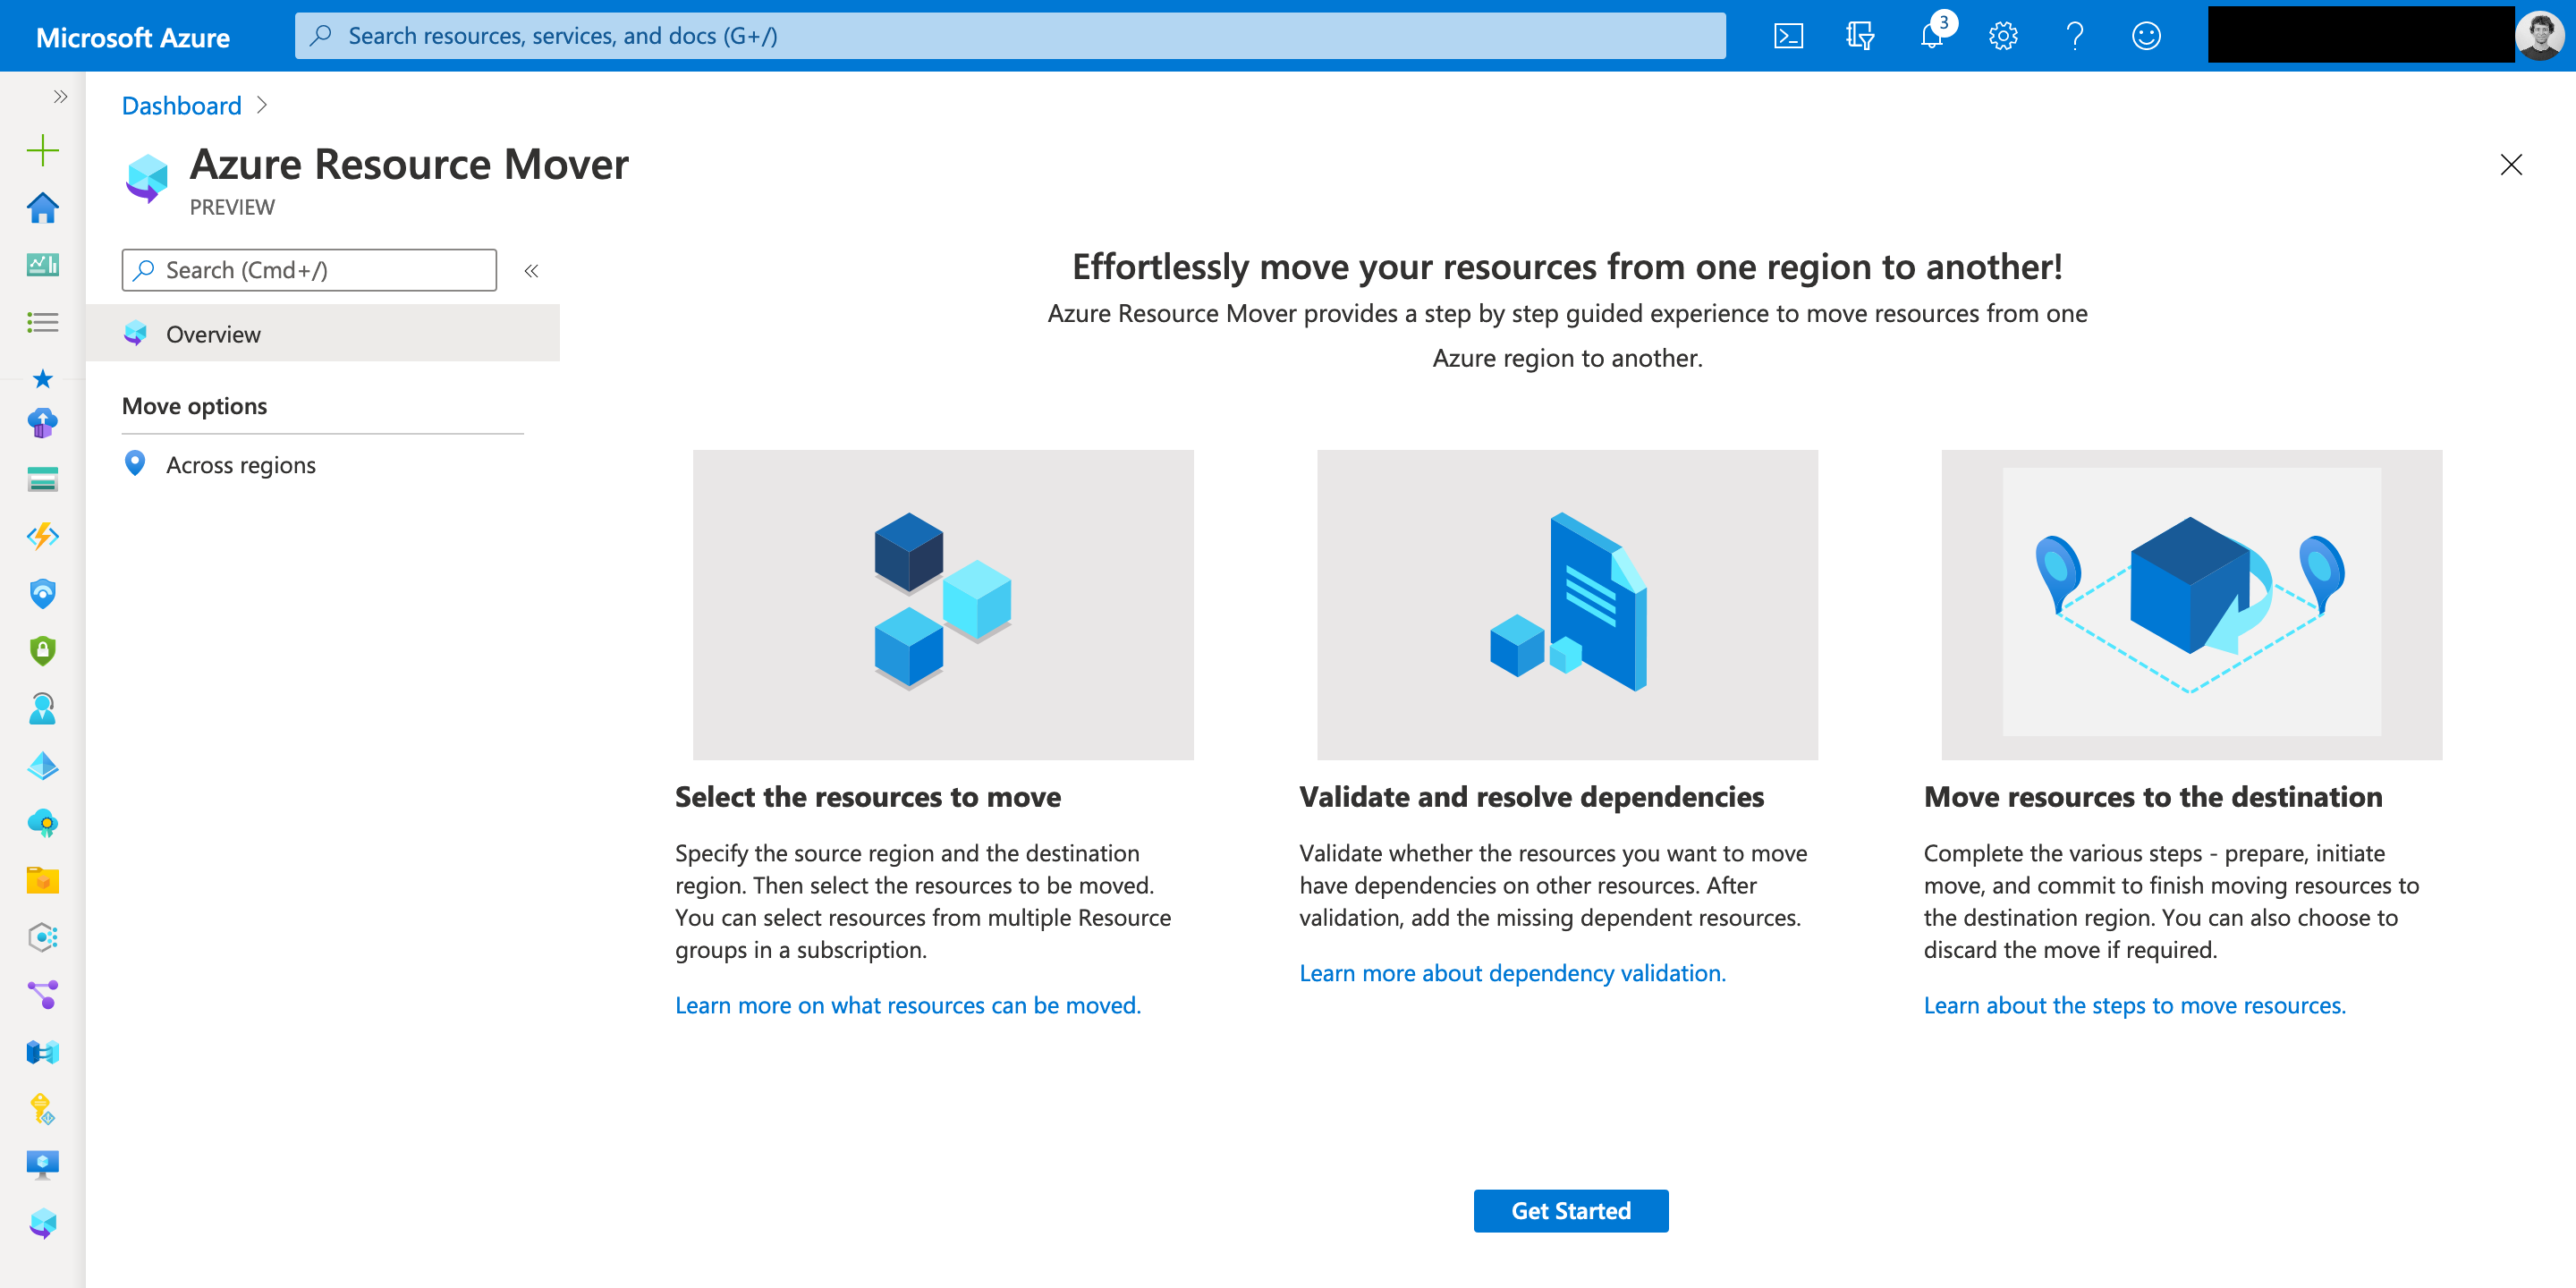
Azure Resource Mover is a new service in Azure that lets you move resources across regions.
It complements the existing capabilities to move resources between resource groups in the same subscriptions or cross subscriptions.
Scenarios for Azure Resource Mover are:
- Taking advantage of a new Azure region that is closer to you and thus reducing latency.
- Moving resources to Azure regions supporting Availability Zones thus increasing availability and resiliency.
- Fulfilling data residency and compliance requirements.
As of writing this blog post Azure Resource Mover is in public preview and supports the move of the following resources.
- Azure VMs and associated disks
- NICs
- Availability sets
- Azure virtual networks
- Public IP addresses
- Network security groups (NSGs)
- Internal and public load balancers
- Azure SQL databases and elastic pools
Using Azure Resource Mover requires either Owner or Contributor and User Access Administrator permissions on subscription level for the first time resources are moved for a source / target region pair.
Before we look deeper into the process how to move an Ubuntu 18.04 VM from North Europe to West Europe I want to highlight the support matrix for VMs and Azure SQL.
-> https://docs.microsoft.com/en-us/azure/resource-mover/support-matrix-move-region-azure-vm
-> https://docs.microsoft.com/en-us/azure/resource-mover/support-matrix-move-region-sql
For a successful move it is important to check the support matrix first. So, that all requirements and prerequisites are fulfilled.
Especially, when the OS is Ubuntu or Debian as the latest kernel version might be not supported yet.
Downgrading the kernel is straightforward. I covered the process in one of my latest blog posts.
-> https://www.danielstechblog.io/downgrade-the-linux-kernel-on-an-azure-ubuntu-vm/
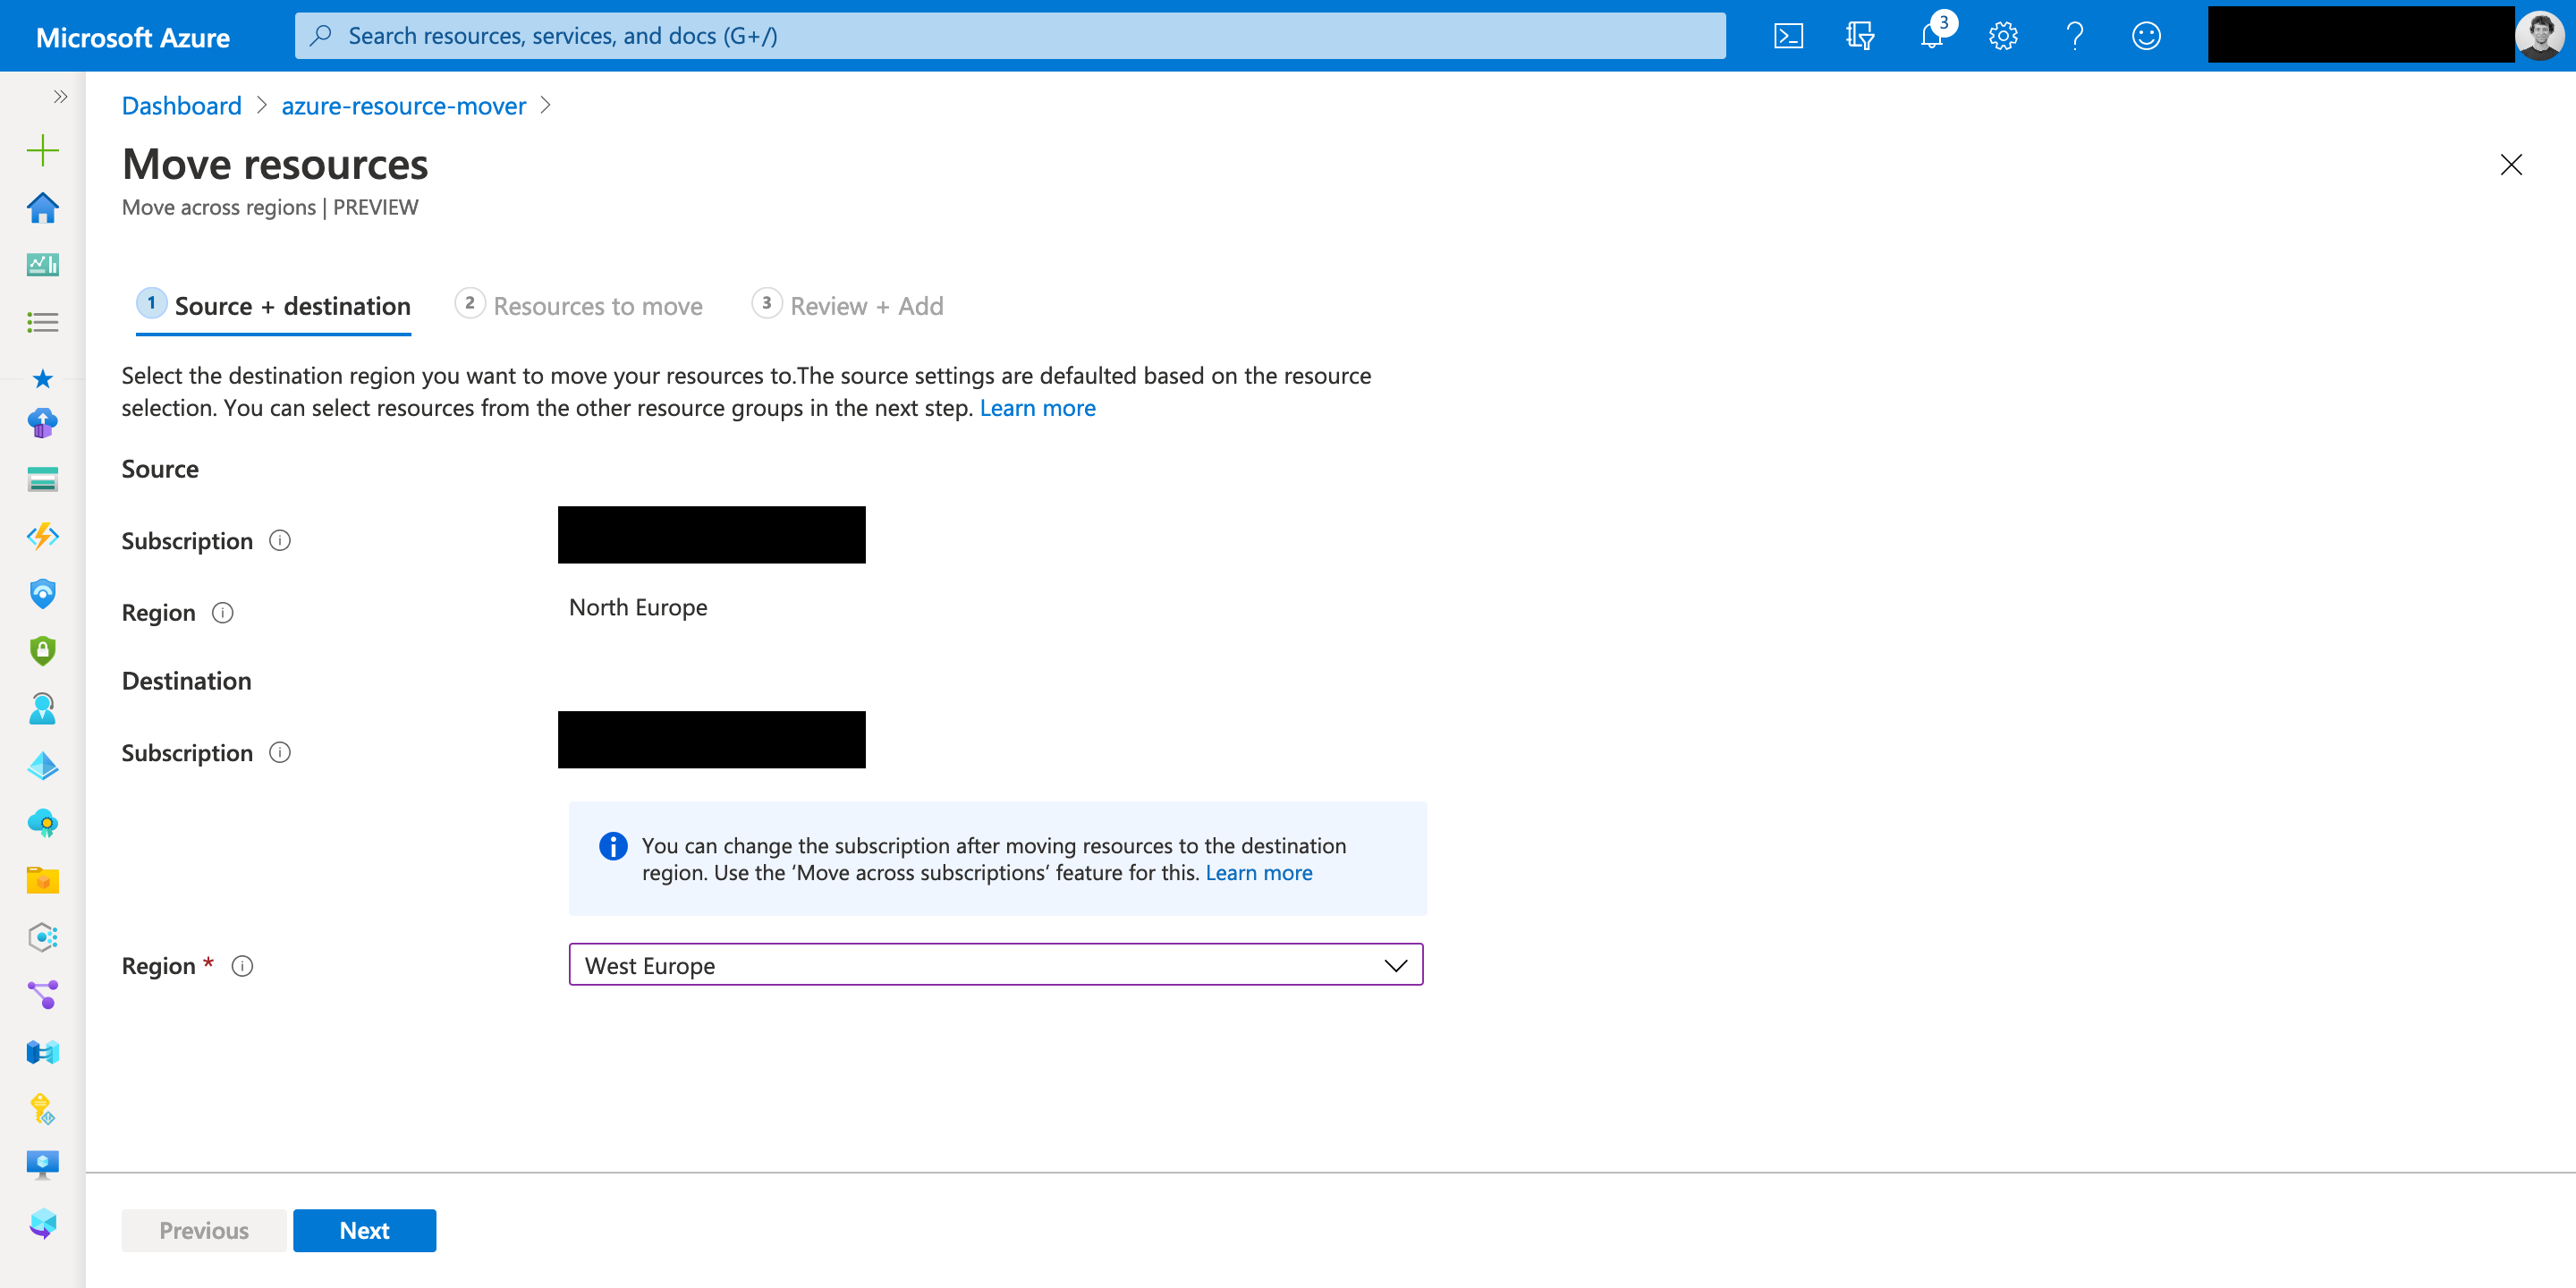
Moving a VM from North Europe to West Europe
Let us start with the move process. You can initiate the process either from the Resource Mover interface or directly from the resource group.
Use the search bar in the Azure portal getting to Azure Resource Mover.
Using the Resource Mover interface lets you specify the subscription and the source as well the target region.
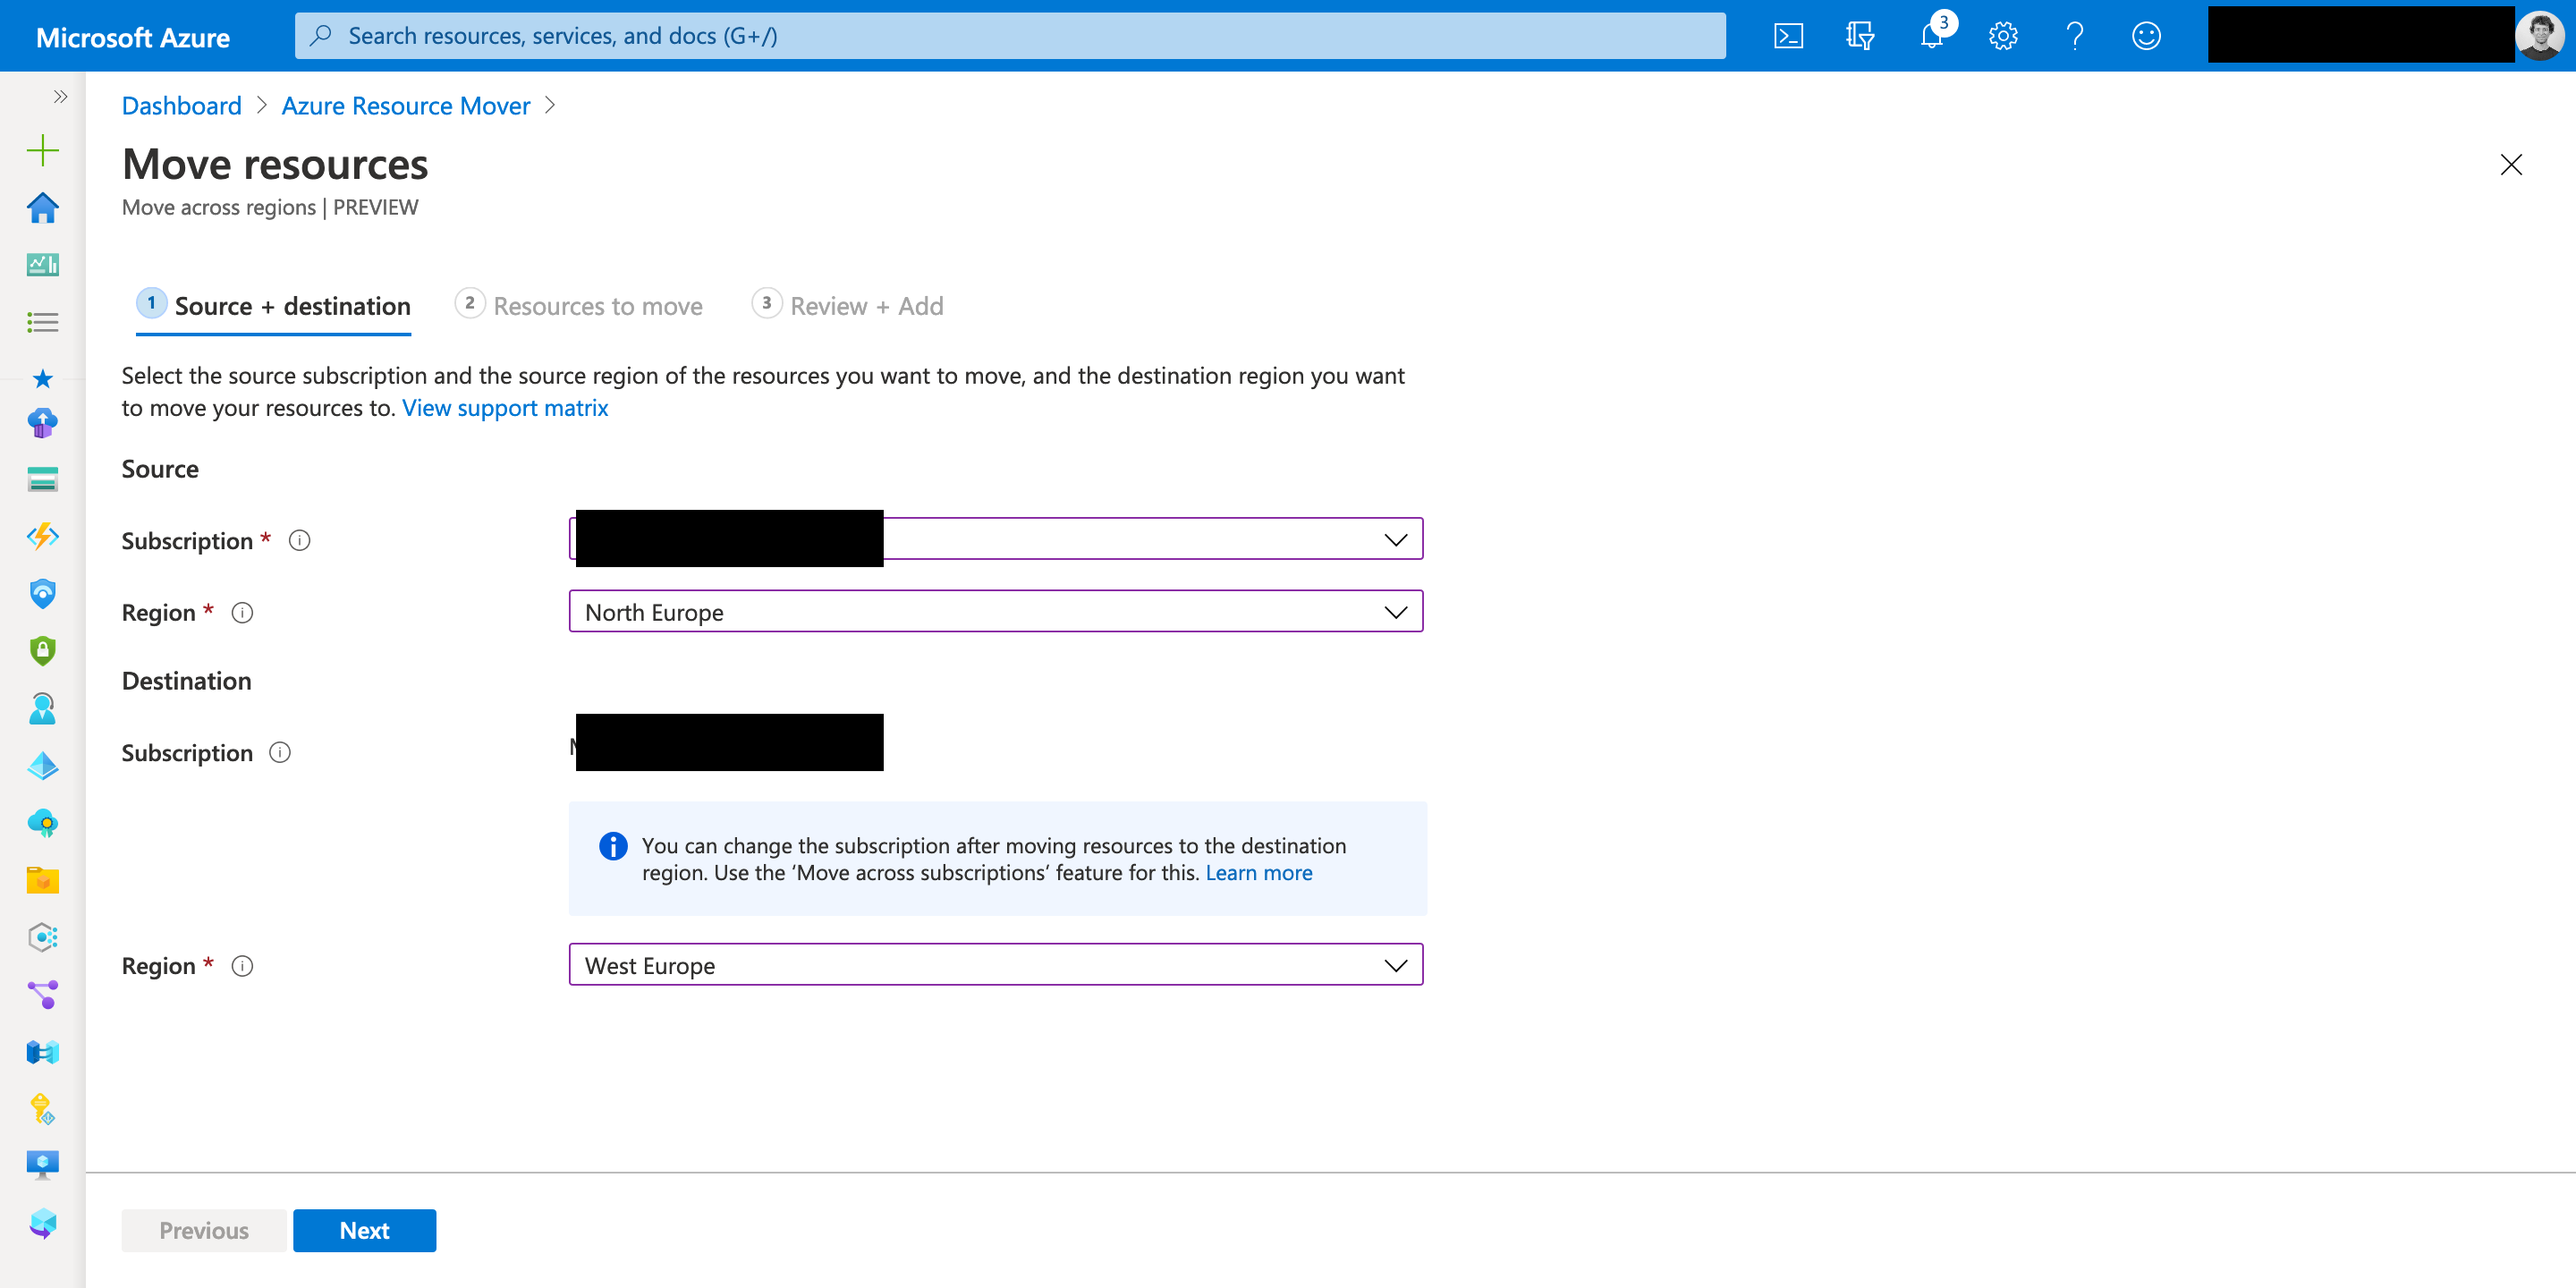
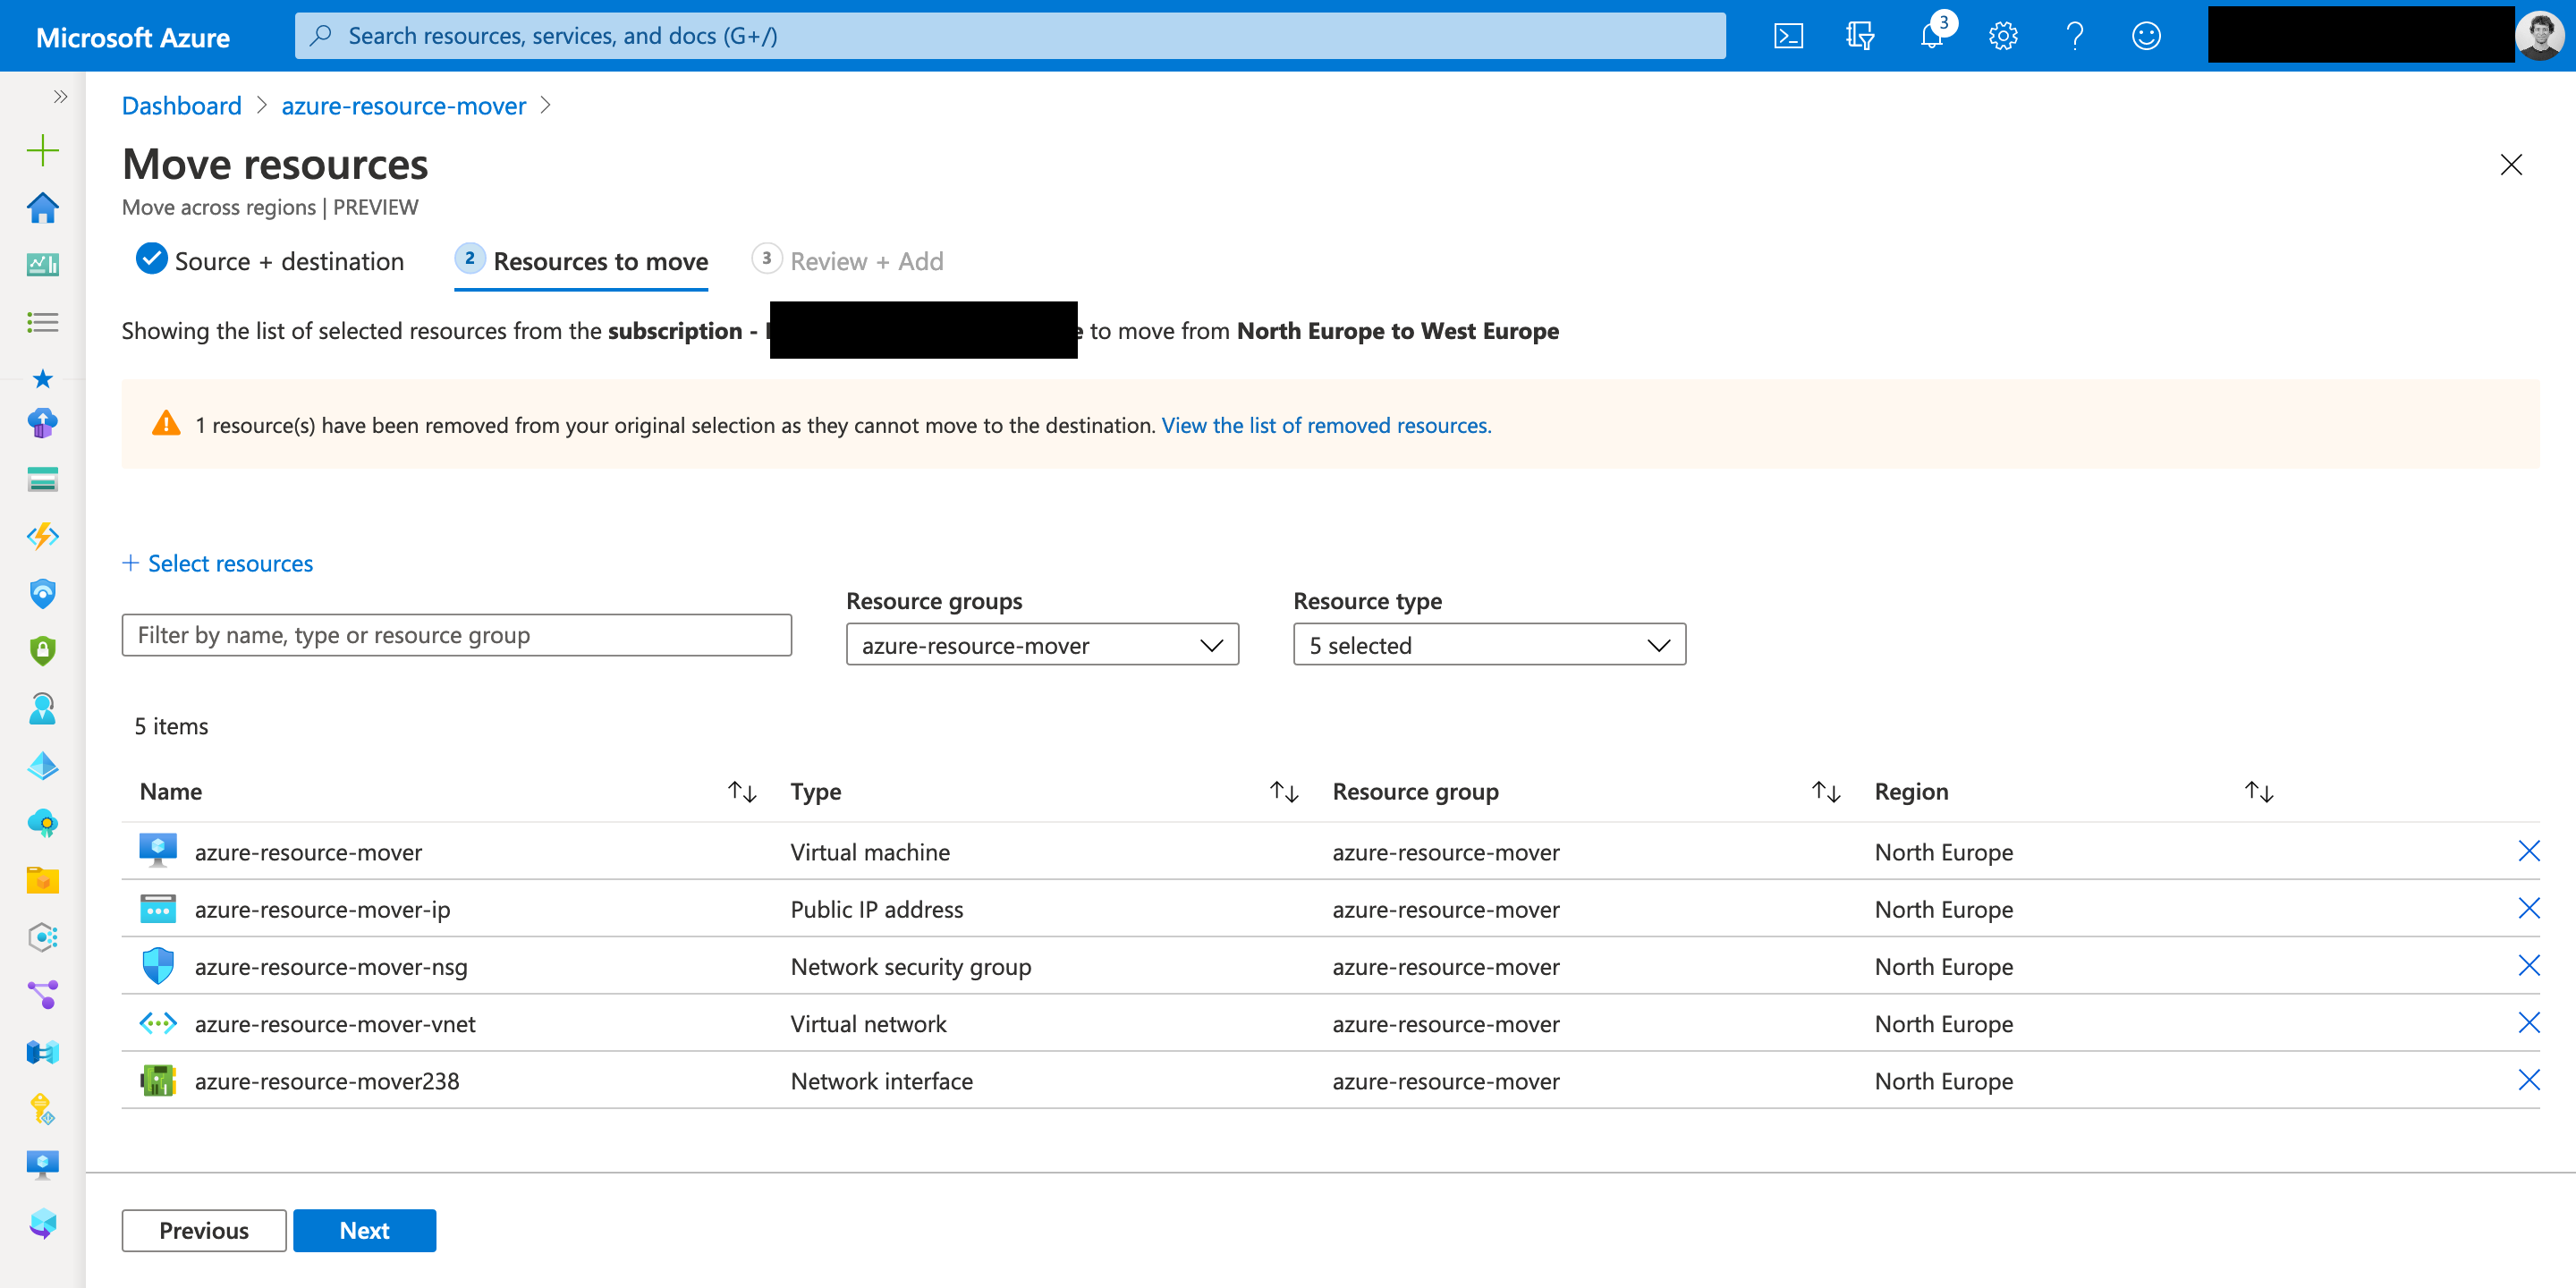
In the next step you select the resources you want to move.

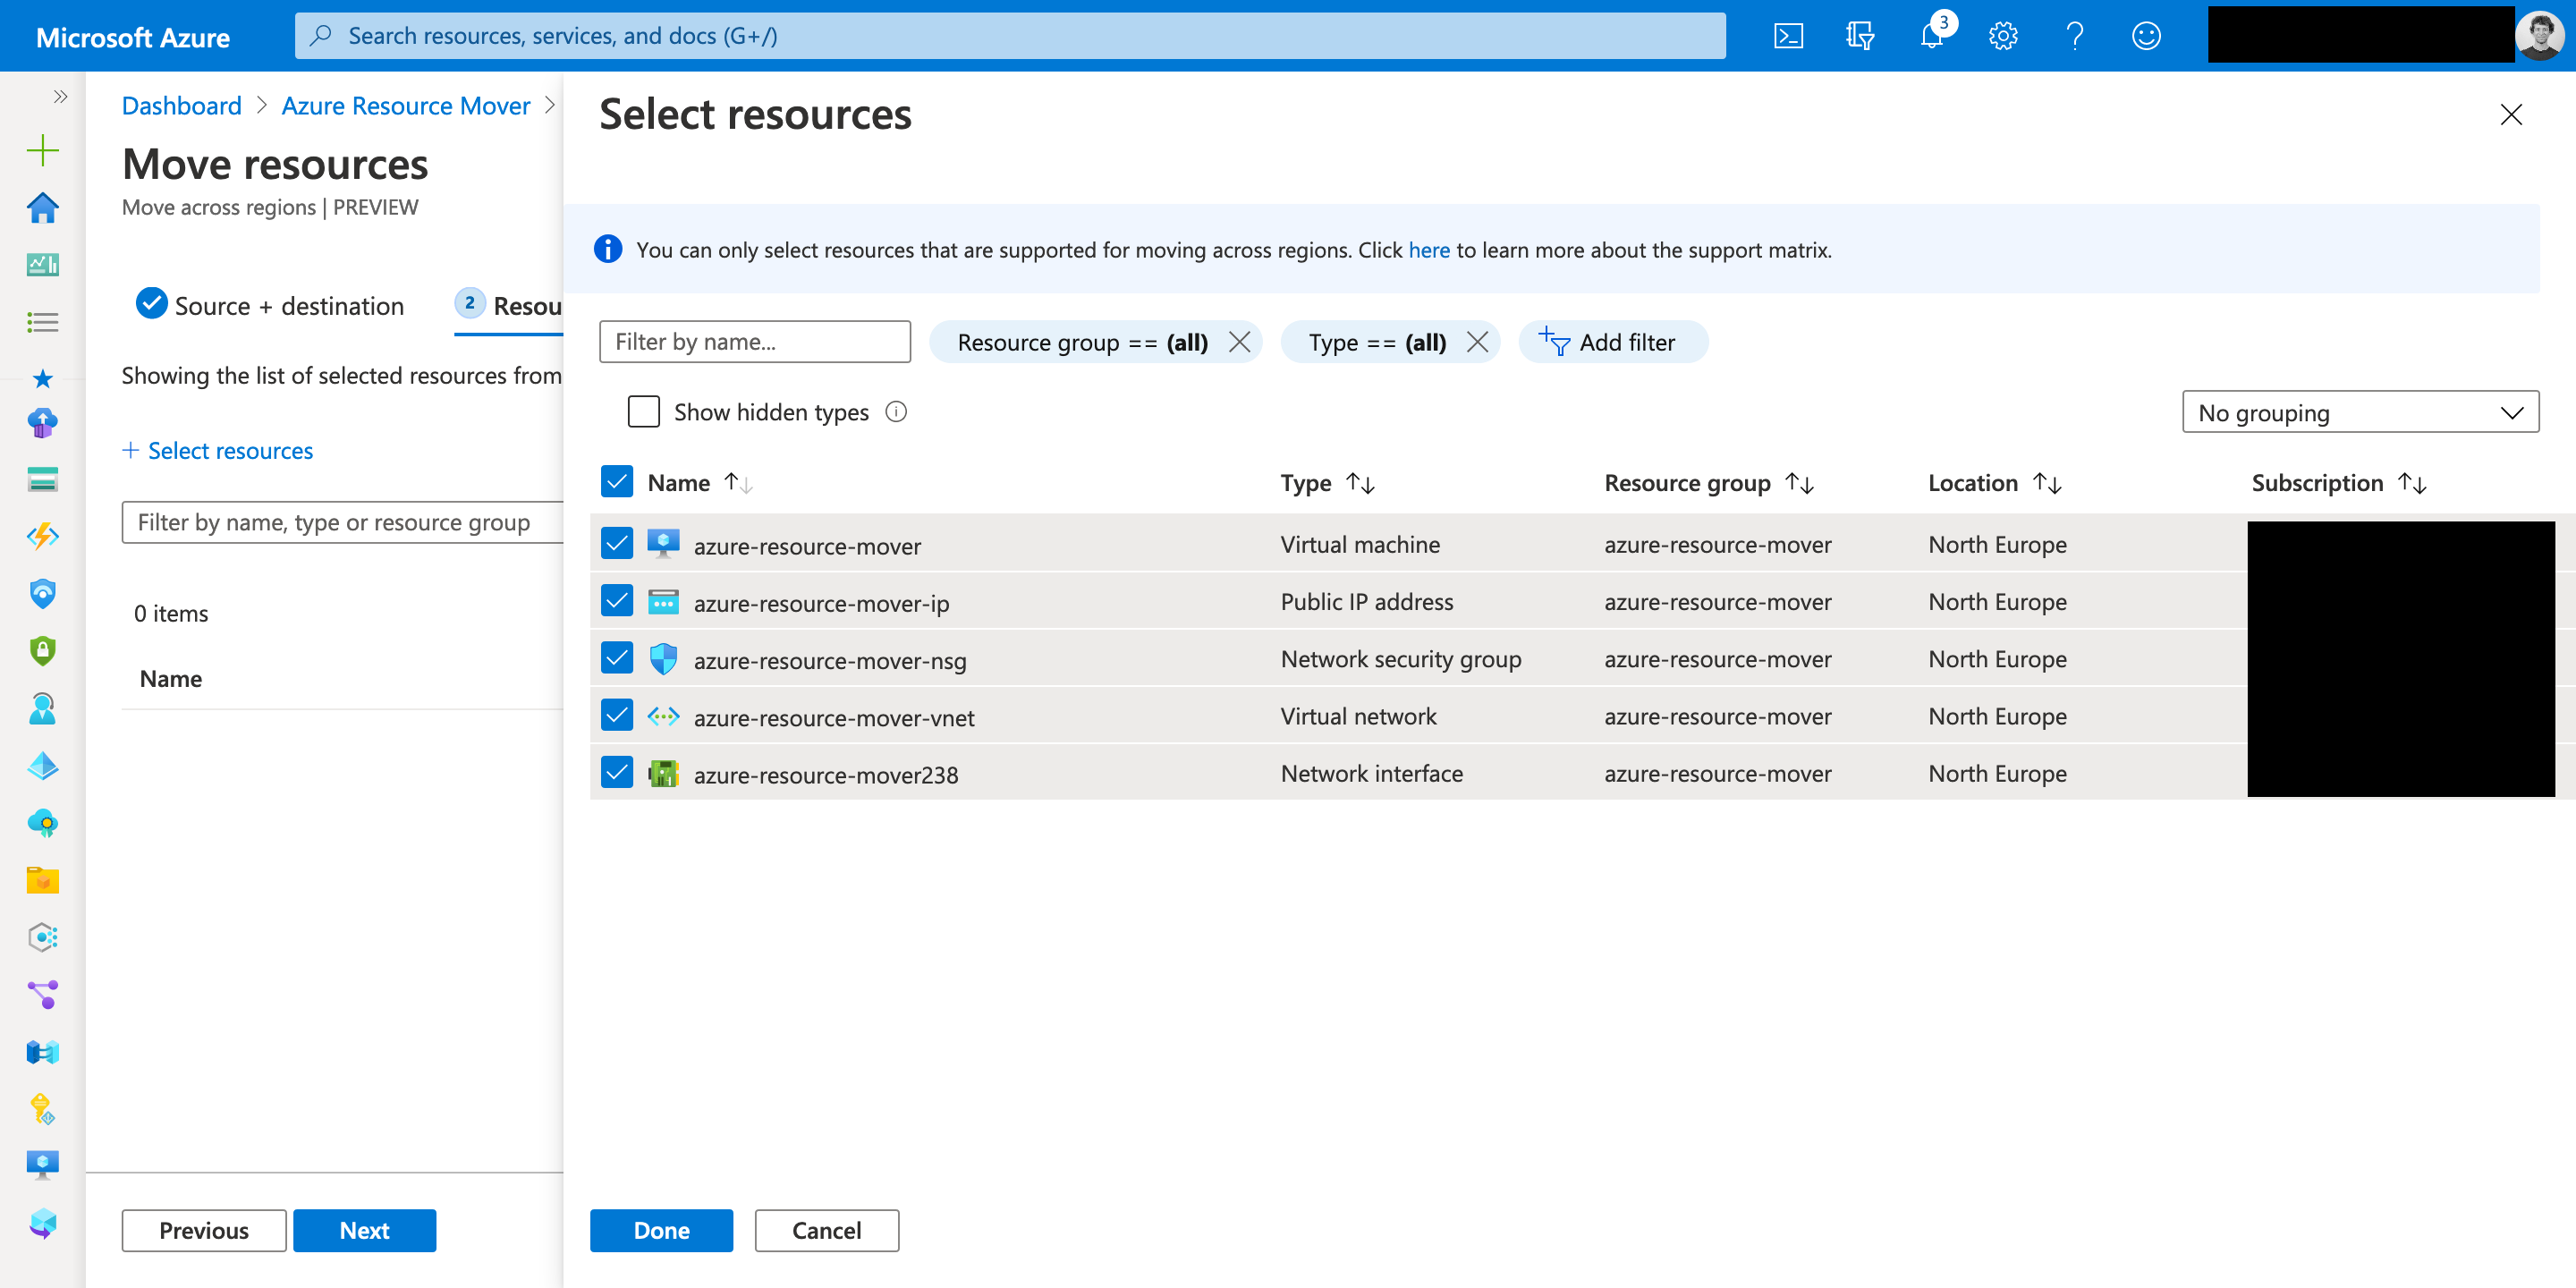

Initiating the process directly from the resource group has some advantages. First, you select the resources you want to move directly and only need to specify the target region in the next step.
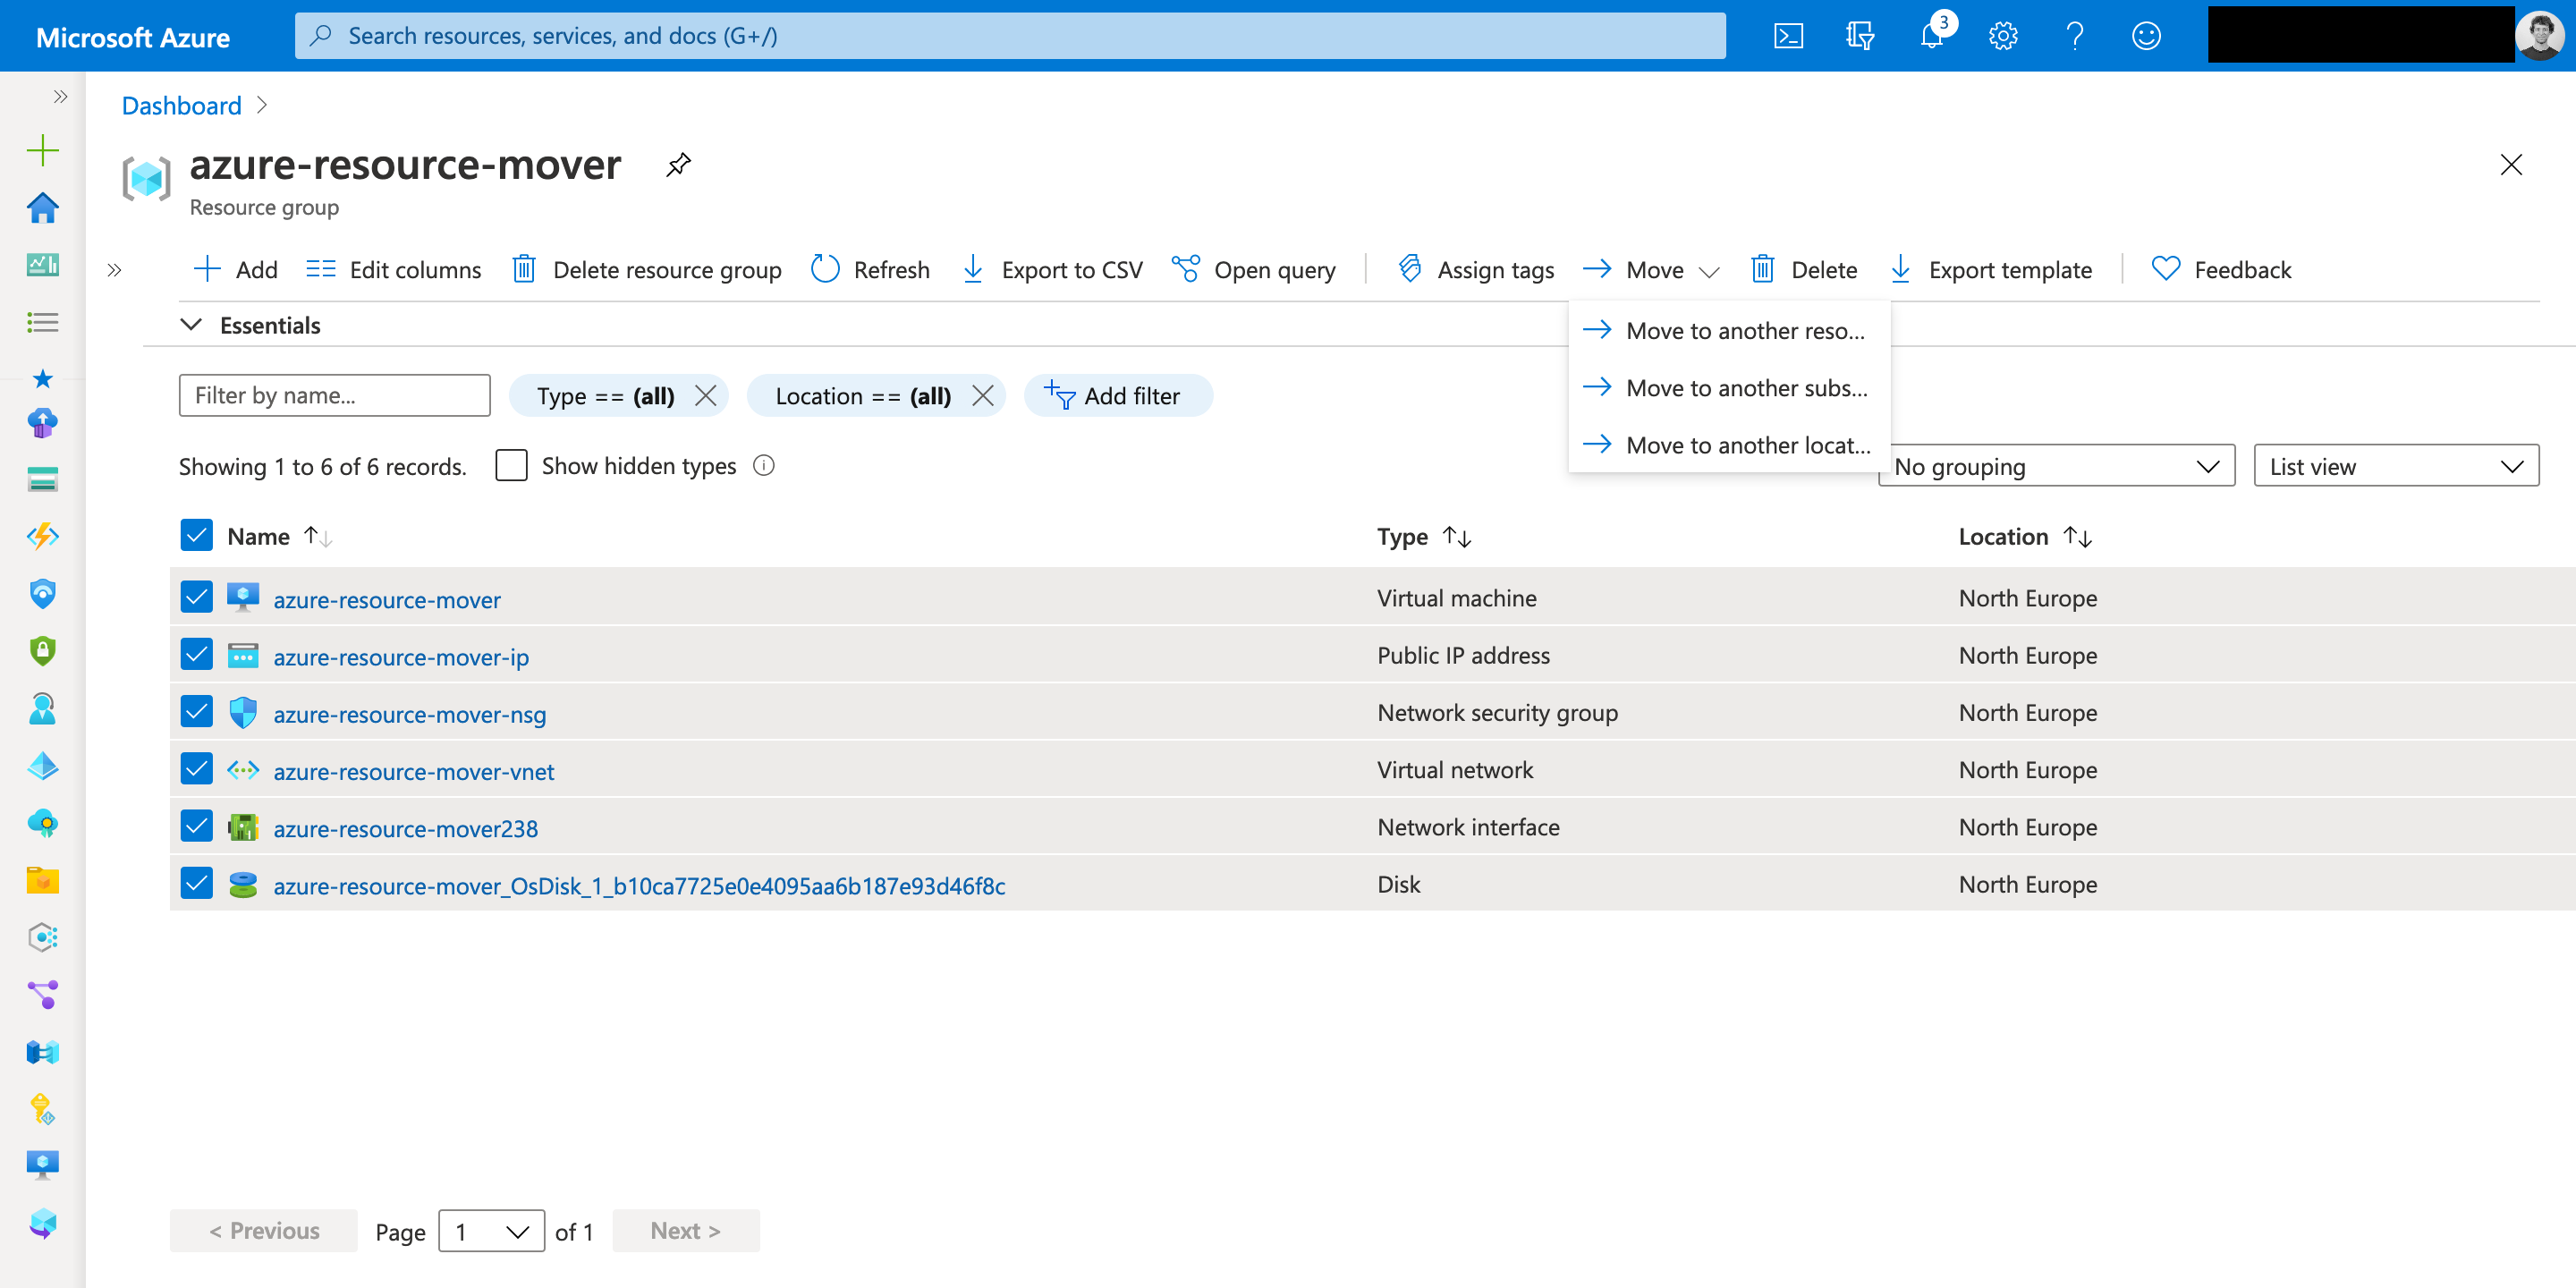
All of the other following steps are done via the Azure Resource Mover interface.
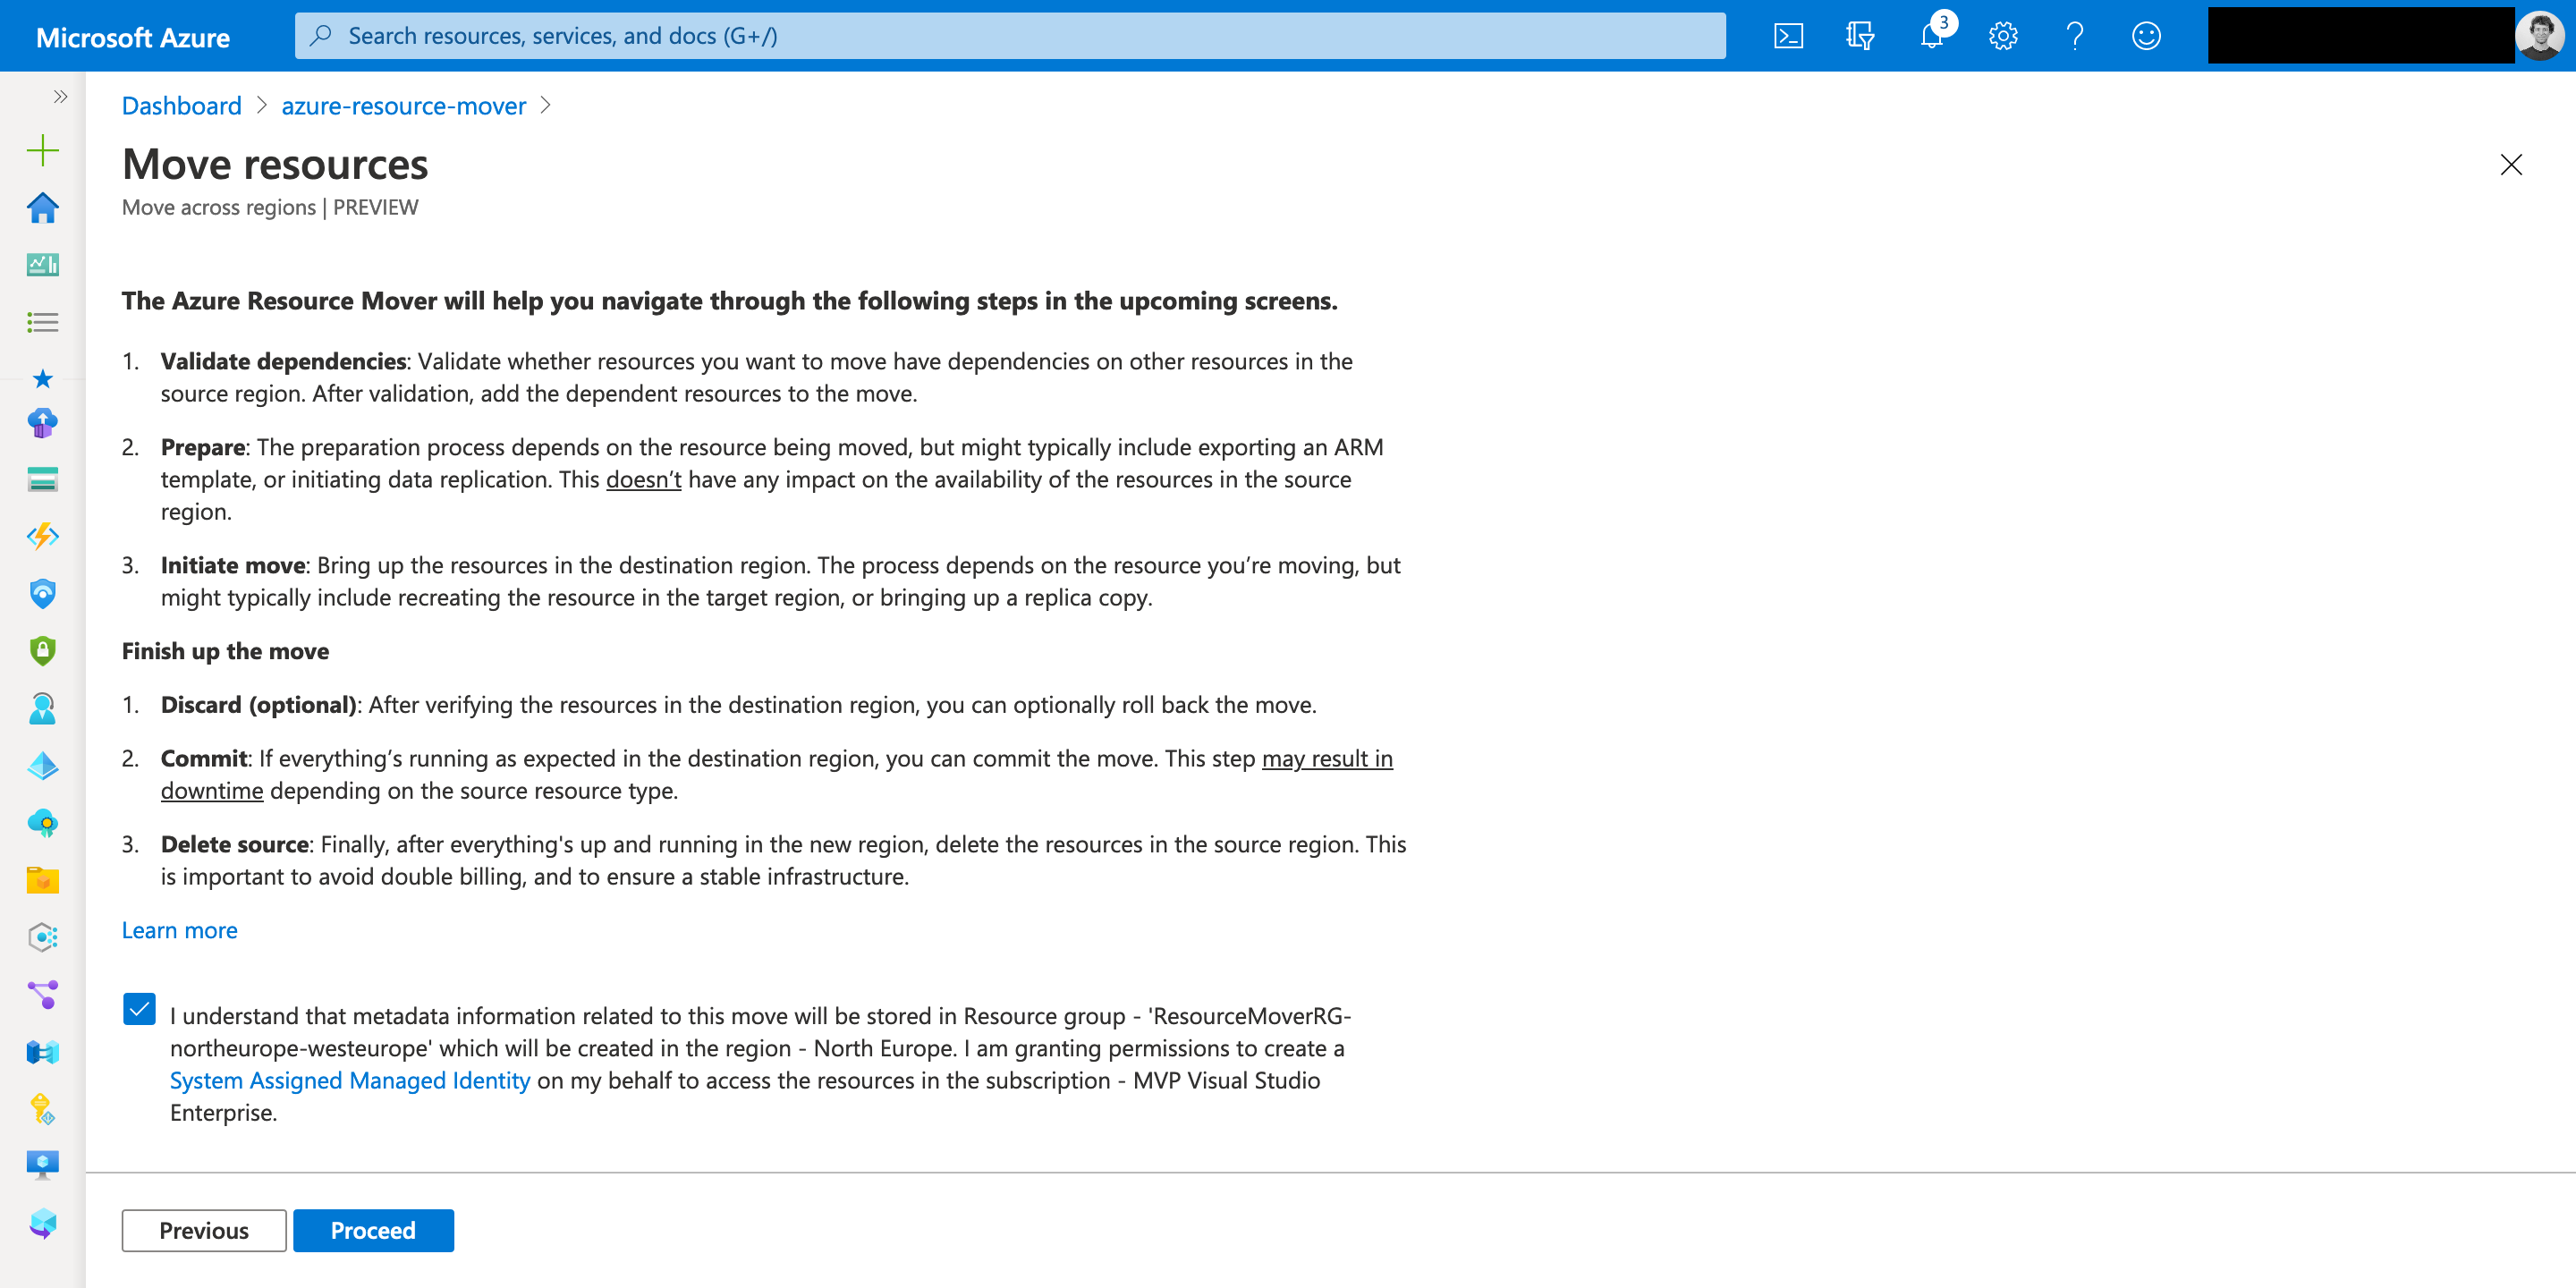
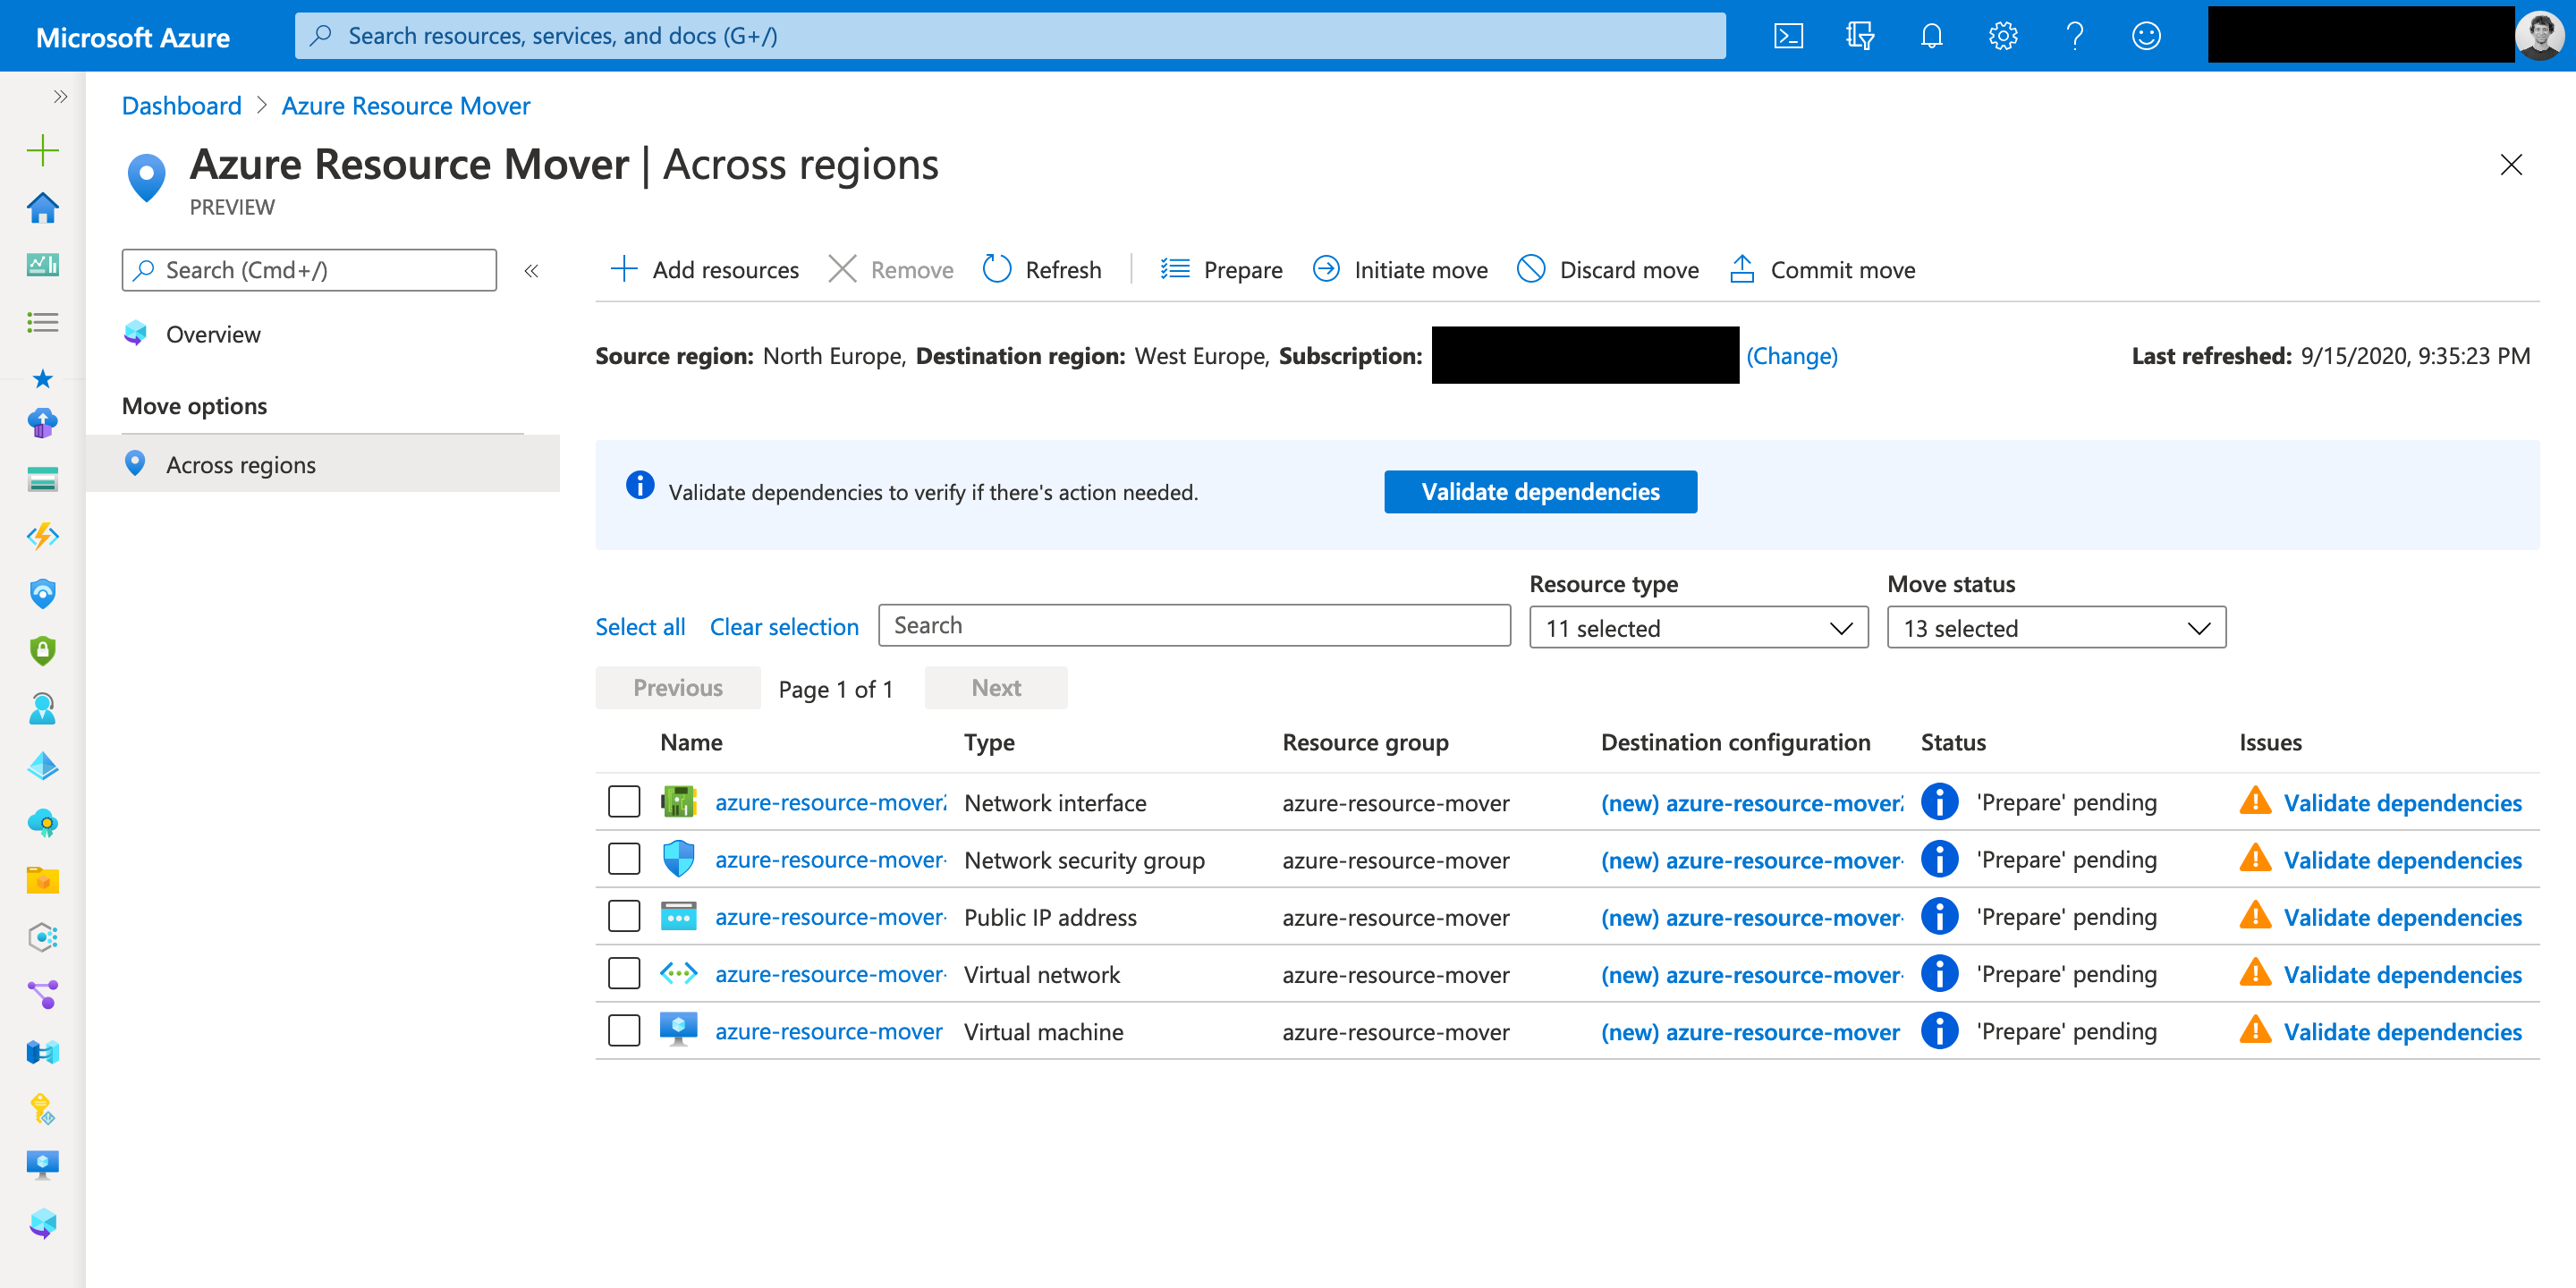
After adding the resources, you validate the dependencies before starting the prepare step with a click on validate dependencies.
When dependencies exist add them to the resource list with add dependencies.
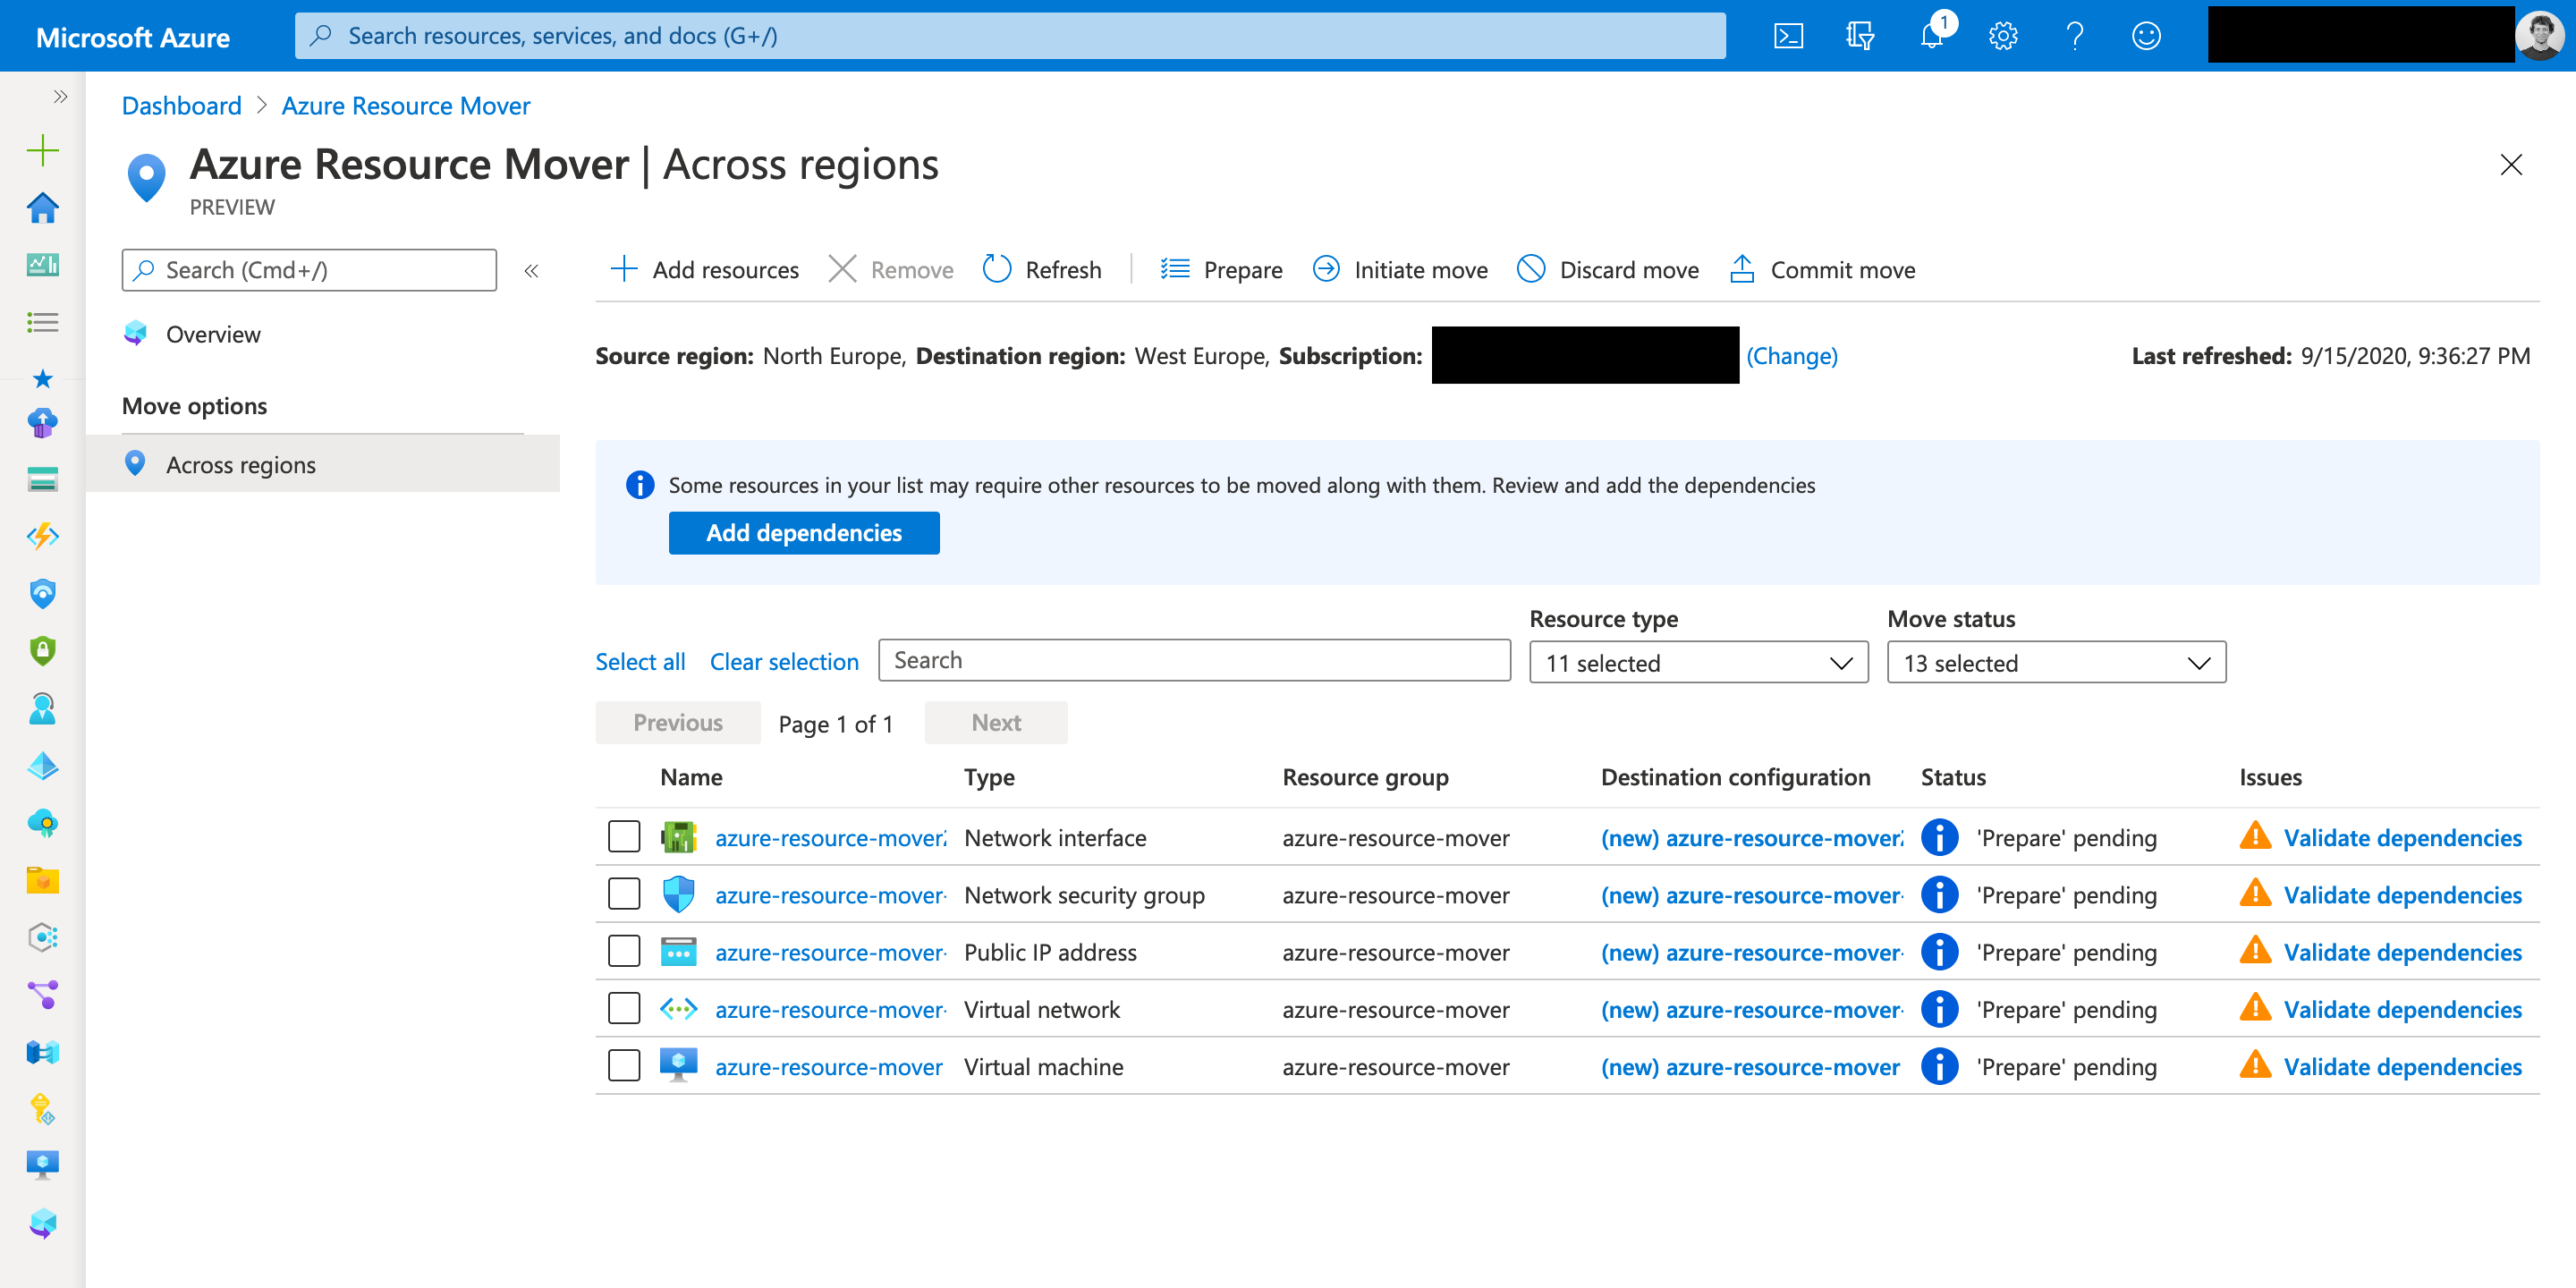
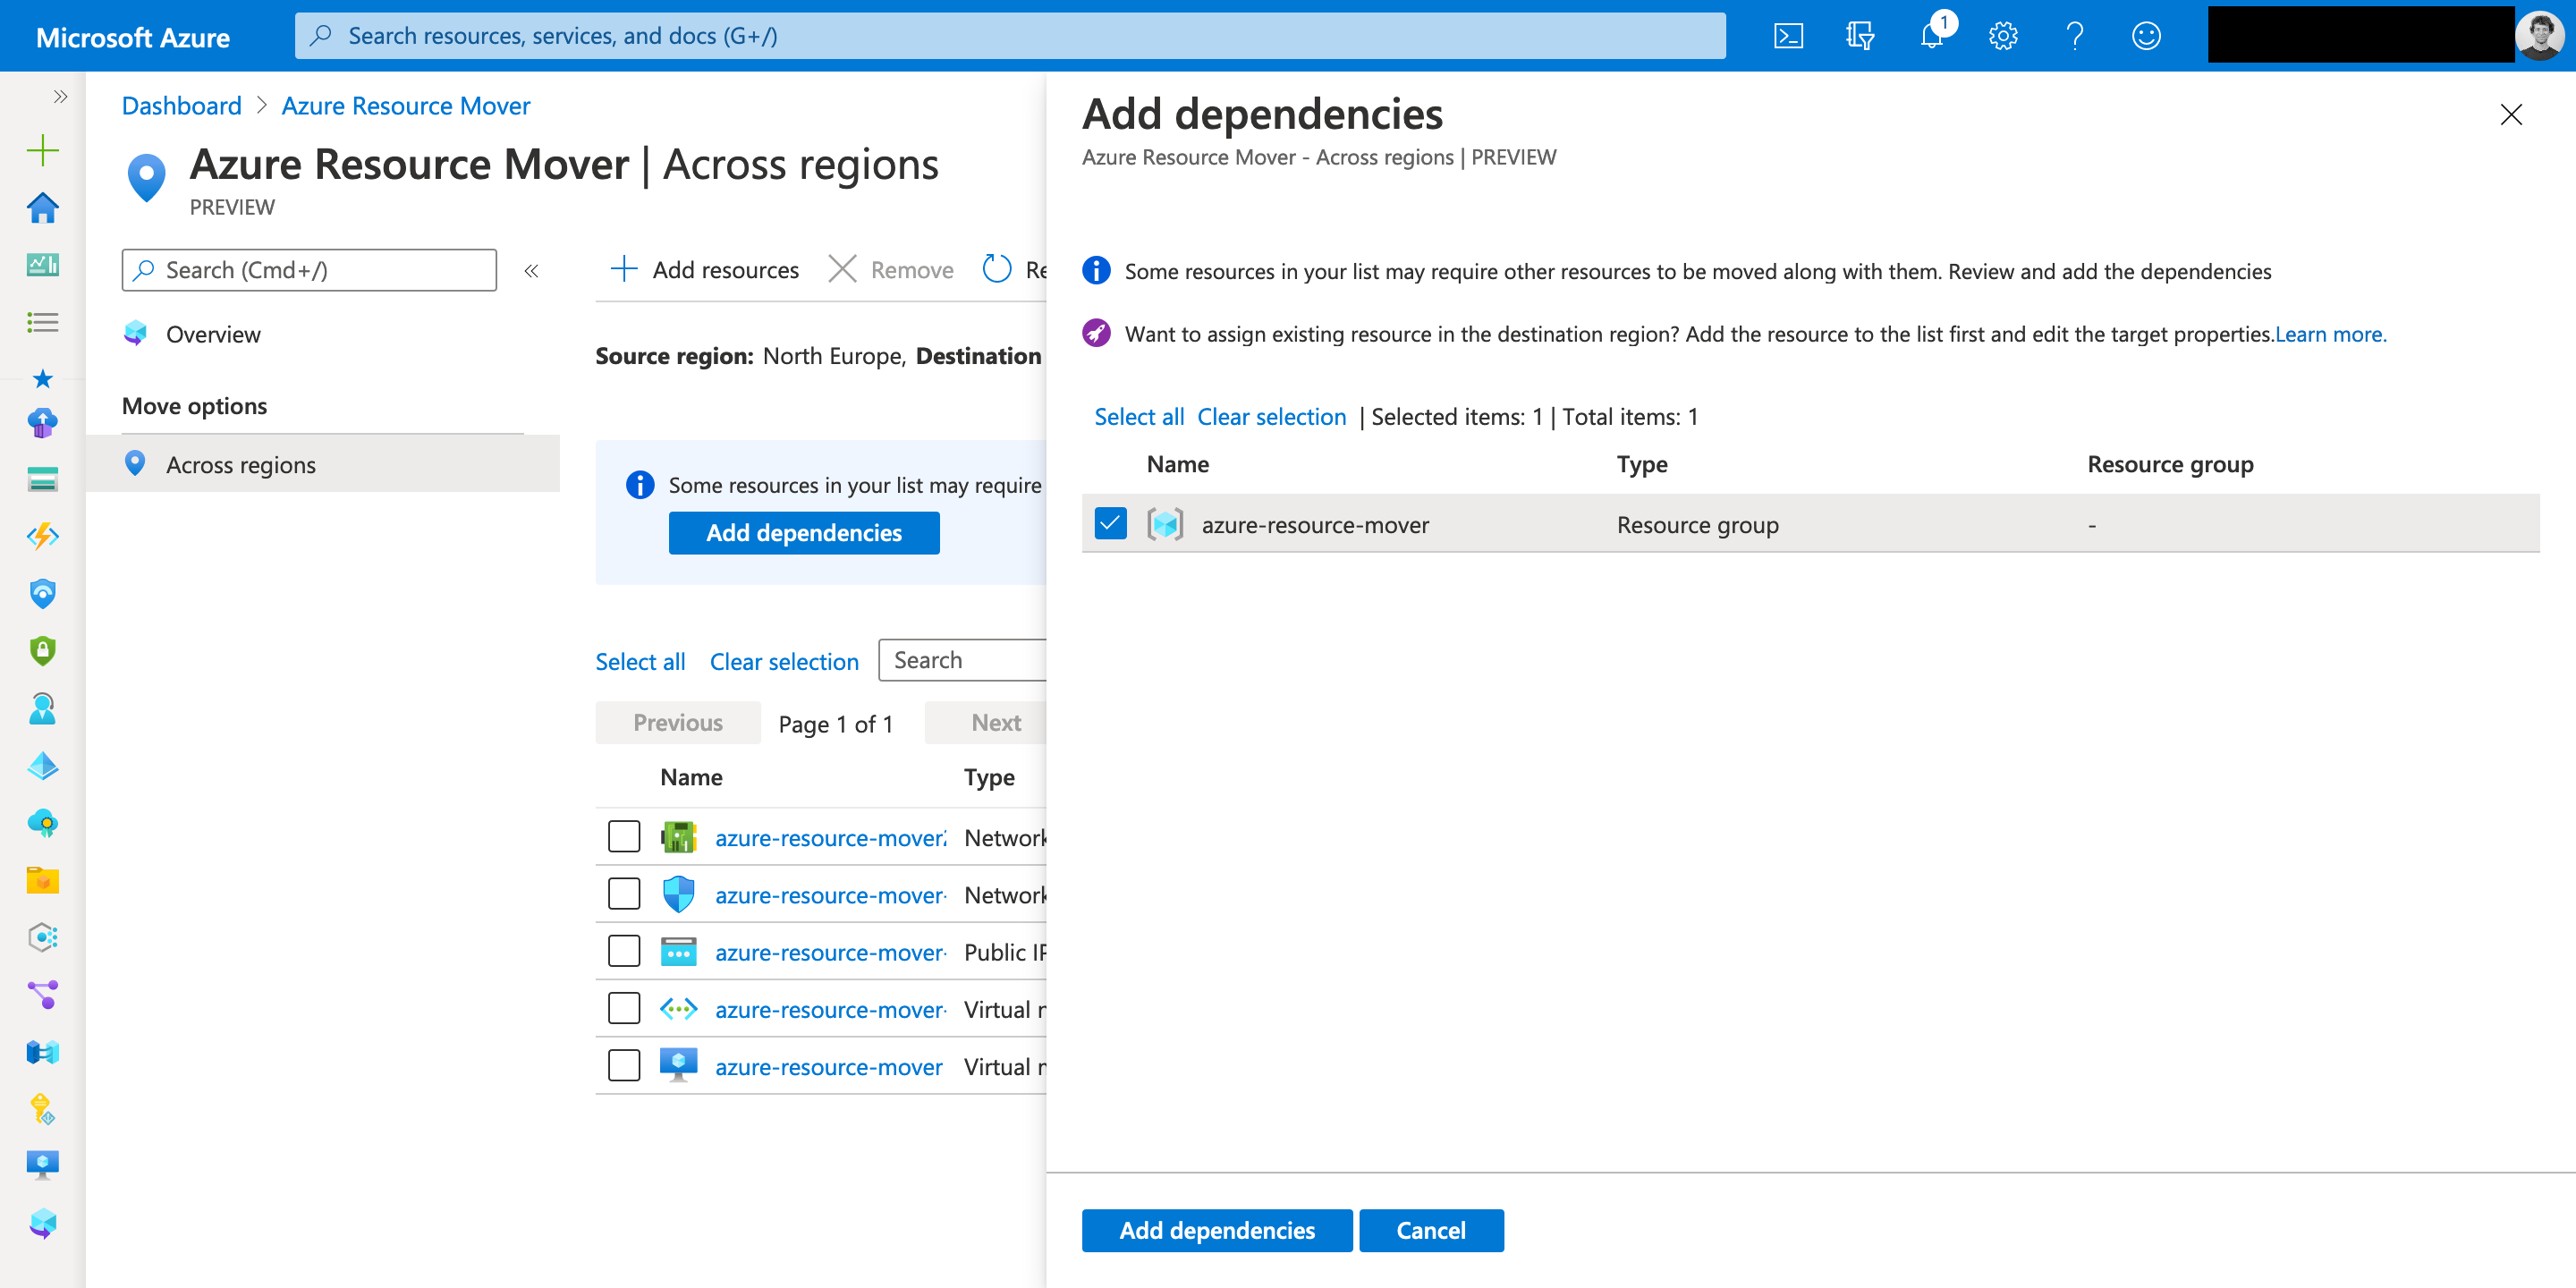
In most cases this will be the source resource group containing the already added resources.

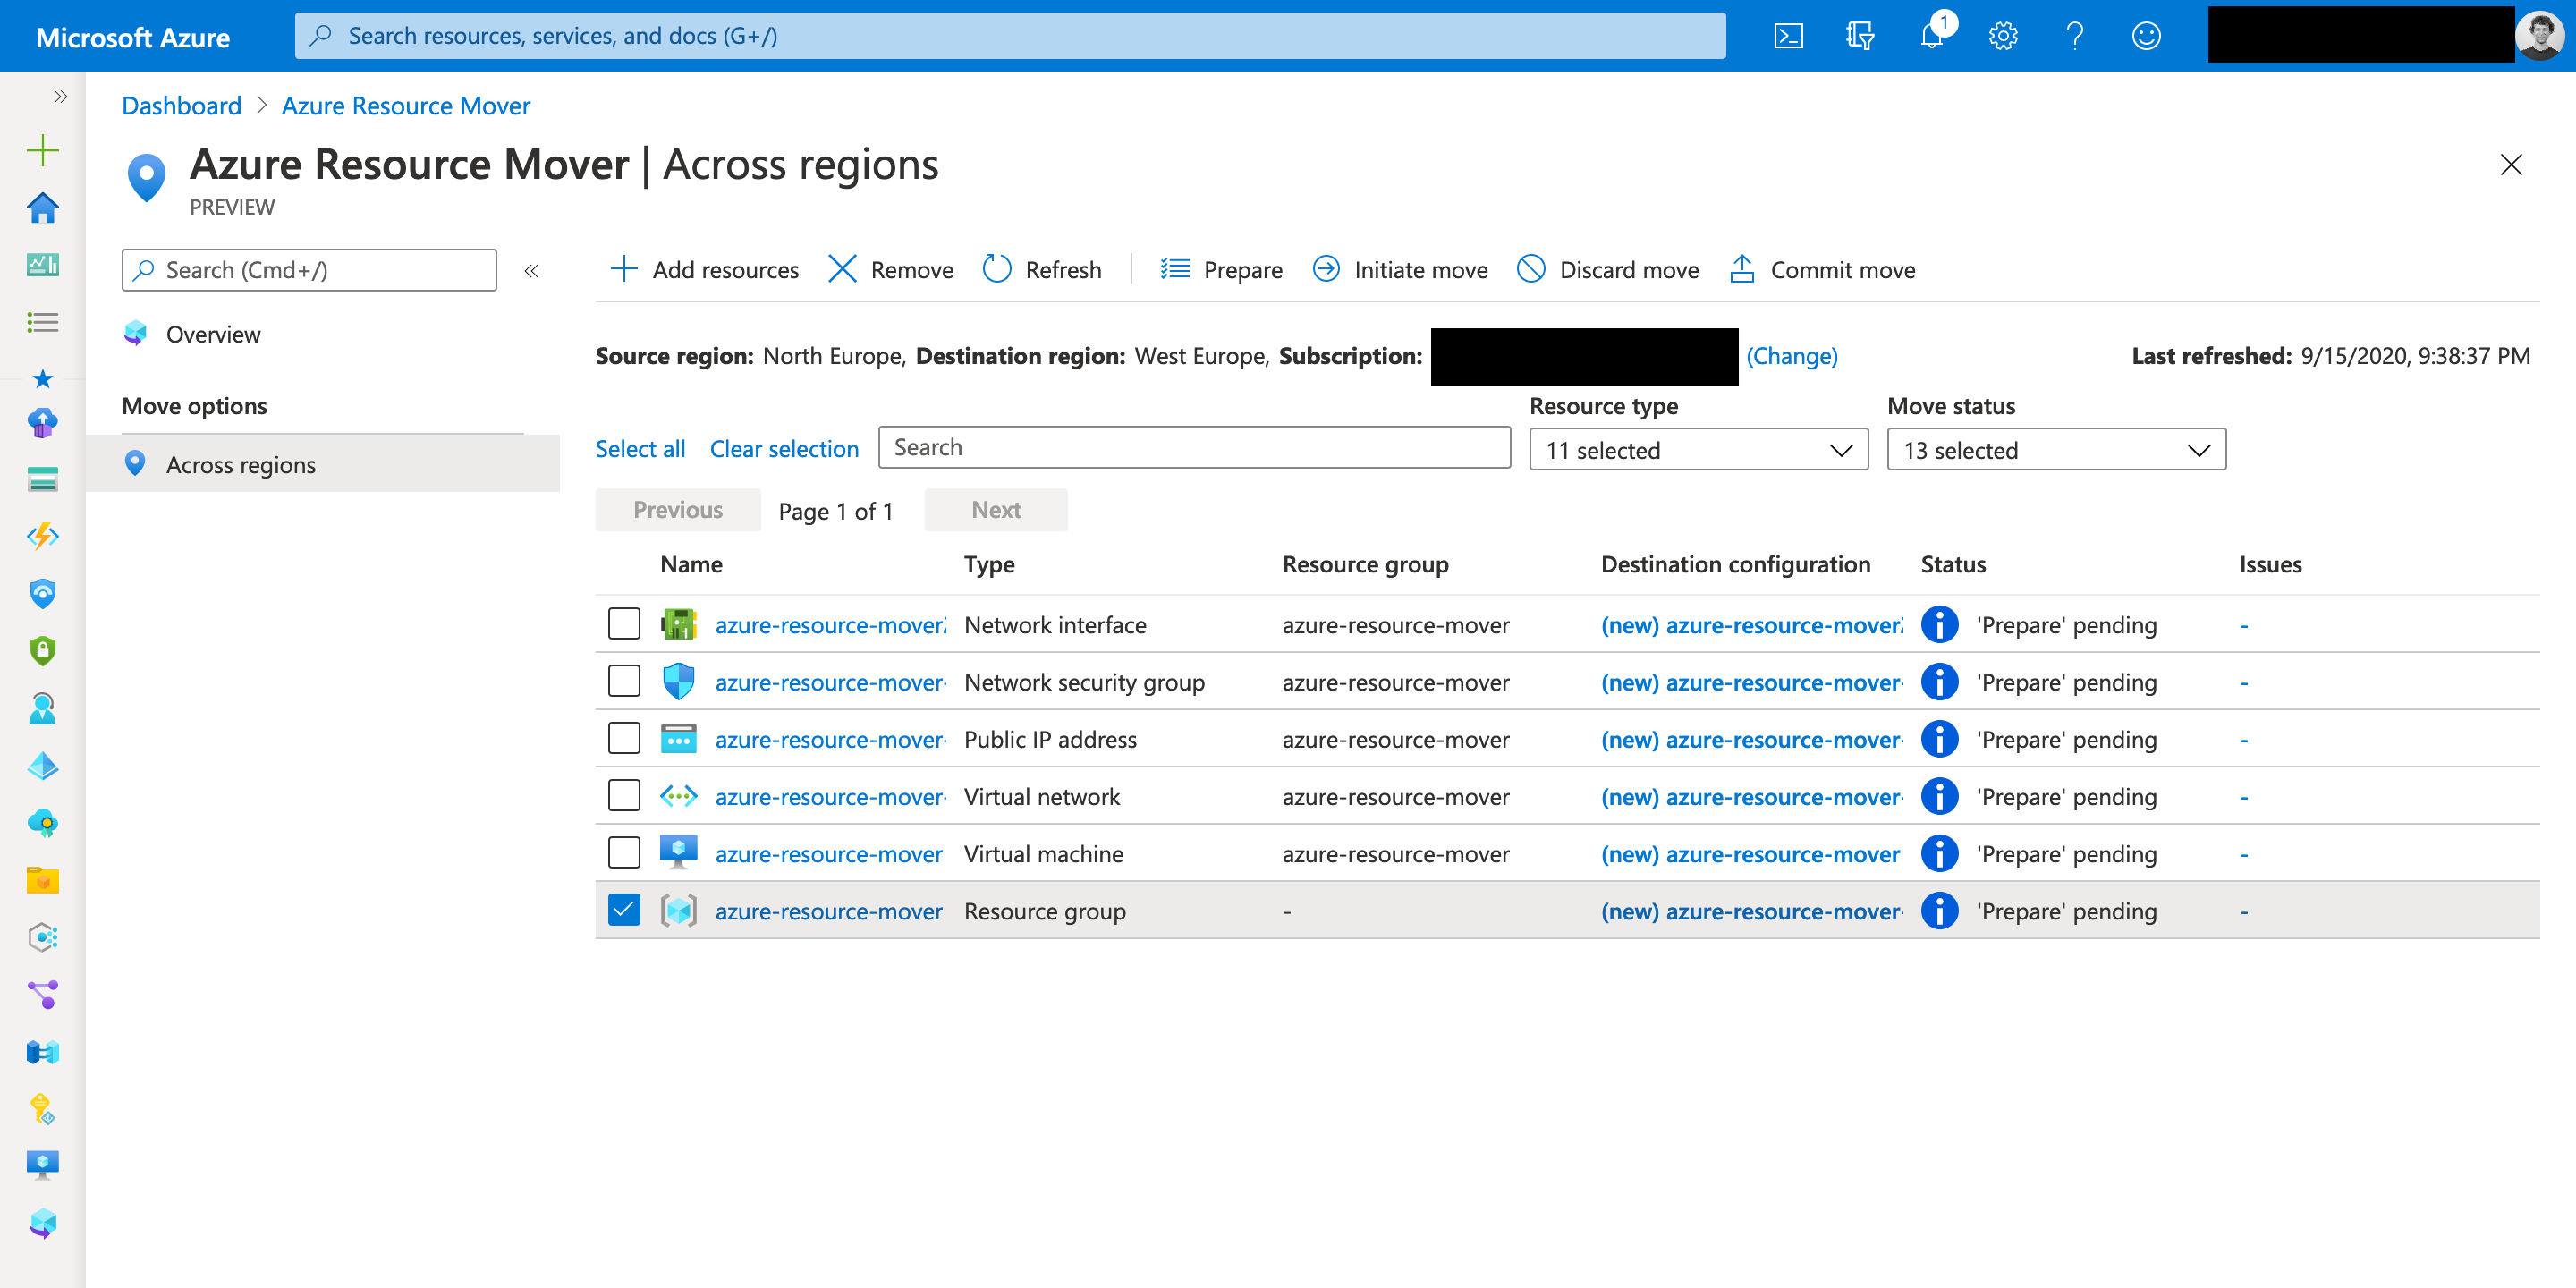
The next steps are prepare, initiate move and commit move. But only for the resource group.


It is a requirement that the resource group got moved first before you start with the other resources.
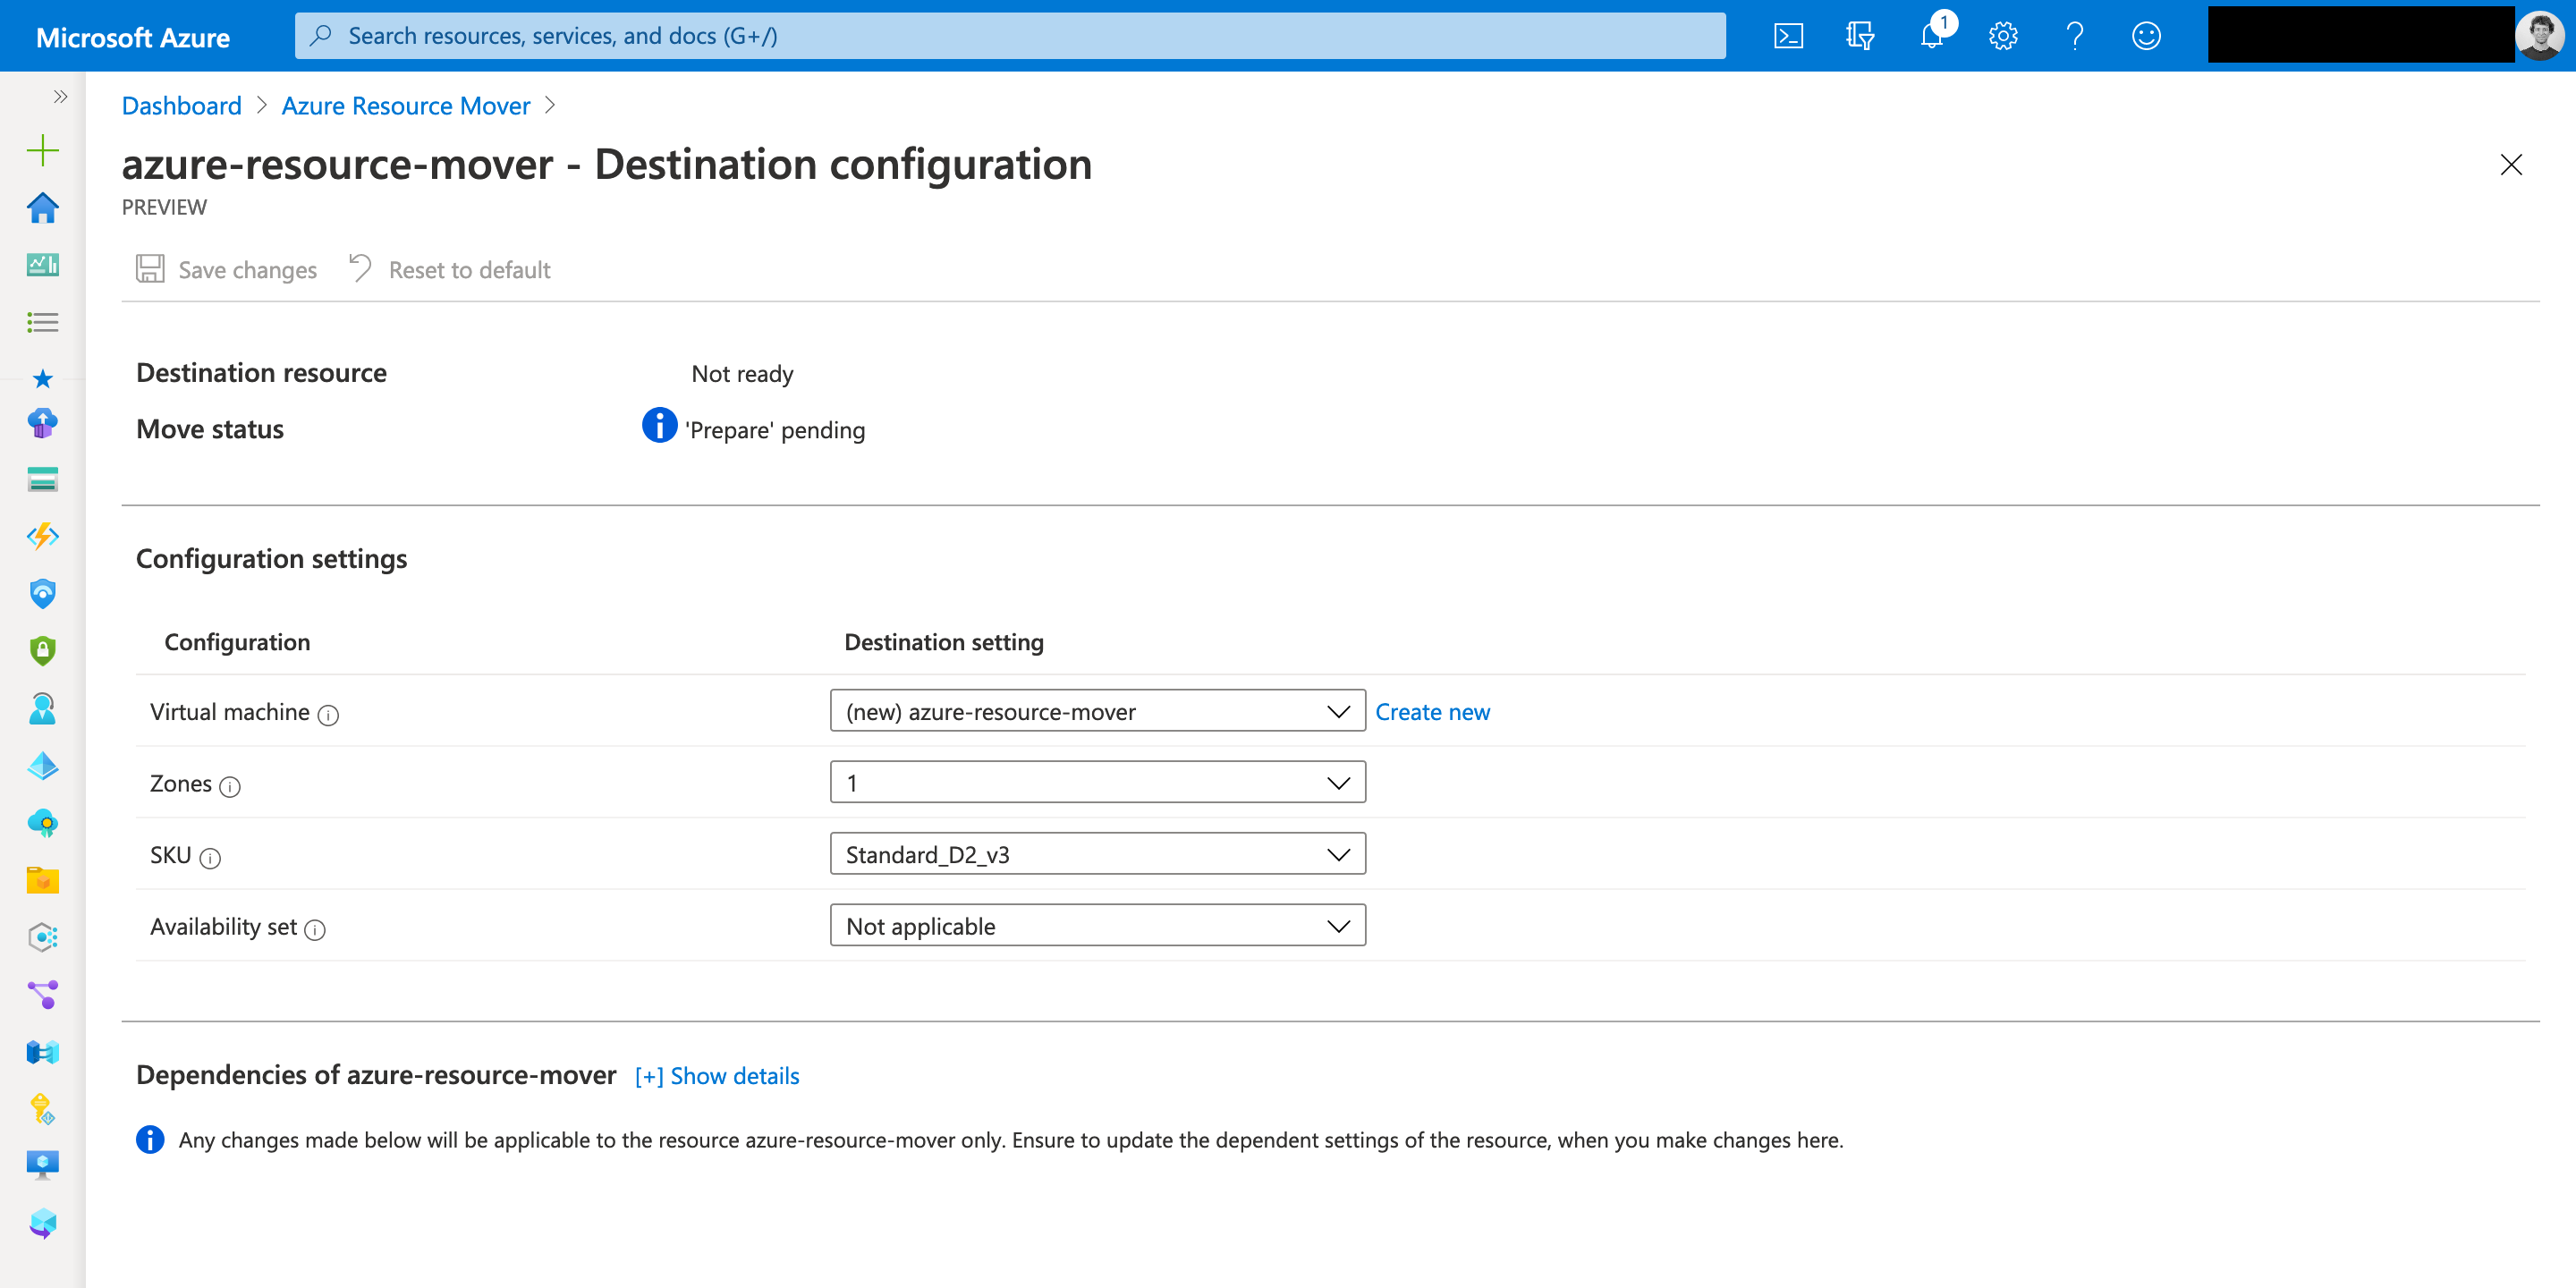
You like to change some configuration settings? Then you have the chance to do it now.
In the column destination configuration click on the resource you want to change the configuration settings for.
The prepare step can take some time to complete when moving a VM. In the background the Azure Site Recovery agent gets installed on the VM and the replication process is set upped.
ASR? Yes, Azure Resource Mover uses an Azure Site Recovery vault in the backend for moving VMs across regions.
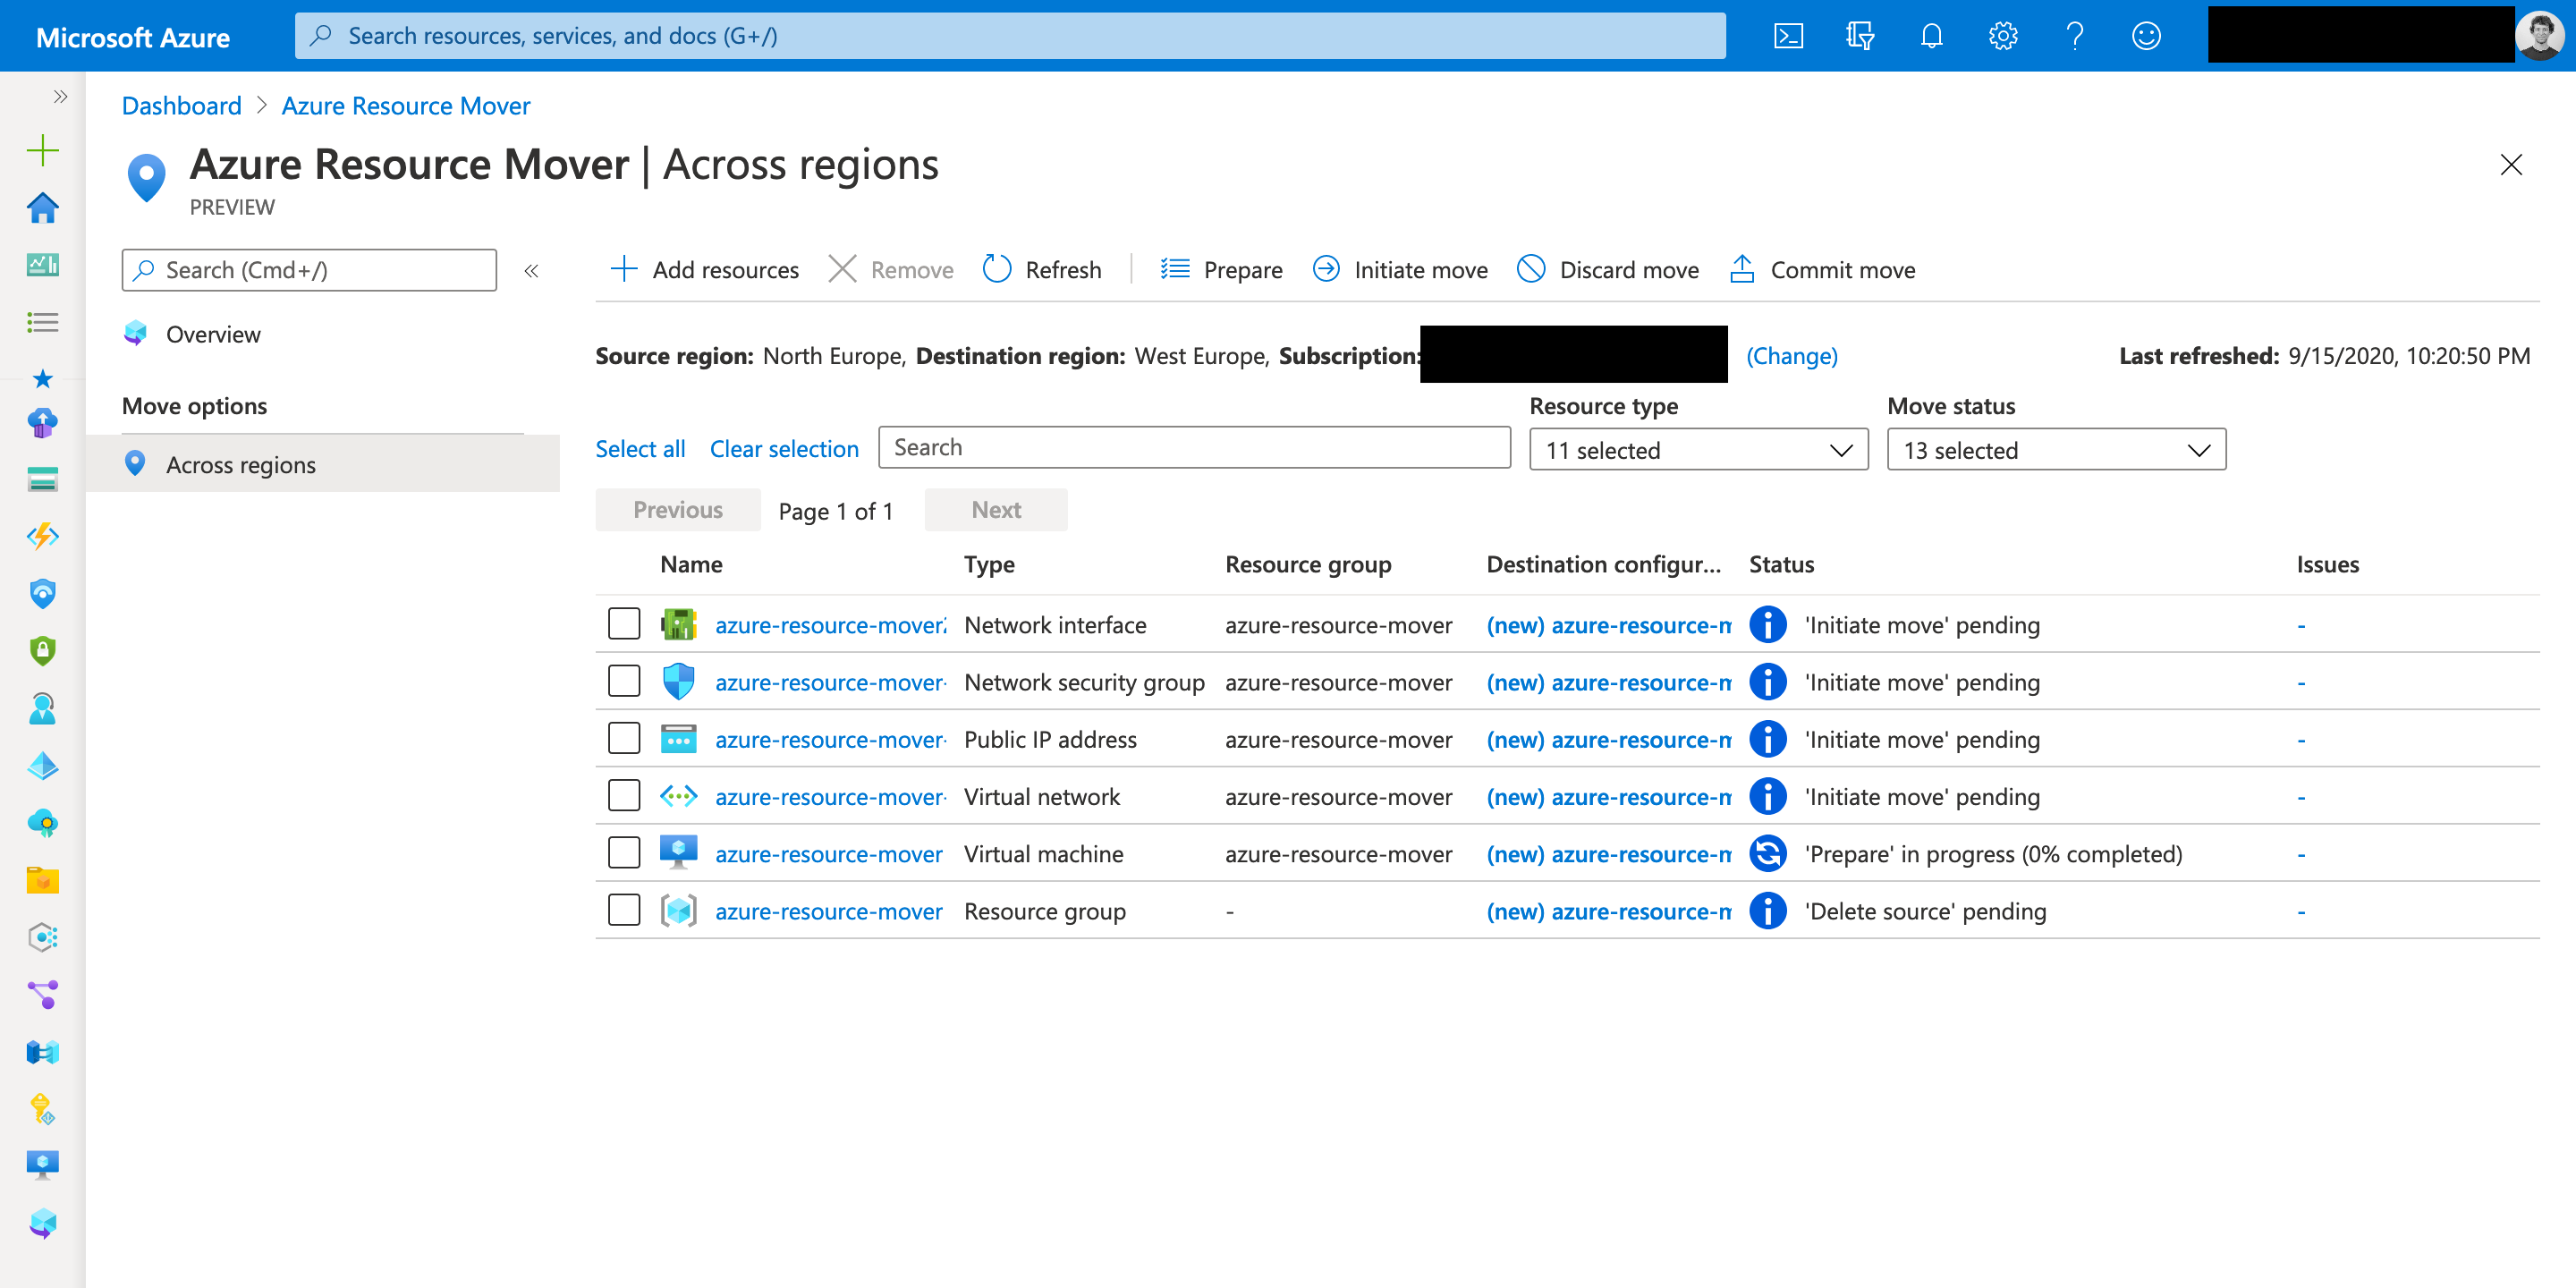

During the initiate move step, the source VM gets deallocated and the target VM started.
The last step you do is committing the move.
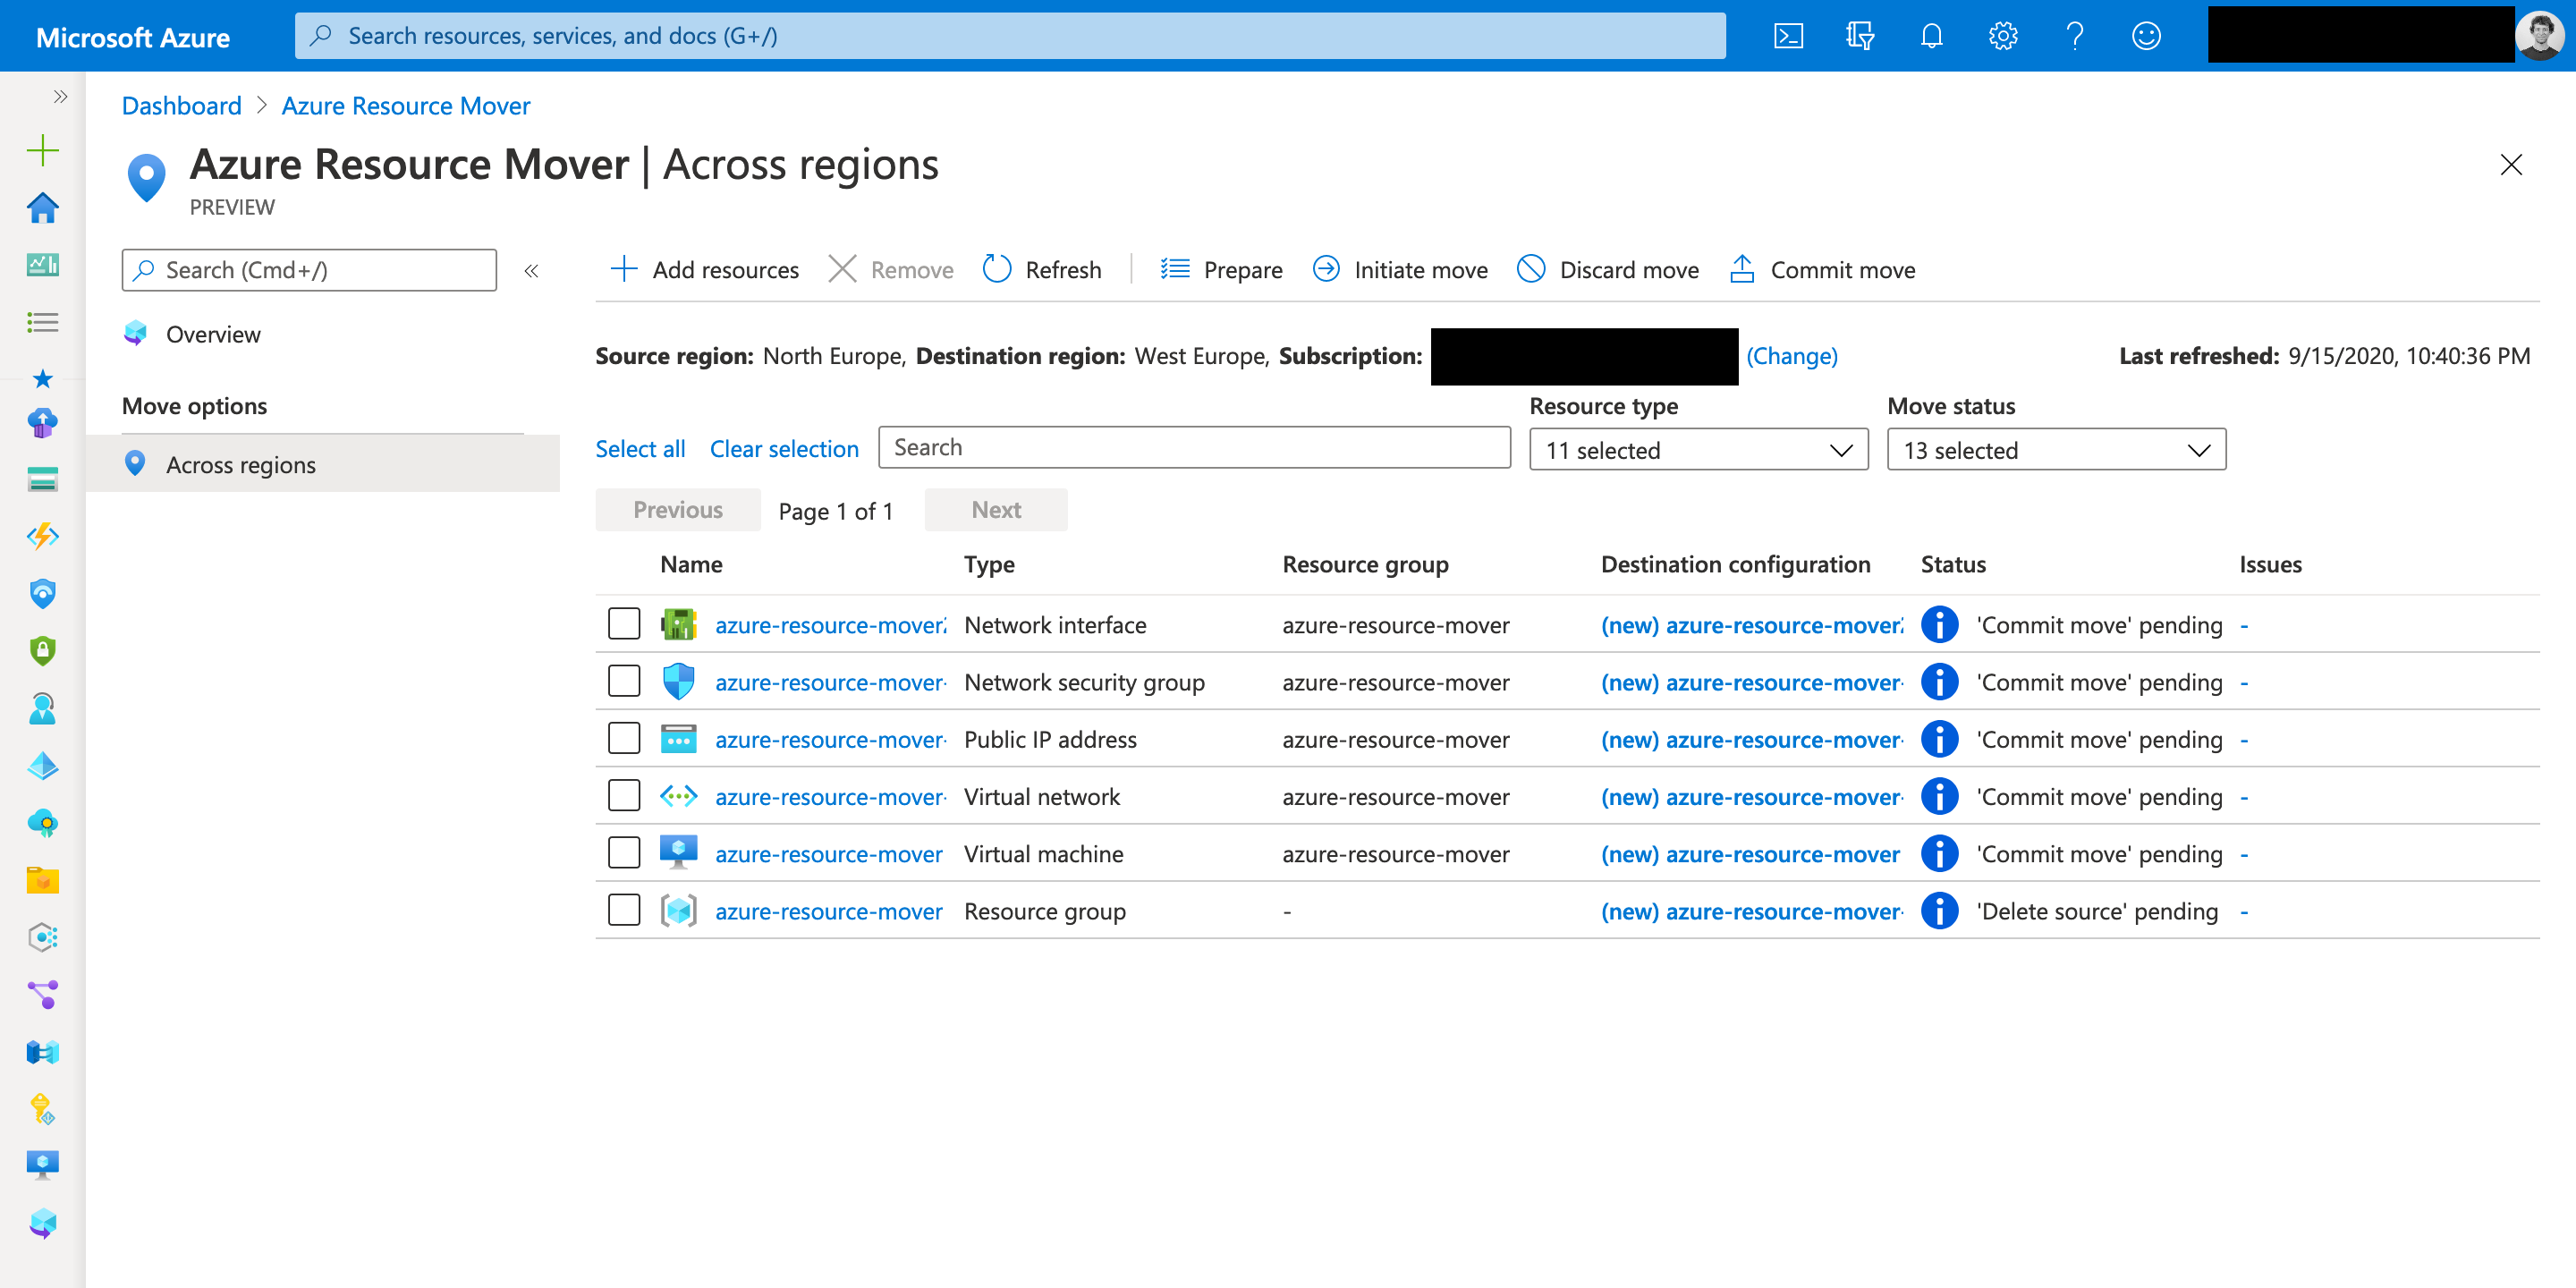
All resources have now the status delete source pending which indicates a successful move.

As seen in the following screenshot the VM runs in West Europe and the source VM in North Europe is deallocated.

Before removing the resources from Azure Resource Mover, you should delete the source resources first.
Then proceed with removing them from Azure Resource Mover.
-> https://docs.microsoft.com/en-us/azure/resource-mover/remove-move-resources#remove-a-resource-portal
When all resources have been moved from the source to the target region you delete the resources Azure Resource Mover created during the process.
-> https://docs.microsoft.com/en-us/azure/resource-mover/manage-resources-created-move-process
Summary
Azure Resource Mover lets you move resources across Azure regions in an easy fashion. But also provides customization options for the configuration settings before moving a resource.
The service itself is free of charge, but you are charged for e.g. network bandwidth. See the pricing details for more information.
-> https://azure.microsoft.com/en-us/pricing/details/resource-mover/
Curious to try out Azure Resource Mover or looking for more information? Check out the Azure documentation and the Microsoft Tech Community blog post.
-> https://docs.microsoft.com/en-us/azure/resource-mover/
-> https://techcommunity.microsoft.com/t5/azure-governance-and-management/introducing-azure-resource-mover-a-seamless-way-to-move-between/ba-p/1703848