This is the second blog post of a series of posts covering the topic about increasing the application availability on Azure Kubernetes Services / Kubernetes.
Today we cover the pod anti-affinity setting.
What is the pod anti-affinity?
In the first post of the series, I talked about the PodDisruptionBudget. The PDB guarantees that a certain amount of your application pods is available.
Defining a pod anti-affinity is the next step increasing your application’s availability. A pod anti-affinity guarantees the distribution of the pods across different nodes in your Kubernetes cluster.
You can define a soft or a hard pod anti-affinity for your application.
The soft anti-affinity is best-effort and might lead to the state that a node runs two replicas of your application instead of distributing it across different nodes.
Using the hard anti-affinity guarantees the distribution across different nodes in your cluster. The only downside using the hard anti-affinity in certain circumstances is a reduction in the overall replica count of your deployment when a node or several nodes have an outage.
Combined with a PDB this can also lead to a deadlock.
So, I recommend using the soft anti-affinity.
Using the pod anti-affinity setting
Let us have a look at the following Kubernetes template which makes use of the pod anti-affinity.
...
  template:
    metadata:
      labels:
        app: go-webapp
        version: v1
    spec:
      affinity:
        podAntiAffinity:
          preferredDuringSchedulingIgnoredDuringExecution:
          - weight: 100
            podAffinityTerm:
              labelSelector:
                matchExpressions:
                - key: app
                  operator: In
                  values:
                  - go-webapp
              topologyKey: kubernetes.io/hostname
      containers:
...
In the template itself I am using a soft anti-affinity which is defined using the term preferredDuringSchedulingIgnoredDuringExecution where a hard anti-affinity is defined by requiredDuringSchedulingIgnoredDuringExecution.
The soft anti-affinity has a special configuration setting called weight which is added to the scheduler calculation controlling the likelihood distributing the pods across different nodes. 1 is the lowest value and 100 the highest. When you want a higher chance of distributing the pods across different nodes with the soft anti-affinity use the value 100 here.
The labelSelector and topologyKey then defines how the scheduling works. The definition above is read like this: A pod should not be scheduled on the node if a pod with the label app=go-webapp is already running on it.
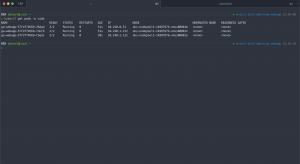
When we deploy our template on the AKS cluster all our replicas run on different nodes.
> kubectl get pods -o wide
NAME                         READY   STATUS    RESTARTS   AGE   IP             NODE                                NOMINATED NODE   READINESS GATES
go-webapp-75c66f85cf-984sk   2/2     Running   0          41s   10.240.0.28    aks-nodepool1-14987876-vmss00001m   <none>           <none>
go-webapp-75c66f85cf-plnk5   2/2     Running   0          26s   10.240.2.10    aks-nodepool1-14987876-vmss00001o   <none>           <none>
go-webapp-75c66f85cf-twck2   2/2     Running   0          41s   10.240.1.145   aks-nodepool1-14987876-vmss00001n   <none>           <none>
Frankly, Kubernetes always tries to distribute your application pods across different nodes. But the pod anti-affinity allows you to better control it.
Soft vs. hard anti-affinity
As mentioned previously soft is best-effort and hard guarantees the distribution. For instance, let us deploy the Kubernetes template on a Docker for Mac single node Kubernetes cluster. First time with the soft anti-affinity setting and the second time with the hard anti-affinity setting.
...
  template:
    metadata:
      labels:
        app: go-webapp
        version: v1
    spec:
      affinity:
        podAntiAffinity:
          requiredDuringSchedulingIgnoredDuringExecution:
          - labelSelector:
              matchExpressions:
              - key: app
                operator: In
                values:
                - go-webapp
            topologyKey: kubernetes.io/hostname
      containers:
...
Using the soft anti-affinity setting brings up all three replicas compared to the one replica using the hard anti-affinity setting.
### Soft anti-affinity ###
> kubectl get pods -o wide
NAME                         READY   STATUS    RESTARTS   AGE   IP          NODE             NOMINATED NODE   READINESS GATES
go-webapp-666859f746-hnnrv   2/2     Running   0          59s   10.1.0.65   docker-desktop   <none>           <none>
go-webapp-666859f746-ltgvr   2/2     Running   0          82s   10.1.0.64   docker-desktop   <none>           <none>
go-webapp-666859f746-tjqqp   2/2     Running   0          38s   10.1.0.66   docker-desktop   <none>           <none>

### Hard anti-affinity ###
> kubectl get pods -o wide
NAME                         READY   STATUS    RESTARTS   AGE   IP          NODE             NOMINATED NODE   READINESS GATES
go-webapp-5748776476-cxq76   0/2     Pending   0          48s   <none>      <none>           <none>           <none>
go-webapp-5748776476-sdnkj   2/2     Running   0          74s   10.1.0.67   docker-desktop   <none>           <none>
go-webapp-5748776476-twwbt   0/2     Pending   0          48s   <none>      <none>           <none>           <none>
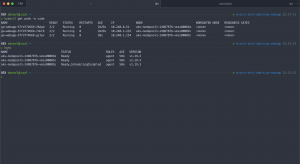
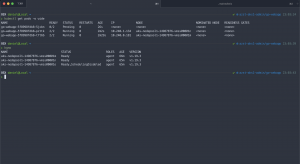
Also have a look at the following screenshots where I did the same on the AKS cluster and drained one of the nodes.
As you see using the hard anti-affinity leads to a state where the overall replica count is reduced until a new node is available to host the pod.
What protection provides the pod anti-affinity?
The pod anti-affinity provides protection against node failures and thus ensures a higher availability of your application.
Summary
Using the pod anti-affinity protects your application against node failures distributing the pods across different nodes on a best-effort or guarantee basis.
As mentioned earlier Kubernetes always tries to distribute your application pods across different nodes even without a specified pod anti-affinity. But the pod anti-affinity allows you to better control it.
You can even go further and use another topologyKey like topology.kubernetes.io/zone protecting your application against zonal failures.
A better solution for this are pod topology spread constraints which reached the stable feature state with Kubernetes 1.19.
I will cover pod topology spread constraints in the next blog post of this series. Stay tuned.


