In the first blog post of this series I have given you an overview of the InMage Scout architecture. For a short recap of what the Master Target is read the following lines.
The Master Target is used as repository and for retention. The Process Server sends its data of the Protected VM to the Master Target. In the next step the Master Target creates the Replica VM in the secondary site and holds the different retention points of different Protected VMs. You need more than one Master Target at your secondary site depending on the number of the VMs you want to protect.
Some other side notes. You need different Master Targets for Windows and Linux workloads. In the case of a failover to the secondary site and you want to do a failback to the primary site again you need several Master Targets at your primary site.
Before you start with creating the VM for your Linux Master Target have a look at the Microsoft best practices for sizing the Master Target and the supported OS.
| CPU | Memory | Boot Volume Capacity + Cache Directory Disk Size | Retention Disk Size | NICs with 1 Gbit/s |
| 8x vCPUs | 8 GB | 50 GB + 100 GB | Based on number of retention days and data change rate. | 1x |
These values are best practices by Microsoft. You can use lower values for your VM except of the Boot Volume Capacity + Cache Directory Disk Size. But I highly recommend to use the best practices values. If you want to protect more than 58 disks with a single Master Target you have to deploy additional Master Targets. You can have multiple Master Targets in your InMage Scout environment.
CentOS 6.4 64-bit and Red Hat Enterprise Linux 6.4 64-bit are supported operating systems for running the Linux Master Target.
Keep in mind that the Linux Master Target VM needs two disks. One for the boot volume and the cache and an additional one for the retention volume.
The size of the retention volume can be calculated in two ways. First one is change rate in GB * retention range in days. Second one is source disk sizes * change rate in percentage * retention range in days.
- 300 GB * 3 days = 900 GB
- 600 GB * 0,5 * 3 days = 900 GB (0,5 = 50%)
The easier one would be option one.
The best way to set up the Linux Master Target is to follow the instructions in the user guide (InMage_Scout_Standard_User_Guide_8.0.1.pdf) at chapter 3.4.1: Install & Prepare CentOS 6.4. I will walk you through this briefly and provide some best practices to set up the Linux Master Target a lot faster than it is stated in the user guide.
As the operating system for the Linux Master Target I have chosen CentOS 6.4 64-bit and created my VM with a 50 GB OS disk. Normally the OS disk should be larger because of the cache directory size and you should use a OS disk with 150 GB in size.
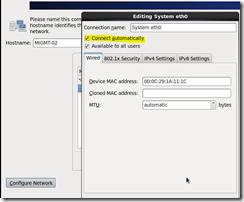
During the setup make sure you configure the network and set the setting “Connect automatically”. Otherwise you have to do it afterwards editing the network configuration file.
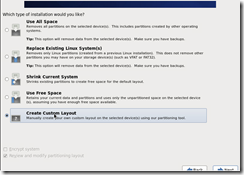
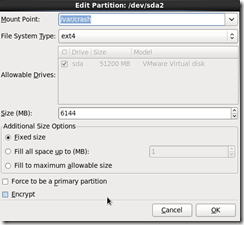
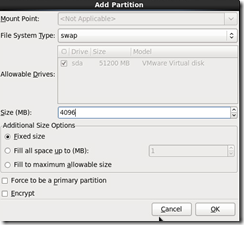
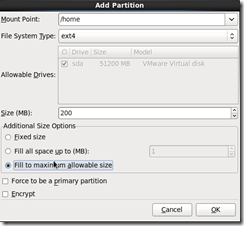
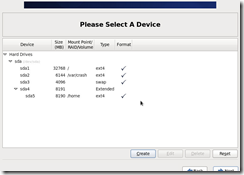
For the partitioning layout you choose the custom layout.
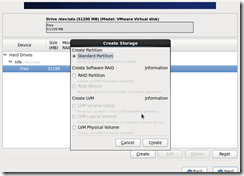
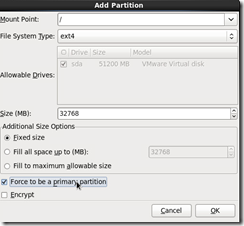
Create a standard partition as your first partition and specify the following settings.
- Mount point: /
- File System Type: ext4
- Size (MB): 32768
- Fixed size
- Forced to be a primary partition
Then you create your next three partitions with the following settings.
| Mount Point | File System Type | Size (MB) | Settings |
| /var/crash | ext4 | 6144 | Fixed size |
| swap | 4096 | Fixed size | |
| /home | ext4 | Fill to maximum allowable size |
That partitioning schema is the same as you can find it in the user guide. If you have a larger VM for your Linux Master Target regarding the memory and OS disk size then follow the following guidelines out of the user guide.
| Partition Name | Partition size allocation formula | File System Type |
| / | 32 GB | ext4 |
| /var/crash | Total (memory size + 20% of the memory)” | ext4 |
| swap | Minimum (double of the memory size or 32GB) | swap |
| /home | Entire remaining space | ext4 |
Select as installation type “Minimal” and complete the OS installation. After you have successfully set upped the VM for your Linux Master Target use putty or another SSH client to log in into the VM. Because we skipped several necessary packages during the installation process we will install them now. Execute the following lines in the terminal session to complete the installation.
yum groupinstall “Base” “Compatibility libraries” “Console internet tools” “Debugging Tools” “Directory Client” “Large Systems Performance” “Legacy UNIX compatibility” “Network file system client” “Networking Tools” “Performance Tools” “Perl Support” “MySQL Database client” “MySQL Database server” “E-mail server” “FTP server” “Network Storage Server” “Server Platform” “System administration tools” “SNMP Support” “System Management” “PHP Support” “Web Server” –y
yum install lsscsi –y
yum install device-mapper-multipath –y
Afterwards copy the RHEL 6 Unified Agent (InMage_UA_8.0.1.0_RHEL6-64_GA_26Feb2015_release.tar.gz) onto the VM and unpack it with the following command.
tar –zxvf InMage_UA_8.0.1.0_RHEL6-64_GA_26Feb2015_release.tar.gz
Now execute the following command to make sure you can execute the PostInstallConfiguration.sh script.
chmod 755 ./PostInstallConfiguration.sh
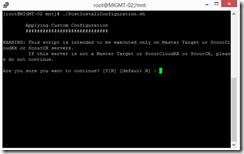
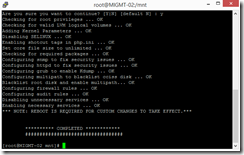
Execute ./PostInstallConfiguration.sh, confirm with yes, reboot the VM and shutdown afterwards.
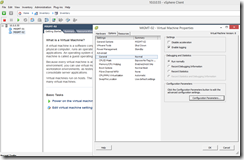
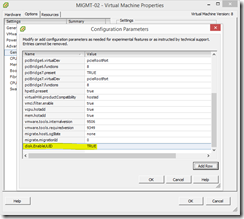
Open the VMware vSphere Client and set the parameter disk.EnableUUID to TRUE for your VM. That is important to get the disk indentifier for the retention volume. Before you start the VM again, add the retention volume. I have chosen in this example a retention volume with 100 GB in size.
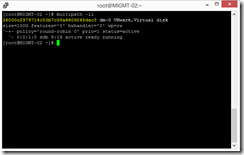
After you log in into the VM execute the following command to get the identifier of the retention volume.
multipath –ll
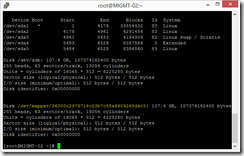
Remember the yellow marked identifier and execute fdisk –l.
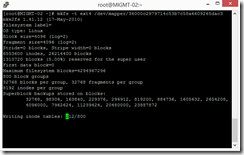
Copy the yellow marked identifier mapping and format the retention volume with the following command.
mkfs –t ext4 /dev/mapper/36000c2979714c53b7c58a6609265dac3
Mount the retention volume.
mkdir /mnt/retention
mount -t ext4 /dev/mapper/36000c2979714c53b7c58a6609265dac3 /mnt/retention
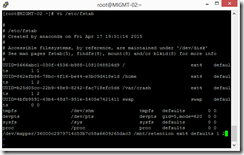
Edit the file /etc/fstab and add the following line.
/dev/mapper/36000c2979714c53b7c58a6609265dac3 /mnt/retention ext4 defaults 1 2
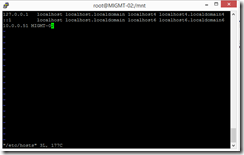
Before you install the Unified Agent on the Linux Master Target you have to edit the file /etc/hosts and add the following entry.
“IP address Master Target” “Hostname Master Target”
10.0.0.51 MIGMT-02
Otherwise the Unified Agent setup will complain about that the matching of host name and IP address is wrong.
Host name ( MIGMT-02 ) does not match with IP address 10.0.0.51 in /etc/hosts
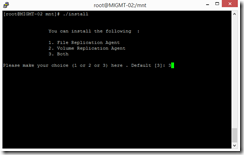
The Unified Agent installation on Linux has to be manual because the push agent installation is not supported for Linux. Go to the folder where you have extracted the RHEL 6.4 Unified Agent files and execute ./install to install the Unified Agent.
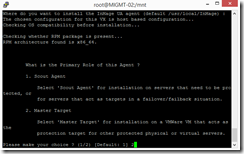
Choose option 3 to install both file and volume agent and choose option 2 afterwards for the Master Target.
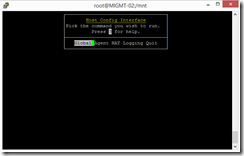
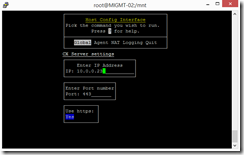
The last thing you have to do is to specify the Configuration Server in the Global settings.
After the successful agent installation on your Linux Master Target VM go back and log in into the management portal. In the management portal select Agent Heartbeat under Monitor and make sure your Linux Master Target VM shows up with the Agent Role Master Target.
The next blog post will be about the Linux Protection.
